Embedded Checkout
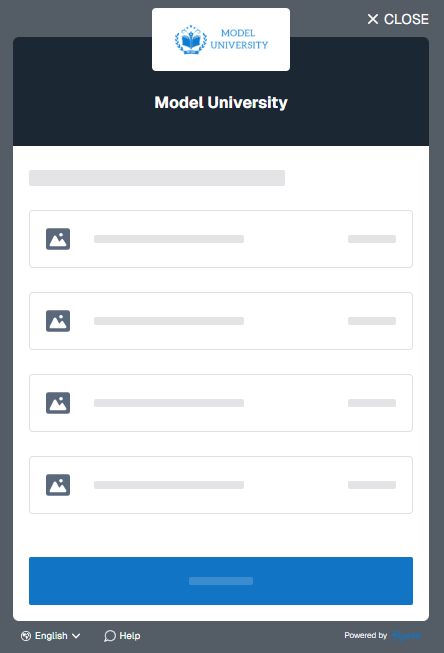
The Checkout Experience for Embedded Checkout
The Checkout Experience offers two options for payments:
-
One Off payments: A single payment, no card or bank account data is stored.
-
Installment plans: Recurring payments, card or bank account data is stored to pay for multiple payments.
Window size
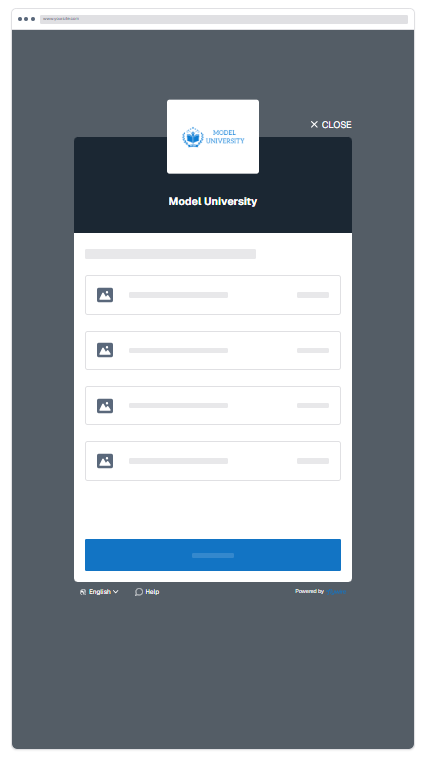
The Checkout Experience automatically scales to 80% of the viewport height with a 510px maximum width. Internal scrolling prevents content overflow.
-
 One Off Payments
-
 Installment Plans
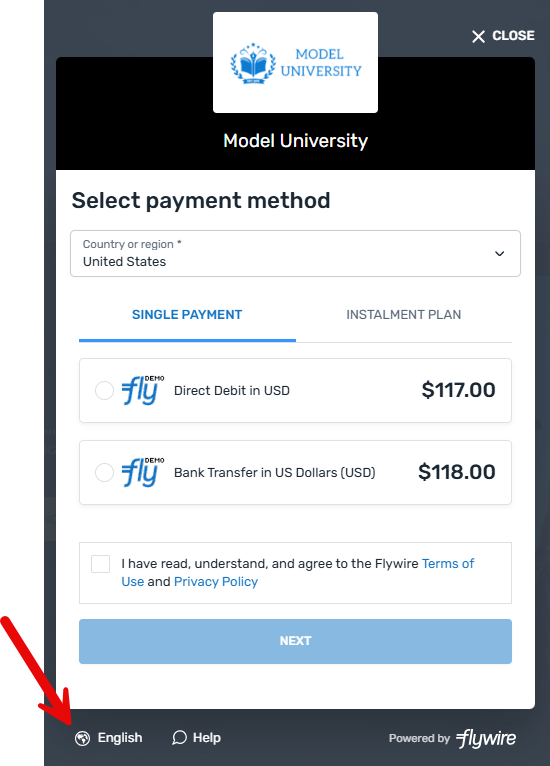
Your payer selects the country they are paying from and picks one of the available payment methods for this country.
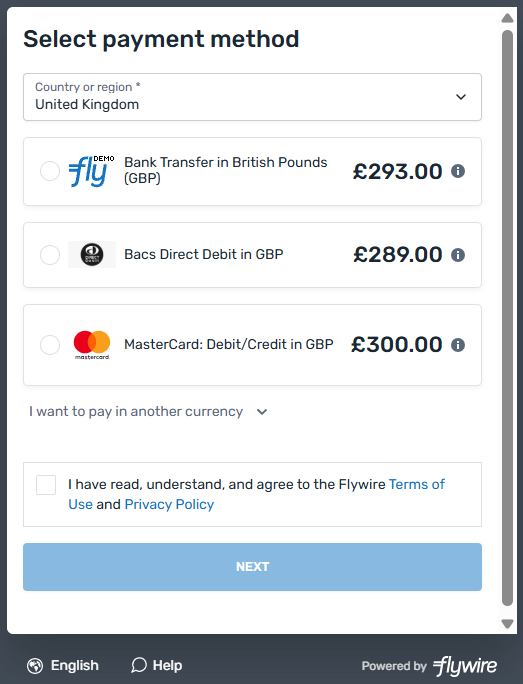
Next, the page to collect payer information is displayed (only if payer information is incomplete or it has been explicitly set to be displayed).
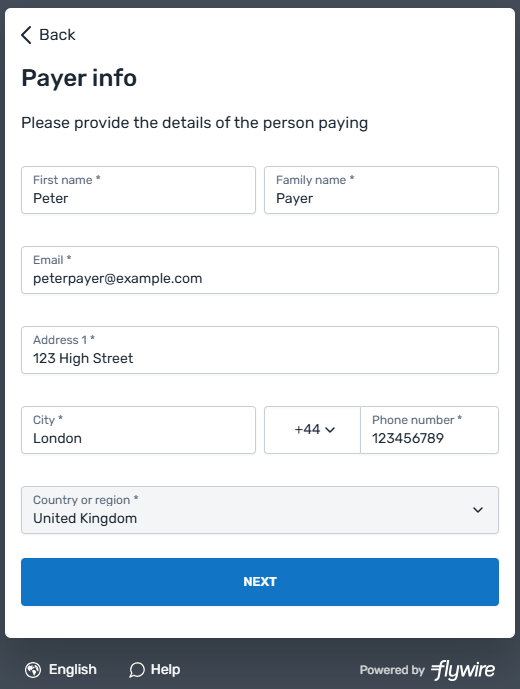
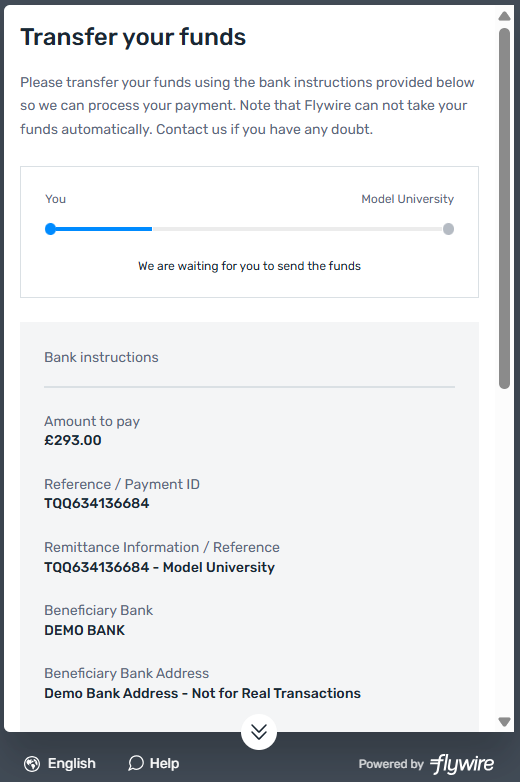
The next page depends on the chosen payment method. It might ask for card or bank account information, or give the payer bank details so that they can make a bank transfer.
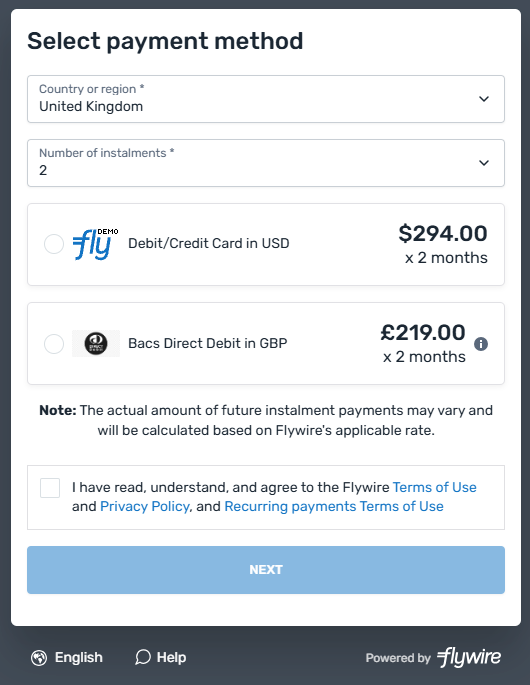
Your payer is asked to pick their country, installment plan (number of installments) and the payment method they want to use.
Next, the page that collects payer information is displayed (unless it has been hidden).
Your payer is then asked to either create a Flywire account or log into an existing one.
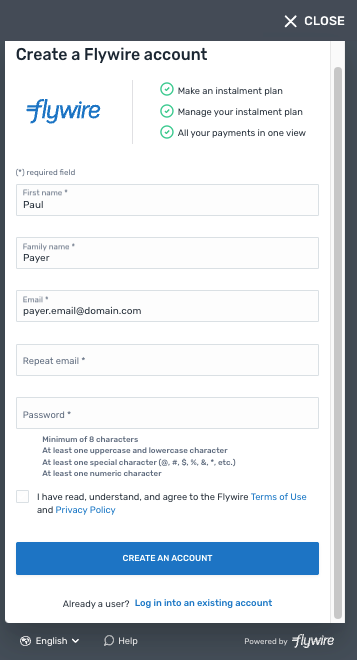
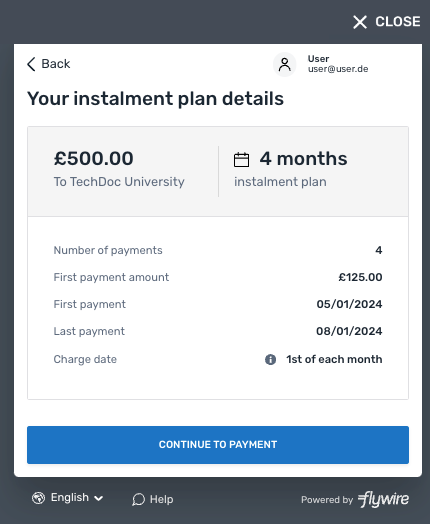
After creating an account or logging into an existing one, your payer sees an overview of the plan they choose.
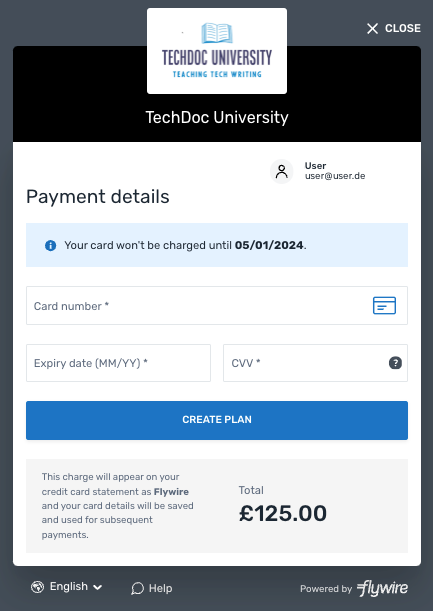
Your payer is then asked to enter their card information to pay for the payments.
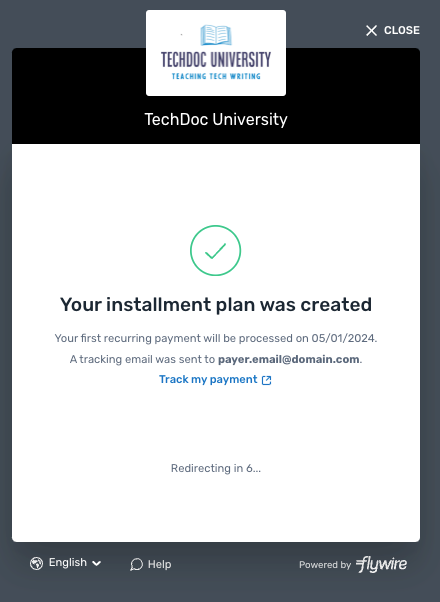
An installment plan with the information provided is now created. The window will close automatically after a few seconds.
Integrating the Checkout Experience into your Website
This simplified html example shows you how to integrate the Checkout Experience into your website:
Script Source
Add the script to your page that opens the Checkout Experience.
The script source is:
https://payment.flywire.com/assets/js/checkout.js
Button
Add a button with an ID to trigger the Checkout Experience form.
Script Initialization
Configuration
Configure the Checkout Experience. See List of Configuration Parameters for all parameters.
You can also use the Checkout Script Configurator to create your configuration.
Button identifier
Connect the script to your button via the button ID.
<!DOCTYPE html>
<html>
  <head>
    <!-- Include the Checkout script -->
    <script src="https://payment.flywire.com/assets/js/checkout.js"></script>
  </head>
  <body>
    <!-- Add a button element -->
    <button id="pay-button">
      Make Payment
    </button>
   <!-- Initialize the script -->
    <script>
      window.flywire.Checkout.render(
      {
        "env": "demo",
        "recipient": "TQQ",
        "locale": "en",
        "amount": 10000,
        "sender_first_name": "TBF",
        "callback_id": "",
        "callback_url": "",
        "return_url": "",
        "provider": "embed2.0",
        "displayPayerInformation": false,
        "theme": {
          "mode": "popup",
          "header": true,
          "footer": true,
          "closeButton": true,
          "chat": true,
          "brandColor": "#1274C4"
        }
      },
        "#pay-button",
      );
     </script>
  </body>
</html>
Checkout Script Configurator
Screen too small? Open the configurator in full screen.
List of Configuration Parameters
Required Basic Settings
Environment
Specifies the environment for Checkout.
Possible values:
-
demo (Sandbox)
-
production (Production environment)
// Set the environment
env: "demo",
Recipient of the Payment (Portal)
Specifies the portal (also called recipient) that will receive the payment.
A portal (also called recipient) defines who receives the money from payments to Flywire.
You as a client have an account with Flywire and define at least one portal. This portal contains settings like the bank account that receives the money from payments and the currency in which Flywire takes payments from your payers.
You can have more than one portal, for example one portal for testing purposes and one production portal. Or you could have multiple portals because you want to receive money into different bank accounts or currencies.
The recipient ID identifies the recipient (also called portal). The recipient ID has been assigned by Flywire when the recipient has been set up.
Format:
Either: 3 letters (ABC)
Or: 5 alphanumeric characters, always starting with a letter (ABC1D)
// Your portal/recipient code (may differ between demo and prod)
recipient: "FLW",
Amount
When setting up your portal with Flywire, you can choose how you want to handle amounts. There are two possible configurations:
-
One amount: There is only one field for the total amount.
-
Items: There are multiple fields to breakdown specific costs (e.g., "Tuition" and "Housing"), and each field has an amount.
If you want to change your portal configuration, please contact the Solutions team.
Not sure which one you’re using? Use the portal checker and look at the field IDs for items:
-
One amount: You will see a single field with the ID amount.
-
Items: You will see one or more IDs with specific names (e.g., tuition_fee, housing, etc.).
My portal uses one amount:
The payment amount in the billing currency.
The billing currency is the currency in which the recipient of the payment is billing their payer. The billing currency depends on the
The amount is specified in the smallest unit of the currency, called subunits. For example, in USD, the subunit is cents, and 100 cents equal 1 USD. So, an amount of 12025 (cents) is equivalent to 120.25 USD.
Note that the subunit-to-unit ratio varies by currency, it is not always 100. See Currencies for the subunits of each currency.
// Set the amount of the payment
amount: 123456,
My portal uses items:
amount object
Provide the amount for each item as pairs of the ID of the item and its amount:
The ID (internal identifier) of the item. You can use the portal checker to look up the IDs for each of your items.
The amount for this item in the billing currency,
The billing currency is the currency in which the recipient of the payment is billing their payer. The billing currency depends on the
The amount is specified in the smallest unit of the currency, called subunits. For example, in USD, the subunit is cents, and 100 cents equal 1 USD. So, an amount of 12025 (cents) is equivalent to 120.25 USD.
Note that the subunit-to-unit ratio varies by currency, it is not always 100. See Currencies for the subunits of each currency.
// Set the amount of the payment
"amount": {
    "tuition": 250025,
    "housing": 500000
  }
Provider
Value must be embed2.0
The provider value defines the internal tracking protocol for the payment. You must use embed2.0 unless a different value has been formally agreed upon with Flywire.
// The origin of the payment
provider: "embed2.0",
Pre-filling Fields of the Checkout Experience
Providing Payer Information
Essentials about providing payer information:
Providing any payer information is optional. The following information tells you if the payer field is required to complete the payment. If you don't provide the required information, the payer has to fill out those fields in the Checkout Experience.
If you provide all required payer fields, the page that collects payer information is automatically hidden. If you want to change this default behavior, see Displaying the payer information page.
The payer's first name.
For a frictionless experience, ensure that the data you are providing conforms with the validation rules of the Checkout Experience (otherwise your payer will see the fields highlighted with an error and has to correct them).
Validation rules of the Checkout Experience:
This field accepts only letters (A-Z) and numbers (0-9).
The last name (family name) of the payer.
For a frictionless experience, ensure that the data you are providing conforms with the validation rules of the Checkout Experience (otherwise your payer will see the fields highlighted with an error and has to correct them).
Validation rules of the Checkout Experience:
This field accepts only letters (A-Z) and numbers (0-9).
The first line of the payer's address.
The residential address is required for legal reasons, which is why PO boxes are not permitted.
The payer's city.
The state field is only displayed when the country is “United States” or “China”. When it is displayed, it is required for sending the form.
The state where the payer resides in.
Format:
Only the second part of the ISO 3166-2 code, for example for US-NY the value is NY.
The country of the payer.
Format:
Two-letter format (ISO 3166-1 alpha-2), for example US for USA or GB for the United Kingdom.
The phone number of the payer (including the country code).
Use + in front of the country code, for example, "+44123456" for country code 44.
The payer's email address.
Only required for specific payments for payers in Canada.
Defines the type of payer. If the payer is an individual, a date of birth is required.
Possible values:
-
individual
-
business
Only relevant for payers in Canada.
If the payer is an individual payer from Canada, their date of birth is required due to FINTRAC regulations. Not required for business payers or payers outside of Canada.
Format: YYYY-MM-DD
// Payer information
"sender_first_name": "Peter",
"sender_last_name": "Payer",
"sender_address1": "Main Street 1",
"sender_city": "London",
"sender_state": "",
"sender_country": "GB",
"sender_phone": "+4412345678",
"sender_email": "[email protected]",
"sender_type": "individual",
"sender_date_of_birth": "2000-12-27",
Providing Dynamic Fields for the Recipient
The Checkout Experience does not display the recipient's dynamic fields.
This means your payer won't be able to provide information for your dynamic fields. You have to ensure that you provide the information for mandatory fields.
Fields of a recipient (also called a portal) are fields that are specific to that recipient. Depending on how you use Flywire, you might know them under the names dynamic fields, custom fields, or student fields.
These fields are defined when the recipient (portal) is set up by Flywire.
Which fields must be provided?
Dynamic fields can be mandatory or optional. You must provide values for mandatory dynamic fields, otherwise the Checkout Experience won't be able to create the payment.
How to provide dynamic fields
You provide the information as a pair of the internal_name of the field and its value. Dynamic fields can have different types, and it depends on the field type how you provide the value for them.
You can use the portal checker to find out:
-
if your portal has mandatory fields
-
what the internal names of the fields are
-
the type of each field
Guide for providing values for each field type
- String
- Dropdown
- Single checkbox
- Multiple checkboxes
String field
When you are checking your portal settings, this field type is called string - text/phone/country/date.
How to pass values for the different field formats:
Field name:
Use the internal name (Id) of the field. You can check your portal settings to find the Id.
Values:
Text
Pass the text as a string.
Phone
The phone number of the payer (including the country code).
Use + in front of the country code, for example, "+44123456" for country code 44.
Country
The ISO2 code of the country.
Date
Date in dd/mm/yyyy format, for example 01/01/2025.
"student_id": "ID123456",
"phone_number": "+44123456789",
"country_residence": "US",
"start_date": "01/01/2025",
Dropdown
When you are checking your portal settings, this field type is called string.
How to pass values for this field type:
Field name:
Use the internal name (Id) of the field. You can check your portal settings to find the Id.
Values:
Pass the internal name (value, not the label) as a string.
If you don't know the internal value, contact the Solutions team.
"student_status": "full_time",Single Checkbox
When you are checking your portal settings, this field type is called boolean.
How to pass values for this field type:
Field name:
Use the internal name (Id) of the field. You can check your portal settings to find the Id.
Values:
Pass either true or false , since this is a boolean field.
"residential_student": "true",Multiple Checkboxes
When you are checking your portal settings, this field type is called array.
How to pass values for this field type:
Field name:
Use the internal name (Id) of the field. You can check your portal settings to find the Id.
Values:
Pass the internal name (value, not the label) as a string.
If you don't know the internal value, contact the Solutions team.
"services_used": "housing, tuition",Providing Dynamic Fields for the Payment Method
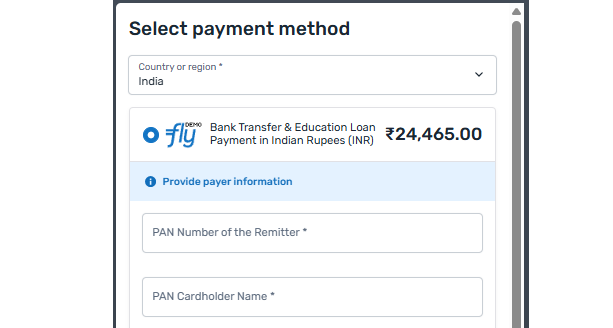
Some payment methods have their own dynamic fields. The Checkout Experience always displays those fields for your payer to fill out, but you have the option to provide values to pre-fill them. Note that providing fields for a payment method does not pre-select the payment method, but if your payer picks this payment method the corresponding fields are pre-filled.
How to provide dynamic fields for payment methods
Provide the field as pairs of the ID of the field and its value. If you don't know the ID of the payment method field, please contact the Solutions team. For how to provide values for the different field types, see Guide for providing values for each field type.
The ID (internal identifier) of the field.
The value for this field. See Guide for providing values for each field type.
// Provide Dynamic Payment Method Fields
offer_pan_number: "FLYPA7733I"
Where are dynamic fields for payment methods displayed?
Hover to see examples for payment method dynamic fields highlighted.
Pre-selecting an Installment Plan Configuration for the Payer
You can pre-select a specific installment plan configuration (cohort) to only display this configuration to your payer.
Cohorts enable you to create tailor-made installment plans for a specific group of payers.
Cohorts require the following:
You need access to ![]() Flywire Dashboard and the Installment Plans module to configure the cohorts. You can find more information in the Flywire Dashboard user guide.
Flywire Dashboard and the Installment Plans module to configure the cohorts. You can find more information in the Flywire Dashboard user guide.
You can use these integrations to display the cohorts to your payer:
-
 Checkout(Checkout with API (Flywire-hosted recurring payments) or Embedded Checkout)
 -
 Pay-By-Link
How does cohorting work?
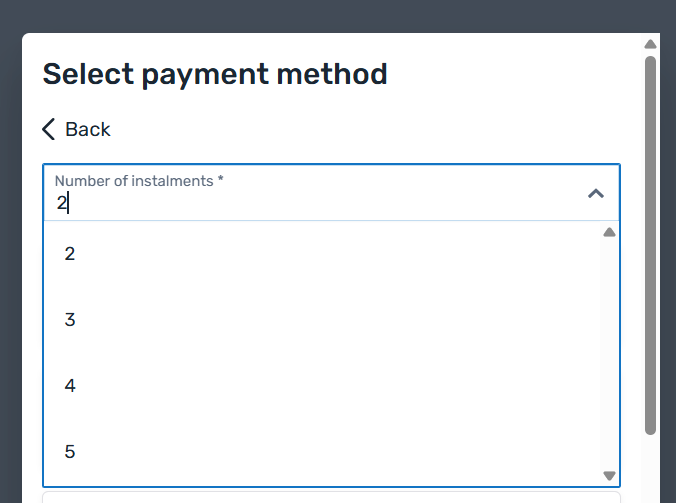
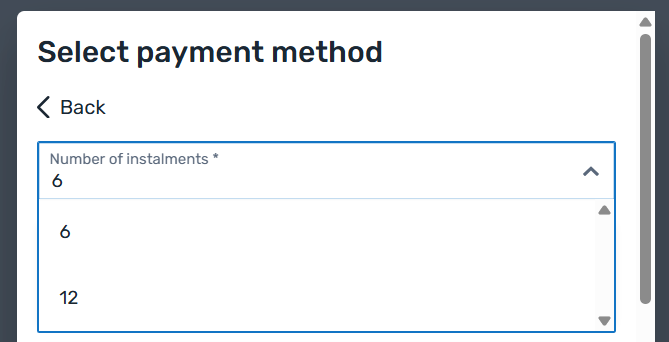
The example below only shows options with a different number of installments, but there are many other settings you can define. Refer to the Flywire Dashboard user guide for detailed information.
With Cohorting
With cohorting, you can define additional installment plan configurations and make them visible only to specific payers.
| Your installment plan configurations in Dashboard: | What your payer sees: | ||
|---|---|---|---|
|
First cohort:
|
|
||
|
Second cohort:
|
|
||
Without Cohorting
Without cohorting, you define one installment plan configuration for everyone:
| Your installment plan configuration in Dashboard: | What your payer sees: | ||
|---|---|---|---|
|
|
You can find the recurring configuration ID (also called cohort ID) in Flywire Dashboard where you configure the cohorts:
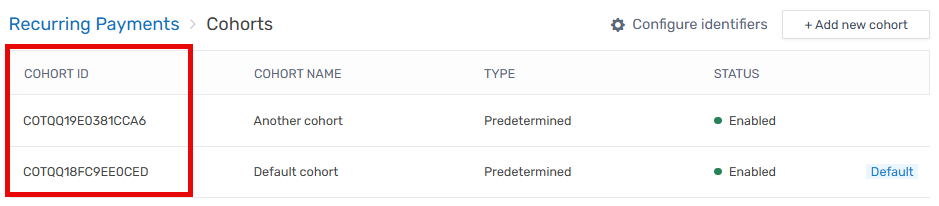
The recurring configuration ID (also called cohort ID) is the unique identifier for a installment plan configuration you created for a specific cohort.
Format:
Either: COABC18EADF349BE
CO3-letter portal/recipient ID11 characters
Or: COABC1D18EADF349BE
CO5-alphanum portal/recipient ID11 characters
// Provide the recurring configuration ID
"recurring_configuration_id": "COTQQ19D4430F877"
Displaying the Checkout Experience
Language
Enables you to set the language of the payment experience.
If not provided, the language defaults to the browser's language (if supported). While browser-based adaptation is recommended, you can set a fixed language using this parameter.
| Language | Value for locale |
|---|---|
| English | en |
| Spanish | es-ES |
| Chinese | zh-CN |
| Korean | ko-KR |
| Portuguese | pt-PT |
| Japanese | ja-JP |
| French | fr-FR |
| Bahasa Indonesia | id-ID |
| Arabic | ar-SA |
| Vietnamese | vi-VN |
| Italian | it-IT |
| German | de-DE |
| Turkish | tr-TR |
// Set the display language
locale: "en",|
|
The Checkout Experience allows payers to change the display language, even if you pre-defined one with the locale parameter. This is enabled by default, the button to change the language is always shown in the footer of the Checkout Experience. If you want to hide the whole footer including the language button, see Theme. |
Theme
- Show as code
- Show UI areas
- Show UI modes
theme object
Defines how the Checkout Experience will be displayed on your page.
Possible values:
-
popup
-
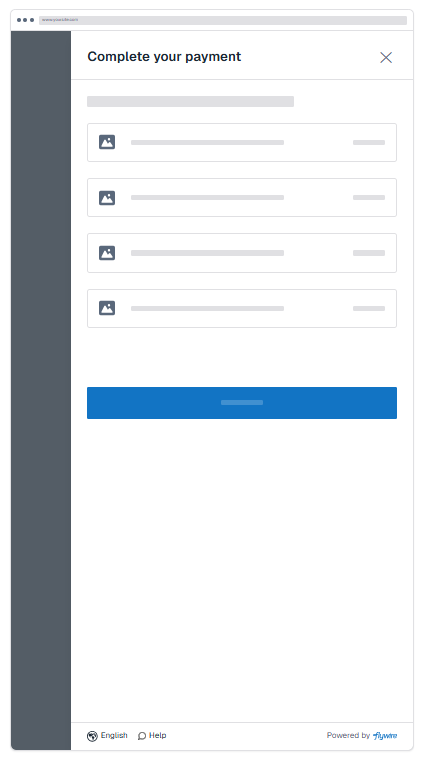
drawer
-
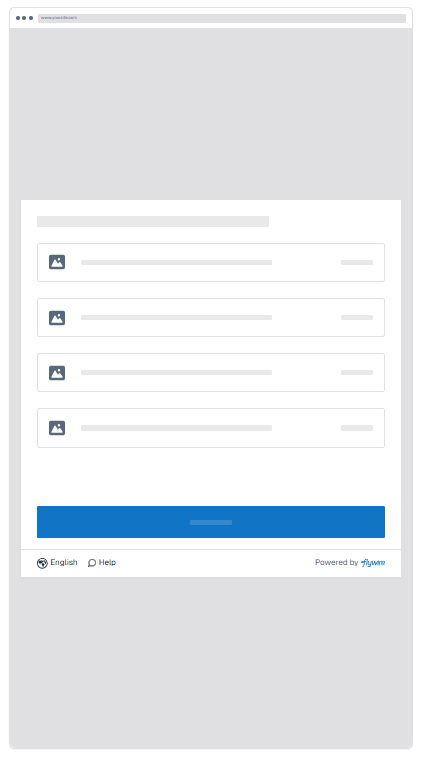
inline
- Popup
- Drawer
- Inline
Defines if the header will be displayed.
Possible values:
-
true (default)
-
false
Defines if the footer will be displayed.
Hiding the footer also hides the chat button, the language button, and the powered by Flywire logo.
Possible values:
-
true (default)
-
false
Defines if the close button will be displayed.
Possible values:
-
true (default)
-
false
Defines if the chat button will be displayed.
The chat button is hidden if you hide the footer.
Possible values:
-
true (default)
-
false
Defines the color for buttons in the Checkout Experience.
// Theme options
"theme": {
	"mode": "popup",
	"header": true,
	"footer": true,
	"closeButton": true,
	"chat": true,
	"brandColor": "#1274C4"
}
Header
Defines if the header will be displayed.
Possible values:
-
true (default)
-
false
Close Button
Defines if the close button will be displayed.
Possible values:
-
true (default)
-
false
Brand Color
Defines the color for buttons in the Checkout Experience.
Footer
Defines if the footer will be displayed.
Hiding the footer also hides the chat button, the language button, and the powered by Flywire logo.
Possible values:
-
true (default)
-
false
Chat Button
Defines if the chat button will be displayed.
The chat button is hidden if you hide the footer.
Possible values:
-
true (default)
-
false
Mode
theme.mode string
Defines how the Checkout Experience will be displayed on your page.
Possible values:
-
popup
-
drawer
-
inline
- Popup
- Drawer
- Inline
Displaying the payer information page
To make the Checkout Experience more lean, the payer information page is automatically hidden if you are providing all required payer information fields. With this parameter, you have the option to display the page even if all required fields are provided.
Possible values:
| true |
Payer information page is displayed even if all required fields are provided, and the fields are editable for the payer. |
| false (default) |
Payer information page is not displayed. If you don't provide this parameter, the page is hidden by default. For the page to be hidden, all required payer information fields must be provided by you. What happens if payer information is missing or invalid? If required field values are missing or are invalid, the payer information page will be displayed so that the payer can add or correct the information. Valid provided fields will be read-only, the payer can only provide the missing/invalid information. If an optional field is not provided, the page will not be displayed to your payer. |
// Display payer information page
"displayPayerInformation": true,
If you want to keep the default setting and hide the payer information page, you must provide all required payer information fields:
For the page to be hidden, all required payer information fields must be provided by you.
What happens if payer information is missing or invalid?
If required field values are missing or are invalid, the payer information page will be displayed so that the payer can add or correct the information. Valid provided fields will be read-only, the payer can only provide the missing/invalid information.
If an optional field is not provided, the page will not be displayed to your payer.
The payer's first name.
For a frictionless experience, ensure that the data you are providing conforms with the validation rules of the Checkout Experience (otherwise your payer will see the fields highlighted with an error and has to correct them).
Validation rules of the Checkout Experience:
This field accepts only letters (A-Z) and numbers (0-9).
The last name (family name) of the payer.
For a frictionless experience, ensure that the data you are providing conforms with the validation rules of the Checkout Experience (otherwise your payer will see the fields highlighted with an error and has to correct them).
Validation rules of the Checkout Experience:
This field accepts only letters (A-Z) and numbers (0-9).
The first line of the payer's address.
The residential address is required for legal reasons, which is why PO boxes are not permitted.
The payer's city.
The state field is only displayed when the country is “United States” or “China”. When it is displayed, it is required for sending the form.
The state where the payer resides in.
Format:
Only the second part of the ISO 3166-2 code, for example for US-NY the value is NY.
The country of the payer.
Format:
Two-letter format (ISO 3166-1 alpha-2), for example US for USA or GB for the United Kingdom.
The phone number of the payer (including the country code).
Use + in front of the country code, for example, "+44123456" for country code 44.
The payer's email address.
Only required for specific payments for payers in Canada.
Defines the type of payer. If the payer is an individual, a date of birth is required.
Possible values:
-
individual
-
business
Only relevant for payers in Canada.
If the payer is an individual payer from Canada, their date of birth is required due to FINTRAC regulations. Not required for business payers or payers outside of Canada.
Format: YYYY-MM-DD
// Payer information
"sender_first_name": "Peter",
"sender_last_name": "Payer",
"sender_address1": "Main Street 1",
"sender_city": "London",
"sender_state": "",
"sender_country": "GB",
"sender_phone": "+4412345678",
"sender_email": "[email protected]",
"sender_type": "individual",
"sender_date_of_birth": "2000-12-27",
Custom Idle Timeout
Allows you to set a custom idle timeout in milliseconds.
The idle timeout defines when the Checkout Experience automatically closes after a period of payer inactivity (e.g., no mouse or keyboard interaction). If no activity is detected for the specified duration, the Checkout Experience will automatically close.
-
Minimum: 600000 ms (10 minutes). Values lower than this will be ignored and the default will be applied.
-
Default: 600000 ms.
// Set custom idle timeout
 "idleTimeout": 700000,
After-Payment Settings
After the payment is created, payment information can be returned to you in two different ways:
-
Information is returned to your website (once), see Return URL.
-
Information is returned to you via callbacks (through the whole payment process), see Callbacks for Payment Status Notifications.
Return URL
How information is sent back to your website
The flow for the Checkout integration is:
-
The payer provides information.
The payer opens the Checkout Experience on your website, enters their personal details, and chooses a payment method.
-
Information is sent back to your website.
This triggers the Checkout integration to send back the payment status and details to your website.
The information is returned through the return_url:
The return URL serves two purposes:
-
It specifies where the payer will be redirected after the payment is created and the Checkout Experience closes.
-
Query parameters with payment information are automatically added to the return URL.
When the payer is redirected to the return URL, Flywire attaches query string parameters containing payment information to the set URL. This way, your website can receive and process the payment information.
-
-
You use the information for your own systems and the payer.
You can use the returned parameters to update your backend, display information to your payer, or for your internal logging and processing of payments.
The return URL serves two purposes:
-
It specifies where the payer will be redirected after the payment is created and the Checkout Experience closes.
-
Query parameters with payment information are automatically added to the return URL.
When the payer is redirected to the return URL, Flywire attaches query string parameters containing payment information to the set URL. This way, your website can receive and process the payment information.
// Set the return url
"return_url": "https://your-website.com",
Callbacks for Payment Status Notifications
If you have access to Flywire Dashboard, callbacks are optional (but recommended) since you have the option to manually track the payment progress there. If you don't have access to Flywire Dashboard, it is highly recommended to use callbacks enable you to track the payment progress.
If you want to receive callbacks, it is required to provide both a callback URL and a callback ID, otherwise no callbacks will be triggered.
The notifications URL enables you to receive callbacks about the payment status (see Payment Status Notifications).
The notifications URL is the dynamic URL for receiving callbacks.
There are two different URLs for receiving callbacks:
Static URL
For API integrations:
When you set up your application that accesses the Flywire API, you had the option to define a notifications URL. This is the static notifications URL. Callbacks will be sent to this URL for all payments you created via the Flywire API.
The recipient of a payment may also have a static notifications URL defined which might be different from your static notifications URL as a client. In that case, callbacks will also be sent to the recipient's notifications URL.For other integrations:
When you set up your portal together with Flywire, you had the option to define a callback URL for that portal. Callbacks will be sent to this URL for all payments for this portal.
If you don't use a static callback URL yet and want to start using it, please contact the Solutions team.
Dynamic URL
The URL you can set in a parameter when you are creating a payment is the dynamic notifications URL. Since this URL can be different for every payment you create, it is called dynamic.
How defining static and dynamic URLs affect callbacks
 = not set = not set |
 = set = set |
| Static URL |
Dynamic URL |
Result |
|
|
|
You won't receive notifications. |
|
|
|
You'll receive notifications to your static URL. |
|
|
|
For API integrations: The dynamic URL will override the static URL and you'll receive notifications only to the dynamic URL. For other integrations: You'll receive callbacks to both URLs. This is called "dual callback URL". A dual callback URL means you defined a static URL in your portal and you are sending callbacks to a different callback URL via the parameter for the payment. In this case, callbacks will be sent to both URLs. This
approach can be useful if you want to update two separate systems.
|
|
|
|
You'll receive notifications to your dynamic URL |
The external reference.
The external reference helps you to identify a payment, since the Flywire-generated payment reference might not be the way you typically identify payments. With the external reference, you can enter your own identifier, such as an ID or invoice number.
The external reference is included in all status notifications to help you map a payment to a callback notification. (see Payment Status Notifications)
// Enable payment status notification callbacks
"callback_url": "https://api.your-domain.com/flywire-notifications",
"callback_id": "REF1234",
Security: Anti-Tampering via Token
Instead of keeping the configuration parameters for your Checkout Experience directly on your website, you can use a token that represents your configuration data but keeps the actual values hidden from the end user, which prevents tampering.
How it works
-
Generate: Your server makes a backend call to the anti-tampering endpoint with your configuration parameters.
If the recipient (portal) of the payment has a Shared Secret, you need to authenticate your request, otherwise no authentication is needed.
-
Exchange: Flywire returns a unique token. You pass this token instead of the raw parameters into your Checkout configuration.
Note that there are some configuration parameters that have to be added on your website in addition to the token.
 Which parameters are not part of the token?
The following parameters have to be set on your website and are not part of the token. They don't contain sensitive data and can safely be used on client-side:
env string
Specifies the environment for Checkout.
Possible values:
-
demo (Sandbox)
-
production (Production environment)
provider string
Value must be embed2.0
The provider value defines the internal tracking protocol for the payment. You must use embed2.0 unless a different value has been formally agreed upon with Flywire.
locale string
Enables you to set the language of the payment experience.
If not provided, the language defaults to the browser's language (if supported). While browser-based adaptation is recommended, you can set a fixed language using this parameter.
Supported languages and their values
Language Value for locale English en Spanish es-ES Chinese zh-CN Korean ko-KR Portuguese pt-PT Japanese ja-JP French fr-FR Bahasa Indonesia id-ID Arabic ar-SA Vietnamese vi-VN Italian it-IT German de-DE Turkish tr-TR return_url string (url)
The return URL serves two purposes:
-
It specifies where the payer will be redirected after the payment is created and the Checkout Experience closes.
-
Query parameters with payment information are automatically added to the return URL.
When the payer is redirected to the return URL, Flywire attaches query string parameters containing payment information to the set URL. This way, your website can receive and process the payment information.
displayPayerInformation boolean
To make the Checkout Experience more lean, the payer information page is automatically hidden if you are providing all required payer information fields. With this parameter, you have the option to display the page even if all required fields are provided.
Possible values:
true Payer information page is displayed even if all required fields are provided, and the fields are editable for the payer.
false (default) Payer information page is not displayed. If you don't provide this parameter, the page is hidden by default.
For the page to be hidden, all required payer information fields must be provided by you.
What happens if payer information is missing or invalid?
If required field values are missing or are invalid, the payer information page will be displayed so that the payer can add or correct the information. Valid provided fields will be read-only, the payer can only provide the missing/invalid information.
If an optional field is not provided, the page will not be displayed to your payer.
idleTimeout integer
Allows you to set a custom idle timeout in milliseconds.
The idle timeout defines when the Checkout Experience automatically closes after a period of payer inactivity (e.g., no mouse or keyboard interaction). If no activity is detected for the specified duration, the Checkout Experience will automatically close.
-
Minimum: 600000 ms (10 minutes). Values lower than this will be ignored and the default will be applied.
-
Default: 600000 ms.
theme object
modestring
Defines how the Checkout Experience will be displayed on your page.
Possible values:
-
popup
-
drawer
-
inline
- Popup
- Drawer
- Inline


 header boolean
Defines if the header will be displayed.
Possible values:
-
true (default)
-
false
footer boolean
Defines if the footer will be displayed.
Hiding the footer also hides the chat button, the language button, and the powered by Flywire logo.
Possible values:
-
true (default)
-
false
closeButton boolean
Defines if the close button will be displayed.
Possible values:
-
true (default)
-
false
chat boolean
Defines if the chat button will be displayed.
The chat button is hidden if you hide the footer.
Possible values:
-
true (default)
-
false
brandColorstring
Defines the color for buttons in the Checkout Experience.
-
Endpoint
| Production | |
| Demo | |
Authentication
It depends on the settings for the recipient of the payment (portal) if authentication is required.
For recipients that require authentication, the following applies:
All requests need to be authenticated with a special header, called the X-Flywire-Digest header. If you leave out the X-Flywire-Digest header, the request will fail.
Hover to highlight the authentication header
curl https://base-url-placeholder/
	-X POST
	-H "Content-Type: application/json"
	-H "X-Flywire-Digest:{your_digest}"
	-d '{
	"recipient": {
		"id": "FWU",
...
}
How to generate the X-Flywire-Digest header
1. Convert the JSON body of your request into a string. Use the exact request body you are using for sending the request.
- Ruby
- .NET
- JavaScript
message_body = your_json_object.to_jsonstring message_body = JsonConvert.SerializeObject(yourJsonObject);const message_body = JSON.stringify(yourJsonObject);
2. Generate the header value:
Encrypt the converted body of your request with your Shared Secret using the SHA-256 algorithm.
The Shared Secret is a string of characters used for security validations.
For API integration:
Your Shared Secret is used to validate notifications. You receive your Shared Secret together with your API credentials via a secure email after you registered your application.
For other integrations:
Your Shared Secret is used to validate notifications and authenticate requests. You receive your Shared Secret from the Flywire Solutions team after your portal has been set up (please contact the Solutions team in case you don't have your Shared Secret). Note that each portal might have a different shared secret. If you have access to multiple portals, make sure you use the correct shared secret for each portal.
Take the result and encrypt it in Base64.
Use the final result as the value for your digest header.
The examples show you how to do this in different programming languages. In each example, exchange the shared_key with your Shared Secret and message_body with the converted JSON body of your request.
- Ruby
- .NET
- JavaScript
digest = OpenSSL::Digest.new('sha256')
encrypted_payload = OpenSSL::HMAC.digest(digest, shared_secret, notification_body)
Base64.encode64(encrypted_payload).strip

# Step 1: Define the hashing algorithm to use for the HMAC.
# This initializes the SHA-256 hashing mechanism.
hash_algorithm = OpenSSL::Digest.new('sha256')

# Step 2: Compute the HMAC in binary format.
# This uses the shared secret and the message body to produce the HMAC signature.
hmac_binary = OpenSSL::HMAC.digest(hash_algorithm, shared_secret, message_body)

# Step 3: Encode the HMAC in Base64 for use in the X-Flywire-Digest header.
x_flywire_digest = Base64.encode64(hmac_binary).strip
public static string Digest(string shared_secret, string message_body)
{
// Step 1: Initialize the HMACSHA256 object with the shared secret.
// This sets up the hashing algorithm (SHA-256) and the secret key for HMAC.
using (var hmacsha256 = new HMACSHA256(Encoding.UTF8.GetBytes(shared_secret)))
{
// Step 2: Convert the message body into a byte array.
// The message body is the message payload you want to hash
var bytes = Encoding.UTF8.GetBytes(message_body);
// Step 3: Compute the HMAC hash of the message body.
// This generates the HMAC using the shared secret and the message body.
var hashedBytes = hmacsha256.ComputeHash(bytes);
// Step 4: Convert the hashed byte array into a Base64 string.
return Convert.ToBase64String(hashedBytes);
}
}const crypto = require('crypto');
function createDigest(shared_secret, message_body) {
// Step 1: Initialize the HMAC with the SHA-256 algorithm and the shared secret.
const hmac = crypto.createHmac('sha256', shared_secret);
// Step 2: Update the HMAC with the message body.
// The message body is the message payload you want to hash
hmac.update(message_body);
// Step 3: Get the HMAC digest and encode it in Base64.
const digestHeader = hmac.digest('base64');
return digestHeader; // The `digestHeader` is the X-Flywire-Digest header.
}Request
Authentication
Only necessary if your recipient (portal) has a Shared Secret, see Authentication.
Request Body
recipient object
Contains the subdomain of the recipient (portal) and - if necessary - dynamic fields.
The unique subdomain for the portal. The subdomain has been provided to you by Flywire when your portal was set up.
Dynamic fields of the recipient
Provided as pairs of the field ID and the value. For more help see Providing Dynamic Fields for the Recipient.
The Checkout Experience does not display the recipient's dynamic fields.
This means your payer won't be able to provide information for your dynamic fields. You have to ensure that you provide the information for mandatory fields.
Fields of a recipient (also called a portal) are fields that are specific to that recipient. Depending on how you use Flywire, you might know them under the names dynamic fields, custom fields, or student fields.
These fields are defined when the recipient (portal) is set up by Flywire.
sender object
Contains the payer data.
Providing any payer information is optional. The following information tells you if the payer field is required to complete the payment. If you don't provide the required information, the payer has to fill out those fields in the Checkout Experience.
country object
Contains the country and defines if the payer can change the provided country.
The country of the payer.
Format:
Two-letter format (ISO 3166-1 alpha-2), for example US for USA or GB for the United Kingdom.
Enables you to define if the payer can change the country you provided:
-
true: Payer cannot change the country in the Checkout Experience.
-
false: Default. Payer can change the country in the Checkout Experience.
The payer's first name.
For a frictionless experience, ensure that the data you are providing conforms with the validation rules of the Checkout Experience (otherwise your payer will see the fields highlighted with an error and has to correct them).
Validation rules of the Checkout Experience:
This field accepts only letters (A-Z) and numbers (0-9).
The last name (family name) of the payer.
For a frictionless experience, ensure that the data you are providing conforms with the validation rules of the Checkout Experience (otherwise your payer will see the fields highlighted with an error and has to correct them).
Validation rules of the Checkout Experience:
This field accepts only letters (A-Z) and numbers (0-9).
The first line of the payer's address.
The residential address is required for legal reasons, which is why PO boxes are not permitted.
The payer's city.
The state field is only displayed when the country is “United States” or “China”. When it is displayed, it is required for sending the form.
The state where the payer resides in.
Format:
Only the second part of the ISO 3166-2 code, for example for US-NY the value is NY.
The phone number of the payer (including the country code).
Use + in front of the country code, for example, "+44123456" for country code 44.
The payer's email address.
Only required for specific payments for payers in Canada.
Defines the type of payer. If the payer is an individual, a date of birth is required.
Possible values:
-
individual
-
business
Only relevant for payers in Canada.
If the payer is an individual payer from Canada, their date of birth is required due to FINTRAC regulations. Not required for business payers or payers outside of Canada.
Format: YYYY-MM-DD
items object
Contains the payment amount.
Identifier for the amount
It depends on your recipient (portal) settings which identifier you need to use:
-
For recipients (portals) that use one amount: Use amount.
-
For recipients (portals) that use items: The ID (internal identifier) of the item. You can use the portal checker to look up the IDs for each of your items.
When setting up your portal with Flywire, you can choose how you want to handle amounts. There are two possible configurations:
-
One amount: There is only one field for the total amount.
-
Items: There are multiple fields to breakdown specific costs (e.g., "Tuition" and "Housing"), and each field has an amount.
If you want to change your portal configuration, please contact the Solutions team.
Not sure which one you’re using? Use the portal checker and look at the field IDs for items:
-
One amount: You will see a single field with the ID amount.
-
Items: You will see one or more IDs with specific names (e.g., tuition_fee, housing, etc.).
Payment amount
The payment amount in the billing currency.
The billing currency is the currency in which the recipient of the payment is billing their payer. The billing currency depends on the
The amount is specified in the smallest unit of the currency, called subunits. For example, in USD, the subunit is cents, and 100 cents equal 1 USD. So, an amount of 12025 (cents) is equivalent to 120.25 USD.
Note that the subunit-to-unit ratio varies by currency, it is not always 100. See Currencies for the subunits of each currency.
The external reference.
The external reference helps you to identify a payment, since the Flywire-generated payment reference might not be the way you typically identify payments. With the external reference, you can enter your own identifier, such as an ID or invoice number.
The external reference is included in all status notifications to help you map a payment to a callback notification. (see Payment Status Notifications)
The notifications URL enables you to receive callbacks about the payment status (see Payment Status Notifications).
The notifications URL is the dynamic URL for receiving callbacks.
There are two different URLs for receiving callbacks:
Static URL
For API integrations:
When you set up your application that accesses the Flywire API, you had the option to define a notifications URL. This is the static notifications URL. Callbacks will be sent to this URL for all payments you created via the Flywire API.
The recipient of a payment may also have a static notifications URL defined which might be different from your static notifications URL as a client. In that case, callbacks will also be sent to the recipient's notifications URL.For other integrations:
When you set up your portal together with Flywire, you had the option to define a callback URL for that portal. Callbacks will be sent to this URL for all payments for this portal.
If you don't use a static callback URL yet and want to start using it, please contact the Solutions team.
Dynamic URL
The URL you can set in a parameter when you are creating a payment is the dynamic notifications URL. Since this URL can be different for every payment you create, it is called dynamic.
How defining static and dynamic URLs affect callbacks
|
= not set |
= set |
| Static URL |
Dynamic URL |
Result |
|
|
|
You won't receive notifications. |
|
|
|
You'll receive notifications to your static URL. |
|
|
|
For API integrations: The dynamic URL will override the static URL and you'll receive notifications only to the dynamic URL. For other integrations: You'll receive callbacks to both URLs. This is called "dual callback URL". A dual callback URL means you defined a static URL in your portal and you are sending callbacks to a different callback URL via the parameter for the payment. In this case, callbacks will be sent to both URLs. This
approach can be useful if you want to update two separate systems.
|
|
|
|
You'll receive notifications to your dynamic URL |
curl https://base-url-placeholder/
-X POST
-H "Content-Type: application/json"
-H "X-Flywire-Digest: {your_digest}"
-d '{
  "recipient": {
    "id": "your_subdomain",
    "student_id": "4882384204"
  },
  "sender": {
    "country": {
      "value": "ES",
      "read_only": true
    },
    "first_name": "Peter",
    "last_name": "Payer",
    "address1": "12 Main Street",
    "city": "New York",
	"state": "NY",
    "phone": "123456789",
    "email": "[email protected]",
    "type":"individual",
    "date_of_birth": "1995-11-00"
  },
  "items": {
    "amount": "400000"
  },
  "callback_id": "your-callback-id",
  "callback_url": "https://your-domain.com/callback"
}'
Response
-
 200 Success
 -
 401 Error
 -
422 Error
-
500 Error
A success response (200) returns the token. Use this token in your Checkout configuration script, see Example for a Configuration with an Anti-Tampering Token.
{
"token": "c8a08d3c-07f2-4561-a11a-3f85ae67e45z"
}
Requests for this recipient require authorization, see Authentication. Ensure that the value in your digest header is correct.
HTTP: 401 UnauthorizedUnprocessable entity.
Check the request body parameters and confirm you are using the correct parameters.
If the recipient ID is flagged as invalid, ensure that you are using the correct subdomain for your recipient. Note that the subdomain is required, not the recipient (portal) ID.
{
"errors": [
	{
	"source": "/recipient/id",
	"param": "id",
	"type": "invalid_param",
	"message": "is_invalid"
	}
	]
}
Internal server error.
{
"errors": "Server error",
"url": "https://www.demo.flywire.com/select-school"
}
Example for a Configuration with an Anti-Tampering Token
This simplified html example shows you how to integrate the Checkout Experience into your website when you are using tokenization for anti-tampering:
Script Source
Add the script to your page that opens the Checkout Experience.
The script source is:
https://payment.flywire.com/assets/js/checkout.js
Button
Add a button with an ID to trigger the Checkout Experience form.
Script Initialization
Raw parameters
The following parameters have to be set on your website and are not part of the token. They don't contain sensitive data and can safely be used on client-side:
Specifies the environment for Checkout.
Possible values:
-
demo (Sandbox)
-
production (Production environment)
Value must be embed2.0
The provider value defines the internal tracking protocol for the payment. You must use embed2.0 unless a different value has been formally agreed upon with Flywire.
Enables you to set the language of the payment experience.
If not provided, the language defaults to the browser's language (if supported). While browser-based adaptation is recommended, you can set a fixed language using this parameter.
| Language | Value for locale |
|---|---|
| English | en |
| Spanish | es-ES |
| Chinese | zh-CN |
| Korean | ko-KR |
| Portuguese | pt-PT |
| Japanese | ja-JP |
| French | fr-FR |
| Bahasa Indonesia | id-ID |
| Arabic | ar-SA |
| Vietnamese | vi-VN |
| Italian | it-IT |
| German | de-DE |
| Turkish | tr-TR |
The return URL serves two purposes:
-
It specifies where the payer will be redirected after the payment is created and the Checkout Experience closes.
-
Query parameters with payment information are automatically added to the return URL.
When the payer is redirected to the return URL, Flywire attaches query string parameters containing payment information to the set URL. This way, your website can receive and process the payment information.
To make the Checkout Experience more lean, the payer information page is automatically hidden if you are providing all required payer information fields. With this parameter, you have the option to display the page even if all required fields are provided.
Possible values:
| true |
Payer information page is displayed even if all required fields are provided, and the fields are editable for the payer. |
| false (default) |
Payer information page is not displayed. If you don't provide this parameter, the page is hidden by default. For the page to be hidden, all required payer information fields must be provided by you. What happens if payer information is missing or invalid? If required field values are missing or are invalid, the payer information page will be displayed so that the payer can add or correct the information. Valid provided fields will be read-only, the payer can only provide the missing/invalid information. If an optional field is not provided, the page will not be displayed to your payer. |
Allows you to set a custom idle timeout in milliseconds.
The idle timeout defines when the Checkout Experience automatically closes after a period of payer inactivity (e.g., no mouse or keyboard interaction). If no activity is detected for the specified duration, the Checkout Experience will automatically close.
-
Minimum: 600000 ms (10 minutes). Values lower than this will be ignored and the default will be applied.
-
Default: 600000 ms.
theme object
Defines how the Checkout Experience will be displayed on your page.
Possible values:
-
popup
-
drawer
-
inline
- Popup
- Drawer
- Inline
Defines if the header will be displayed.
Possible values:
-
true (default)
-
false
Defines if the footer will be displayed.
Hiding the footer also hides the chat button, the language button, and the powered by Flywire logo.
Possible values:
-
true (default)
-
false
Defines if the close button will be displayed.
Possible values:
-
true (default)
-
false
Defines if the chat button will be displayed.
The chat button is hidden if you hide the footer.
Possible values:
-
true (default)
-
false
Defines the color for buttons in the Checkout Experience.
Token
The anti-tampering token you received in the response.
Button identifier
Connect the script to your button via the button ID.
<!DOCTYPE html>
<html>
  <head>
    <!-- Include the Checkout script -->
    <script src="https://payment.flywire.com/assets/js/checkout.js"></script>
  </head>
  <body>
    <!-- Add a button element -->
    <button id="pay-button">
      Make Payment
    </button>
   <!-- Initialize the script -->
    <script>
      window.flywire.Checkout.render(
      {
        "env": "demo",
        "provider": "embed2.0",
        "locale": "en",
        "return_url": "",
        "displayPayerInformation": false,
        "idleTimeout": 700000,
        "theme": {
          "mode": "popup",
          "header": true,
          "footer": true,
          "closeButton": true,
          "chat": true,
          "brandColor": "#1274C4"
        },
	    "token":"c8a08d3c-07f2-4561-a11a-3f85ae67e45z"
      },
        "#pay-button",
      );
     </script>
  </body>
</html>
