Payment Request Links
This page is about creating Payment Requests via query parameters.
When you are using query parameters, you can only create links for a Payment Request with a single payment.
A Payment Request is a way to ask your customer to make a payment, typically by sending them a link. Payment Requests serve as an umbrella sitting on top of one or multiple payments.
Payments Requests can be edited after they are created, for example, you can add more payments to it (see Managing Payment Requests).
Payment Requests can be used for different purposes:
Want to create Payment Request links with more features?
For creating Payment Requests links with features like installments or subscriptions you need to use ![]() Client Dashboard or the
Client Dashboard or the ![]() Flywire API.
Flywire API.
Want to manage Payment Requests after creating them?
For managing Payment Requests, for example changing or deleting them, you need to use ![]() Client Dashboard or the
Client Dashboard or the ![]() Flywire API .
Flywire API .
Want to receive callbacks?
Make sure you read the Notes for Callbacks.
How it works
-
You build a Payment Request by constructing them with these two parts:
-
Base URL (depends on the environment you want to use, see Base URLs)
-
Query String (depends on your individual settings and use case, see List of parameters)
Example:
https://app.flywire.com/#/payment-request/quick-pay?code=FWB&clientId=XYZ123&amount=2000&firstName=John&lastName=Doe
-
-
You give this link to your payer, for example via email.
-
The payer visits the link.
-
Once the payer clicks on the "Make Payment" button, the query parameters are resolved into a Payment Request ID and a Payment Request is created in your system.
-
Now that the Payment Request has been created, it will be visible to you in Dashboard and via the API.
Which type of Payment Request link do you want to create?
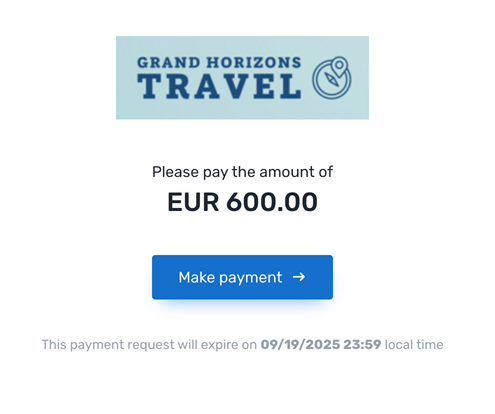
Stateful (unique) Links
|
Unpaid:
Paid: 
|
A stateful Payment Request link for single payment shows the amount to pay. Since the link is stateful, visiting the link again after the payment is made shows the information that the amount is already paid. This means you can use these types of links for unique links, for example links that you only want to use for a specific payer. Good to know: Stateful Payment Request links are ideal for highly customized links you want to send to a specific customer. For example, you can insert them into an invoice or an email template and they pre-fill the Commercial Payment Experience form with all the payer info and the payment amount. You can create stateful Payment Request links via Pay-By-Link or via an API request. To create the links, you have two options: 1) Build the link with
2) Build the link with the
|
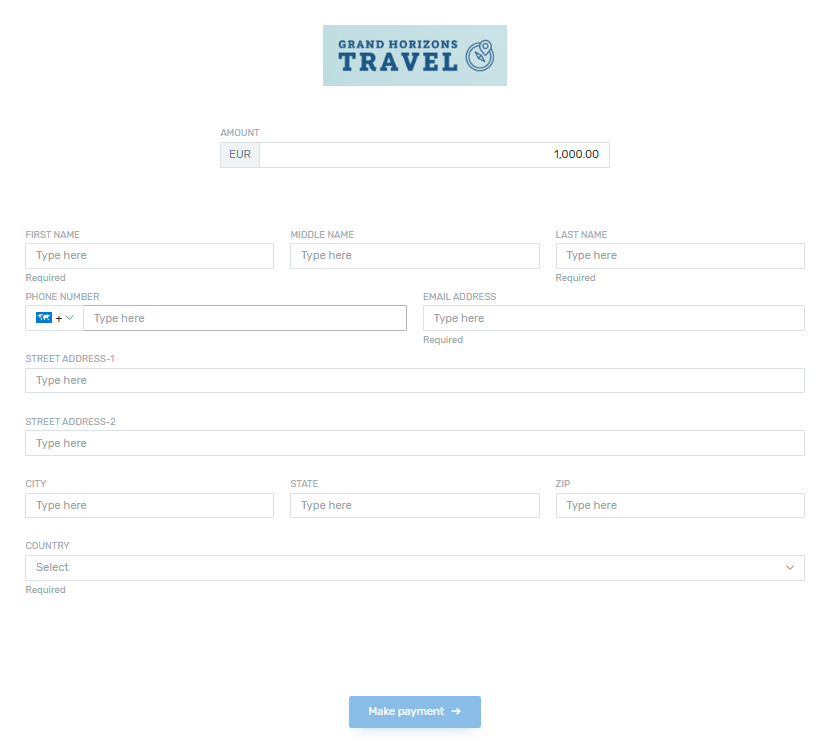
Stateless (reusable) Links
|
A stateless Payment Request link shows a form to enter payer details and then make a payment - even if a payment already has been made through this link. This means you can use these types of links to reuse them, for example using them on your website to always make a payment with a pre-set amount. Good to know: Stateless links need to be enabled for your portal before you can use them. Please reach out to your Flywire contact for this.
Stateless links always create a Payment Request for a single payment. Unlike stateful Payment Request links, stateless links don't require an amount to be provided, which means you can use them for completely "blank" links that don't pre-fill any fields. For stateless links, your portal settings define if payment methods are stored and contacts will be created. If you want to change those settings, please reach out to your Flywire contact. Optional tokenization
Mandatory tokenization
No tokenization
|
Payment Request Link Generator
Important for stateful links
When building stateful Payment Request links via query parameters, you must include a unique value, like a booking reference. This ensures that the system generates a unique Payment Request ID. If you use identical query parameters and values, they will always be resolved to the same Payment Request ID.
This ID has been automatically generated when the Payment Request or subscription was created.
This ID is publicly visible at the end of the Payment Request link, for example:
https://app.flywire.com/rest/payment-request/pay/public/959c09e5-a27b-49e9-8f92-e9e13374cfdd
Format:
959c09e5-a27b-49e9-8f92-e9e13374cfdd
32 hexadecimal characters grouped into 8-4-4-4-12
Payment Request Links Reference
Base URLs
For stateful links
| Production | |
| Demo | |
For stateless links
| Production | |
| Demo | |
List of parameters
All values must be URL encoded since they are used in query string parameters. To make reading the guide easier the example values have not been encoded. Omitting this step may generate broken links.
Important for stateful links
When building stateful Payment Request links via query parameters, you must include a unique value, like a booking reference. This ensures that the system generates a unique Payment Request ID. If you use identical query parameters and values, they will always be resolved to the same Payment Request ID.
This ID has been automatically generated when the Payment Request or subscription was created.
This ID is publicly visible at the end of the Payment Request link, for example:
https://app.flywire.com/rest/payment-request/pay/public/959c09e5-a27b-49e9-8f92-e9e13374cfdd
Format:
959c09e5-a27b-49e9-8f92-e9e13374cfdd
32 hexadecimal characters grouped into 8-4-4-4-12
Portal identification and authentication (required)
Providing the portal code and client ID is required. If you don't know them, please reach out to your Flywire contact.
| Parameter | Description | Example |
|---|---|---|
| code |
The portal code for this portal (also called recipient). The portal code identifies the portal. The portal code has been assigned by Flywire when the portal has been set up. Format: Either: 3 letters (ABC) Or: 5 alphanumeric characters, always starting with a letter (ABC1D) |
code=FWB |
| clientId |
Your client ID is identical to the public reference of your company. Your account with Flywire is called a company. Your company can have access to multiple portals (also called recipients). The public reference (also called client ID) uniquely identifies this company in the Flywire system. It is a six-character code that can contain letters and numbers in the format ABC123. |
clientId=ABC123 |
Payment amount (required for stateful links)
Providing an amount it required for stateful Payment Request links.
| Parameter | Description | Example |
|---|---|---|
| amount |
The payment amount in the billing currency. The billing currency is the currency in which the recipient of the payment is billing their payer. The billing currency depends on the The amount is specified as a decimal (1000.25). |
amount=1234.56 |
Payer data
Some payer data fields might be required for creating the link.
It depends on your Dashboard settings whether and which sender (payer) fields are required.
You can check the settings in ![]() Client Dashboard under "Settings - Payment Requests". If your user doesn't have the permissions to view this tab, you can create a new Payment Request in Dashboard and check which fields are marked as required.
Client Dashboard under "Settings - Payment Requests". If your user doesn't have the permissions to view this tab, you can create a new Payment Request in Dashboard and check which fields are marked as required.
| Parameter | Description | Example |
|---|---|---|
| firstName |
The payer's first name. The field only accepts Latin characters from A-Z and 0-9. Max. 256 characters. |
firstName=John |
| lastName |
The last name (family name) of the payer. The field only accepts Latin characters from A-Z and 0-9. Max. 256 characters. |
lastName=Doe |
|
The payer's email address. |
[email protected] | |
| address |
The payer's address. |
address=21 Jump St |
| city |
The payer's city. The field only accepts Latin characters from A-Z and 0-9. Max. 256 characters. |
city=Boston |
| state |
The state where the payer resides in. Format: Only the second part of the ISO 3166-2 code, for example for US-NY the value is NY. List of ISO codes for states in US List of ISO codes for states for China The field only accepts Latin characters from A-Z and 0-9. Max. 256 characters. |
state=MA |
| zip |
The payer's zip code. |
zip=02111 |
| country |
The country of the payer. Format: Two-letter format (ISO 3166-1 alpha-2), for example US for USA or GB for the United Kingdom. |
country=US |
| phone |
The phone number of the payer (including the country code). Use + in front of the country code, for example, "+44123456" for country code 44. |
phone=+44123456 |
Custom fields for the portal
Some custom fields might be required for creating the link.
It depends on your settings if a custom field is optional or required.
There are two layers of required fields:
1) Fields that are required due to settings in your Dashboard
If a field is set to required in Client Dashboard, you must provide it when you create the Payment Request or subscription. Optional fields can be left out.
You can check the settings in ![]() Client Dashboard under "Settings - Payment Requests". If your user doesn't have the permissions to view this tab, you can create a new Payment Request in Dashboard and check which fields are marked as required.
Client Dashboard under "Settings - Payment Requests". If your user doesn't have the permissions to view this tab, you can create a new Payment Request in Dashboard and check which fields are marked as required.
2) Fields that are required due to settings for the portal
If a field is required for the portal, it is required to create the payment.
If a field is not required due to Dashboard settings but is required for the portal, you can decide if you provide it or not when you create the Payment Request or subscription. If you don't provide it, your payer has to fill out the field in the Commercial Payment Experience form, since it is required to create the payment.
You have two options:
Checking via the API
You can check which fields are required for a recipient (portal) with this request (replace {recipientId} with the recipient ID):
Required fields have the required parameter set to true. For more info see Getting Details about a Recipient.
Checking online
You can check which fields are required by checking your portal configuration.
Check your portal configuration to see which custom fields exist for your portal.
Custom fields are fields that are specific to your portal.
These fields are defined when the recipient (portal) is set up by Flywire.
Example for common custom fields:
(Note that the custom fields for your portal might be different, these are just examples)
| Parameter | Description | Example |
|---|---|---|
| booking_reference | Unique booking identifier | booking_reference=REF-1234 |
| invoice_number | Unique invoice identifier | invoice_number=INV-1234 |
Language options
| Parameter | Description | Example | ||||||||||||||||||||||||||||
|---|---|---|---|---|---|---|---|---|---|---|---|---|---|---|---|---|---|---|---|---|---|---|---|---|---|---|---|---|---|---|
| locale |
Enables you to set the language of the payment experience. If not provided, the language defaults to the browser's language (if supported). While browser-based adaptation is recommended, you can set a fixed language using this parameter.
|
locale=es |
Filtering payment options
By default, Flywire displays all payment options for a portal. In some cases, you might want to restrict the available payment options, for example if you want to accept only bank transfers for payments over a certain amount or only show card payments a certain time before a booking.
You can use two filters to restrict payment options:
-
Restrict to specific types of payments
-
Restrict to specific currencies
| Parameter | Description | Example | ||||||||||
|---|---|---|---|---|---|---|---|---|---|---|---|---|
| filterType |
Payment method type filters. Each filter you add means show this option. Each filter you leave out means hide this option. For example, credit_card ,online means: Show card payment options and online alternative pay options, but no bank transfer options. If you don't provide any filters, all payment method types will be displayed in the Commercial Payment Experience.
|
filterType=online,credit_card | ||||||||||
| filterCcy |
Be careful with combining those filters. Your payer might end up not being able to pay if you restrict the options too much. As a best practice, use either local/ foreign (when you want the options to depend on the payer's country) or fx / nonFX (when you want the options to depend on your billing currency). |
filterCcy=fx |
Notes for Callbacks
Callbacks for the Payment Request
Callbacks for Payment Requests are set up via Dashboard, see Callbacks for Payment Request Notifications.
Callbacks for payments that are part of a Payment Request
You cannot provide a dynamic callback URL for payments that are part of a Payment Request. To receive callbacks about those payments, you have to use the static URL. Alternatively, you can use callback notifications for Payment Request status updates, but note that the content of those callbacks is different from payment status callbacks.
There are two different URLs for receiving callbacks:
Static URL
A static callback URL is a fixed URL defined in your portal. All payments for this portal will send callbacks to this URL.
The static callback URL has been defined when your portal was set up. If you don't use a static callback URL yet and want to start using it, please reach out to your Flywire contact.
Dynamic URL
A dynamic callback URL is a URL that you define when you create the payment. Since this URL can be different for every payment you create, it is called dynamic. You define the URL for the
Checkout integration via the callbackUrl parameter.
If you want to receive callbacks, it is required to provide both a callback URL and a callback ID, otherwise no callbacks will be triggered.
You must also set the callback version to 2.
You cannot provide a dynamic callback URL for payments that are part of a Payment Request. To receive callbacks about those payments, you have to use the static URL. Alternatively, you can use callback notifications for Payment Request status updates, but note that the content of those callbacks is different from payment status callbacks.
How defining static and dynamic URLs affect callbacks
 = not set = not set |
 = set = set |
| Static URL |
Dynamic URL |
Result |
|
|
|
You won't receive callbacks . |
|
|
|
You'll receive callbacks to your static URL. You'll also receive callbacks for payments that are part of Payment Requests. |
|
|
|
You'll receive callbacks to both URLs. You'll also receive callbacks for payments that are part of Payment Requests, but only to the static URL. |
|
|
|
You'll receive callbacks to your dynamic URL You will not receive callbacks for payments that are part of Payment Requests since there is no static URL. |
Anti-Tampering
When query parameters are used as plain text in URLs, they can be easily understood and potentially tampered with. To safeguard against this, you can encrypt the links with Base64 to enhance their security.
1. Base URL
2. Query String Construction with URL Encoding
Note: Do not include the leading query string ?
3. Base64 Encoding
4. Final URL Construction
const baseUrl = 'https://app.flywire.com/#/payment-request/quick-pay';
// Note: Do not include the leading query string ?
let queryString = 'code=FWB';
queryString += '&clientId=ABC123';
queryString += '&amount=1234.56';
queryString += '&email=' + encodeURIComponent('[email protected]');
queryString += '&address=' + encodeURIComponent('123 Main St, Suite #100');

queryString = btoa(queryString);

const finalUrl = baseUrl + '?' + queryString;
console.log(finalUrl);
After the payment is created
After the payer followed the payment request link and filled out the form, a payment is created.
The payment will be visible to you in your ![]() Client Dashboard , where you can manage it (for example add installments) and track the payment's history (for example checking if the payer has opened the link).
Client Dashboard , where you can manage it (for example add installments) and track the payment's history (for example checking if the payer has opened the link).
