Use Case: 529 Payments
What are 529 Payments?
A 529 Payment is when someone uses Flywire's recipient network but doesn't need Flywire to collect funds from a payer. This might be because you already have the funds (for example if you are a 529 provider or a bank) or use another system to collect payments. Since funds are collected independently, 529 Payments don't include payment details like credit card or bank account info.
Walkthrough: Creating a 529 Payment
To be able to use the Flywire API, you need to be registered, and all requests to the Flywire API need to be authenticated, see Flywire API Basics
If you are just getting started and only have Sandbox credentials, you need to use the Sandbox environment. All request examples let you switch between the production and sandbox base URL.
1. Choose the recipient for the payment.
Since you are using the network of Flywire recipients, you have to find the recipient ID of the recipient who receives the funds from the payer.
A recipient - also called a portal - contains the information that is needed for receiving funds, like the receiving bank account, the currency in which Flywire takes payments from your payers, or specific fields your system requires to process a payment. Flywire assigns each recipient a unique identifier, called recipient ID or portal code.
You as a client can have multiple recipients, for example for different bank accounts or currencies.
In this step you get the list of recipients that are available for you.
The list of recipients contains all the recipients that are available to you as a client. You can display this list in your UI, for example as a drop down, so that the person creating the payment in your system can choose one of the recipients.
Parameters for the Request Body
No request body needed.
Optional Query Parameters for Pagination
This endpoint supports pagination. If you are not providing any pagination parameters, the response is returned with default pagination settings.
Pagination parameters are added as query parameters with the request in the format {endpoint_path}?page=2&per_page=10
The default setting is:
page=1 (start on page 1)
per_page=10 (display 10 entries per page)
Enables you to access a specific page of the results.
Possible values: Any positive number except zero.
Enables you to define how many results will be included per page.
Possible values: min 1, max 100
curl https://base-url-placeholder/recipients?page=1&per_page=100
  -X GET
  -H "Content-Type: application/json"
  -H "X-Authentication-Key: {api_key}"
The returned list contains only minimal information about the recipients. You are looking for the recipient ID to identify them. In this example, the list of recipients contains International American University and Flywire University.
Missing recipients in the list?
If you are missing recipients in your list of available recipients, the recipient might have been set to inactive in Flywire. The list only returns active recipients. Recipients can be set to inactive for multiple reasons, for example the recipient doesn’t want to receive funds in the configured way anymore. Please contact the Solutions team if you’re missing recipients in your list.
Pagination Parameters
The total number of items in the full result list, not just of the current page.
The total number of pages available.
The current page of the results.
The maximum number of results to return at one time (on one page).
recipients array
The recipient ID (also called portal code).
The recipient ID identifies the recipient (also called portal). The recipient ID has been assigned by Flywire when the recipient has been set up.
Format:
Either: 3 letters (ABC)
Or: 5 alphanumeric characters, always starting with a letter (ABC1D)
The external code for the recipient (if there is one).
The external code of a recipient is optional, it can contain an identifier for the recipient that is different from the Flywire recipient ID. One example for an external code is the "Federal School Code (FSC)", which is a list of codes that identify different schools within the US.
The name of the recipient.
The country where the recipient is located.
Format:
Two-letter format (ISO 3166-1 alpha-2), for example US for USA or GB for the United Kingdom.
The state where the recipient is located.
{
    "total_entries": 350,
    "total_pages": 4,
    "page": 1,
    "per_page": 100,
    "recipients": [
    {
      "id": "AAE",
      "external_code": "E00210",
      "name": "International American University",
      "country": "US",
      "state": "MA"
    },
    {
      "id": "FWU",
      "external_code": "E00212",
      "name": "Flywire University",
      "country": "US",
      "state": "IN"
    },
    // The array continues with similar objects for each recipient
  ]
}
You can find all details about this step here: Recipients - Getting a List of all available Recipients.
2. Check which fields and items are needed for a payment to this recipient.
You need the following information for creating a 529 payment:
-
The mandatory fields for the recipient.
 More about fields
Fields of a recipient (also called a portal) are fields that are specific to that recipient. Depending on how you use Flywire, you might know them under the names dynamic fields, custom fields, or student fields.
These fields are defined when the recipient (portal) is set up by Flywire.
-
The items for the recipient.
More about items
An item is something that your payer can pay for (for example: tuition fees, housing, etc.). When you create a payment, you display the items to your payer and they can choose for which items they want to pay. How many items there are depends on the recipient's configuration.
To get this information, you have to get details about the recipient.In this example, you want to get the recipient information for Flywire University. From the recipient list you got in the step before, you can see that the recipient ID for Flywire University is “FWU”.
This means your API request has to be GET /recipients/FWU.
This endpoint returns all the information about one recipient.
Parameters for the Request Body
No request body needed.
How to Resolve the Path Placeholders of the Endpoint
Replace the {recipientId} of the endpoint with the actual recipient ID.
The recipient ID identifies the recipient (also called portal). The recipient ID has been assigned by Flywire when the recipient has been set up.
Format:
Either: 3 letters (ABC)
Or: 5 alphanumeric characters, always starting with a letter (ABC1D)
You can use this request to get a list of all recipients that are available to you as a client and what their recipient ID is:
For details see Getting a List of all available Recipients.
curl https://base-url-placeholder/recipients/FWU
  -X GET
  -H "Content-Type: application/json"
  -H "X-Authentication-Key: {api_key}"
The recipient ID (also called portal code).
The recipient ID identifies the recipient (also called portal). The recipient ID has been assigned by Flywire when the recipient has been set up.
Format:
Either: 3 letters (ABC)
Or: 5 alphanumeric characters, always starting with a letter (ABC1D)
The external code for the recipient (if there is one).
The external code of a recipient is optional, it can contain an identifier for the recipient that is different from the Flywire recipient ID. One example for an external code is the "Federal School Code (FSC)", which is a list of codes that identify different schools within the US.
The name of the recipient.
The email associated with the recipient.
The website of the recipient.
The URL that contains the logo of the recipient.
If you want to display the recipient's logo in your own UI knowing the Flywire logo standards can be helpful to you. Flywire asks clients to provide logos as a vector (PDF or SVG) with a max size of 1MB and the following dimensions:
| Type | max-width | max-height |
|---|---|---|
| Desktop | 240px | 88px |
| Mobile | 200px | 88px |
Tips:
-
If a logo is square-shaped or vertical-shaped, adjust it to the max height.
-
If a logo is horizontal-shaped, adjust it to the max width.
The first address line of the recipient.
The second address line of the recipient.
The city where the recipient is located.
The state where the recipient is located.
The zip code where the recipient is located.
The country where the recipient is located.
Format:
Two-letter format (ISO 3166-1 alpha-2), for example US for USA or GB for the United Kingdom.
The billing currency in ISO 4217 format.
The billing currency is the currency in which the recipient of the payment is billing their payer. The billing currency depends on the
| Currency ISO 4217 code |
Currency Full Name | Subunit to Unit |
|---|---|---|
| AED | United Arab Emirates Dirhams | 100 |
| AFN | Afghan afghanis | 100 |
| AMD | Armenian drams | 100 |
| ANG | Netherlands Antillean guilders | 100 |
| AOA | Angolan kwanzas | 100 |
| ARS | Argentine pesos | 100 |
| AUD | Australian Dollars | 100 |
| AWG | Aruban florin | 100 |
| AZN | Azerbaijani Manat | 100 |
| BAM | Bosnia and Herzegovina convertible marks | 100 |
| BBD | Barbadian dollars | 100 |
| BDT | Bangladeshi takas | 100 |
| BGN | Bulgarian Levs | 100 |
| BHD | Bahraini Dinars | 1,000 |
| BIF | Burundian franc | 100 |
| BMD | Bermudian Dollars | 100 |
| BND | Brunei dollar | 100 |
| BOB | Bolivian Bolivianos | 100 |
| BRL | Brazilian Reals | 100 |
| BSD | Bahamian Dollars | 100 |
| BTN | Bhutanese ngultrum | 100 |
| BWP | Botswana pula | 100 |
| BZD | Belize dollars | 100 |
| CAD | Canadian Dollars | 100 |
| CDF | Congolese francs | 100 |
| CHF | Swiss Francs | 100 |
| CLP | Chilean pesos | 1 |
| CNH | Chinese Yuan (Offshore) Renminbi | 100 |
| CNY | Chinese Yuan Renminbi | 100 |
| COP | Colombian pesos | 100 |
| CRC | Costa Rican colones | 100 |
| CVE | Cape Verdean escudos | 100 |
| CZK | Czech Korunas | 100 |
| DJF | Djiboutian francs | 100 |
| DKK | Danish Kroner | 100 |
| DOP | Dominican pesos | 100 |
| DZD | Algerian dinars | 100 |
| EGP | Egyptian pounds | 100 |
| ERN | Eritrean Nakfas | 100 |
| ETB | Ethiopian Birrs | 100 |
| EUR | Euros | 100 |
| FJD | Fijian Dollars | 100 |
| FKP | Falkland Islands pounds | 100 |
| GBP | British Pounds | 100 |
| GEL | Georgian lari | 100 |
| GHS | Ghana cedis | 100 |
| GIP | Gibraltar Pounds | 100 |
| GMD | Gambian dalasis | 100 |
| GNF | Guinean francs | 100 |
| GTQ | Guatemalan Quetzals | 100 |
| GYD | Guyanaese Dollars | 100 |
| HKD | Hong Kong Dollars | 100 |
| HNL | Honduran lempiras | 100 |
| HRK | Croatian Kunas | 100 |
| HTG | Haitian gourdes | 100 |
| HUF | Hungarian Forints | 100 |
| IDR | Indonesian Rupiahs | 100 |
| ILS | Israeli New Sheqels | 100 |
| INR | Indian Rupees | 100 |
| ISK | Icelandic krónur | 100 |
| JMD | Jamaican dollars | 100 |
| JOD | Jordanian Dinars | 100 |
| JPY | Japanese Yen | 1 |
| KES | Kenyan Shillings | 100 |
| KGS | Kyrgyzstani Som | 100 |
| KHR | Cambodian Riels | 100 |
| KMF | Comorian francs | 100 |
| KRW | South Korean Won | 100 |
| KWD | Kuwaiti Dinars | 1,000 |
| KYD | Cayman Island Dollars | 100 |
| KZT | Kazakhstani tenge | 100 |
| LAK | Lao kip | 100 |
| LBP | Lebanese Pounds | 100 |
| LKR | Sri Lankan rupees | 100 |
| LRD | Liberian dollars | 100 |
| LSL | Lesotho maloti | 100 |
| LYD | Libyan Dinars | 1,000 |
| MAD | Moroccan Dirhams | 100 |
| MDL | Moldovan lei | 100 |
| MGA | Malagasy ariary | 5 |
| MKD | Macedonian denari | 100 |
| MMK | Myanmar kyat | 100 |
| MNT | Mongolian tugriks | 100 |
| MOP | Macau Patacas | 100 |
| MUR | Mauritian Rupees | 100 |
| MVR | Maldivian Rufiyaas | 100 |
| MWK | Malawian kwachas | 100 |
| MXN | Mexican Pesos | 100 |
| MYR | Malaysian Ringgits | 100 |
| MZN | Mozambican meticais | 100 |
| NAD | Namibian Dollars | 100 |
| NGN | Nigerian Naira | 100 |
| NIO | Nicaraguan córdobas | 100 |
| NOK | Norwegian Kroner | 100 |
| NPR | Nepalese rupees | 100 |
| NZD | New Zealand Dollars | 100 |
| OMR | Omani Rials | 1,000 |
| PAB | Panamanian Balboas | 100 |
| PEN | Peruvian Nuevo Sols | 100 |
| PGK | Papua New Guinean kina | 100 |
| PHP | Philippine Pisos | 100 |
| PKR | Pakistani rupees | 100 |
| PLN | Polish złoties | 100 |
| PYG | Paraguayan guaranies | 100 |
| QAR | Qatari Riyals | 100 |
| RON | Romanian Leus | 100 |
| RSD | Serbian Dinars | 100 |
| RWF | Rwandan francs | 100 |
| SAR | Saudi Riyals | 100 |
| SBD | Solomon Islands dollars | 100 |
| SCR | Seychellois rupees | 100 |
| SEK | Swedish Kronor | 100 |
| SGD | Singapore Dollars | 100 |
| SHP | Saint Helena pounds | 100 |
| SLL | Sierra Leonean leones | 100 |
| SOS | Somali shillings | 100 |
| SRD | Surinamese dollars | 100 |
| STD | São Tomé and Príncipe dobras | 100 |
| SZL | Swazi Lilangenis | 100 |
| THB | Thai Bahts | 100 |
| TJS | Tajikistani somoni | 100 |
| TND | Tunisian Dinars | 1,000 |
| TOP | Tongan paʻanga | 100 |
| TRY | Turkish Liras | 100 |
| TTD | Trinidad and Tobago Dollars | 100 |
| TWD | New Taiwan Dollars | 100 |
| TZS | Tanzanian shillings | 100 |
| UAH | Ukrainian Hryvnia | 100 |
| UGX | Ugandan shillings | 100 |
| USD | United States Dollars | 100 |
| UYU | Uruguayan pesos | 100 |
| UZS | Uzbekistan So'm | 100 |
| VND | Vietnamese Dong | 10 |
| VUV | Vanuatu vatu | 1 |
| WST | Samoan tālā | 100 |
| XAF | CFA francs | 100 |
| XCD | East Caribbean dollars | 100 |
| XOF | West African CFA francs | 100 |
| XPF | French Pacific Francs | 100 |
| YER | Yemeni Rials | 100 |
| ZAR | South African Rands | 100 |
| ZMW | Zambian kwacha | 100 |
fields array
Fields of a recipient (also called a portal) are fields that are specific to that recipient. Depending on how you use Flywire, you might know them under the names dynamic fields, custom fields, or student fields.
These fields are defined when the recipient (portal) is set up by Flywire.
Identifier of the field.
The type of the field affects how the field is filled out and how the field is displayed in the PayEx portal.
For more information see Recipients - Field Types
Information about how fields and messages are displayed in the UI are only relevant to you if the payer makes the payment through your PayEx portal.
|
|
no
|
|
|
no
|
|
|
no
|
|
|
yes
|
The format used to represent this field:
-
country
-
date
-
phone
-
text
Indicates if the field is required (true) or optional (false) when creating the payment. If true you must provide this field when creating a payment.
The RegEx pattern used to validate the provided value when it is entered in the field during the payment process.
Validation message that you can display in your PayEx portal when an error related to the validation of this field appears. This is a helpful hint for your payer to help them fill out the field correctly. For example "Your student ID needs to start with an F followed by 8 digits".
Information about how fields and messages are displayed in the UI are only relevant to you if the payer makes the payment through your PayEx portal.
|
|
no
|
|
|
no
|
|
|
no
|
|
|
yes
|
The value depends on the type of the field.
view_options object
The view options contain information about how the field is displayed in
Information about how fields and messages are displayed in the UI are only relevant to you if the payer makes the payment through your PayEx portal.
|
|
no
|
|
|
no
|
|
|
no
|
|
|
yes
|
Fields are usually organized in sections. This property indicates the section where the field belongs.
The section name where the field belongs. It can be rendered as a section title when rendering the view.
The description of the section. It can be used as a subtitle of the section when rendering the view.
The label of the field. The label value will be returned in the language set in the locale parameter when you were retrieving the recipient details. If you didn't specify a locale, the default is English.
Help text related to the field. It can be displayed as part of the UI next to the field.
Text hint to explain how to fill in that field.
Placeholder to use inside the field.
Relative position for order of the fields.
You can hide fields from being displayed when they are not meant to be filled out by the payer. You can use this for fields that are required, but are pre-populated by you.
-
true - field is hidden
-
false - field is displayed
items array
An item is something that your payer can pay for (for example: tuition fees, housing, etc.). When you create a payment, you display the items to your payer and they can choose for which items they want to pay. How many items there are depends on the recipient's configuration.
The Flywire API expects every recipient to have at least one item. If no item(s) were specified when the recipient was set up, the Flywire API interprets that as one item which has the id "default".
Identifier of the item.
The Flywire API expects every recipient to have at least one item. If no item(s) were specified when the recipient was set up, the Flywire API interprets that as one item which has the id "default".
ISO 4217 of the currency associated with this item.
User friendly description of the item.
settingsobject
amount_limits object
Contains the payment amount limits.
The settings of a recipient define the minimum and maximum amount for a payment. These limits are defined when you set up the recipient with Flywire.
If you didn't customize the settings, the default limits are:
-
Minimum: 5000 = 50.00 USD
-
Maximum: 15000000 = 150000.00 USD
When you try to create a payment with an amount that is below or above the set limits, you will not be able to create the payment and an error response will be returned.
The minimum amount
The amount is specified in the smallest unit of the currency, called subunits. For example, in USD, the subunit is cents, and 100 cents equal 1 USD. So, an amount of 12025 (cents) is equivalent to 120.25 USD.
Note that the subunit-to-unit ratio varies by currency, it is not always 100. See Currencies for the subunits of each currency.
The maximum amount
The amount is specified in the smallest unit of the currency, called subunits. For example, in USD, the subunit is cents, and 100 cents equal 1 USD. So, an amount of 12025 (cents) is equivalent to 120.25 USD.
Note that the subunit-to-unit ratio varies by currency, it is not always 100. See Currencies for the subunits of each currency.
refund_bundle_cut_offobject
The scheduled interval for the cut-off time.
The possible interval values depend on your agreement with Flywire. For example, the value could be daily or weekly.
The cut-off time controls when Flywire starts to process pending refunds. Since Flywire processes refunds in bundles and not as single refunds, there is a time span where you can add more refunds to a bundle before it gets processed. For example, if the cut-off time is 1 day, you can add more refunds to the refund bundle for 1 day until Flywire starts processing it or - if your refund bundles need approval - until the bundle can be approved and then processed.
The cut-off time is set individually for each recipient. Please contact the Solutions team if you want to set or change the cut-off time for a recipient.
All refund bundles must be approved before processing, but there is a difference between how they get approved. It depends on the settings for the recipient of the original payment which type of approval is needed:
| Type of approval | approval_type (setting for the recipient) |
|---|---|
|
Manual approval Manual approvals create an extra step in processing refunds. Flywire waits for your approval before processing a refund bundle (see Approving a refund bundle). |
manual |
|
Automatic approval Flywire processes refund bundles automatically after the cut-off time. |
automatic |
To add or change the settings for refund approvals of a recipient please contact the Solutions team.
The date and time when the next cut-off will happen.
Timestamps use ISO 8601 format with UTC (YYYY-MM-DDTHH:MM:SSZ, e.g., 2025-03-31T13:21:27Z).
The last part of a timestamp indicates the time zone:
-
Z → Means UTC (Coordinated Universal Time).
Example: 2024-09-20T14:30:00Z = 2:30 PM in UTC.
-
+hh:mm or -hh:mm → Offset from UTC.
Example: 2024-09-20T14:30:00+02:00 = 2:30 PM in a time zone 2 hours ahead of UTC (e.g., Central European Summer Time).
{
  "id": "TQQ",
  "external_code": "",
  "name": "TechDoc University",
  "email": "",
  "website": "",
  "logo_url": "https://cloud.TechDoc_University_Logo1695717629",
  "address": "London Street",
  "address2": "",
  "city": "London",
  "state": "London",
  "zip": "",
  "country": "GB",
  "currency": "GBP",
  "fields": [
    {
      "id": "services_used",
      "type": "array",
      "format": "",
      "required": false,
      "pattern": null,
      "pattern_message": null,
      "value": [
        {
          "label": "Housing",
          "value": "housing"
        },
        {
          "label": "Tuition & Fees (including room & meal plan)",
          "value": "tuition"
        },
        {
          "label": "Orientation",
          "value": "orientation"
        }
      ],
      "view_options": {
        "section_identifier": "student_information",
        "section_name": "Student Information",
        "section_description": "Please provide us the following details",
        "label": "Services Used",
        "help": null,
        "hint": null,
        "placeholder": null,
        "position": 2,
        "hidden": false
      }
    }
  ],
  "items": [
    {
      "id": "default",
      "currency": "GBP",
      "label": "Amount"
    }
  ],
  "settings": {
    "amount_limits": {
      "minimum_amount": 3668,
      "maximum_amount": 11004758
    }
  },
"refund_bundle_cut_off": {
    "periodicity": "weekly",
    "approval_type": "manual",
    "next_cutoff_time": "2023-12-22T09:47:06.090Z"
	}
}
You can find all details about this step here: Recipients - Getting Details about a Recipient.
3. Choose the payment method (offer) for this payment.
Usually, the payer can decide which payment method they want to use. For 529 Payments, you are choosing the payment method for them. This will be a special payment method that Flywire created for you.
Get the list of offers to find your payment method. In this example, you want to get offers for Flywire University (FWU), paying from the US a total amount of 12,000 USD. These settings are added as query parameters, which makes the request look like this:
GET /offers?amount=1200000&country=US&recipient=FWU
When you're getting a list of offers with, Flywire will return all the offers available for the combination of recipient, amount to pay, and country of the payer.
Do not re-use offer IDs for different payments.
You need to get an offer each time you want to create a payment. The offer ID depends on the provided amount, country and currency, so different IDs will be generated for the same payment method.
Parameters for the Request Body
No request body needed.
Required Query Parameters
The amount to pay. It must be greater than 0.
You need to provide the amount in your billing currency.
The billing currency is the currency in which the recipient of the payment is billing their payer. The billing currency depends on the
The amount is specified in the smallest unit of the currency, called subunits. For example, in USD, the subunit is cents, and 100 cents equal 1 USD. So, an amount of 12025 (cents) is equivalent to 120.25 USD.
Note that the subunit-to-unit ratio varies by currency, it is not always 100. See Currencies for the subunits of each currency.
The country code of the payer's country (meaning the country the money will be sent from).
Format:
Two-letter format (ISO 3166-1 alpha-2), for example US for USA or GB for the United Kingdom.
The recipient ID (also called portal code).
The recipient ID identifies the recipient (also called portal). The recipient ID has been assigned by Flywire when the recipient has been set up.
Format:
Either: 3 letters (ABC)
Or: 5 alphanumeric characters, always starting with a letter (ABC1D)
You can use this request to get a list of all recipients that are available to you as a client and what their recipient ID is:
For details see Getting a List of all available Recipients.
Optional Query Parameters for Pagination
This endpoint supports pagination. If you are not providing any pagination parameters, the response is returned with default pagination settings.
Pagination parameters are added as query parameters with the request in the format {endpoint_path}?page=2&per_page=10
The default setting is:
page=1 (start on page 1)
per_page=10 (display 10 entries per page)
Enables you to access a specific page of the results.
Possible values: Any positive number except zero.
Enables you to define how many results will be included per page.
Possible values: min 1, max 100
curl https://base-url-placeholder/offers?amount=12000&country=US&recipient=FWU&page=1&per_page=10
  -X GET
  -H "Content-Type: application/json"
  -H "X-Authentication-Key: {api_key}"
Each payment method in the returned list has different attributes to identify them (name, what kind of payment method it is, etc.). Each payment method also has a unique ID. You will need the ID of your chosen payment method for the order in the next step.
Can I just use the same offer ID for all my 529 Payments?
You need to get an offer each time you want to create a payment. The offer ID depends on the provided amount, country and currency, so different IDs will be generated for the same payment method.
Pagination Parameters
The total number of items in the full result list, not just of the current page.
The total number of pages available.
The current page of the results.
The maximum number of results to return at one time (on one page).
offers object
The offer ID.
The offer ID is a string of characters that uniquely identifies a specific offer.
Example format: MTAxMSEgcHXfY8Fua499cmFuc2Zlcl9l7XigRWM
payment_method object
Contains information about the payment method of this offer.
Identifier of the payment method associated with this offer.
The name of the payment method associated with this offer.
The payment method type.
Possible values:
| bank_transfer |
Payment is done via bank transfer. |
| online |
Payment is done via an alternative payment method (APM), through a third-party provider. |
| card |
Payment is done via credit or debit card.
|
|
direct_debit |
Payment is done via direct debit. |
| 529_payments |
Payment is done via a 529 provider. |
Description of the payment method of this offer.
Only returned in specific cases.
Extra terms configured for this payment method in that specific country.
price object
Contains the amount of money the payer has to send if this offer is selected.
The amount to pay (price) in offers can change due to FX rates. The final amount is only "locked in" when you create a payment from the order.
If a payment is done in two different currencies, the amount your payer pays depends on the current FX rate. Since FX rates frequently change, the amount to pay can change too.
The amount to pay for an offer (given in the price parameter) is the amount at the time you requested the offer. It can change at any moment, even if the offer is used for an order.
The amount in the payer currency.
The amount to pay (price) in offers can change due to FX rates. The final amount is only "locked in" when you create a payment from the order.
If a payment is done in two different currencies, the amount your payer pays depends on the current FX rate. Since FX rates frequently change, the amount to pay can change too.
The amount to pay for an offer (given in the price parameter) is the amount at the time you requested the offer. It can change at any moment, even if the offer is used for an order.
The amount is specified in the smallest unit of the currency, called subunits. For example, in USD, the subunit is cents, and 100 cents equal 1 USD. So, an amount of 12025 (cents) is equivalent to 120.25 USD.
Note that the subunit-to-unit ratio varies by currency, it is not always 100. See Currencies for the subunits of each currency.
The payer currency.
Format:
Three-letter ISO 4217 currency code, for example EUR.
Amount of Flywire fees that are being applied to this offer.
Flywire exchange rate of the offer used to calculate the price if conversion needed.
fields array
Some countries' regulations require extra fields in order to process a payment depending on the selected offer. If an offer contains any extra fields, they are required fields.
-
Paying in China with certain methods requires the payer to provide their Chinese identification number and exact name that appears on the ID.
-
Paying in India with certain methods requires the payer to provide their PAN number and source of funds.
-
Paying in Brazil with certain methods requires the payer to provide their CPF number (Cadastro de Pessoas Físicas or Natural Persons Register).
Identifier of the field.
The value for this field.
{
  "total_entries": 1,
  "total_pages": 1,
  "page": 1,
  "per_page": 10,
  "offers": [
    {
	"id": "MXZwMDAyHHUSE9PVF9POlIgS33j",
	"payment_method": {
		"id": "529_provider",
		"name": "Domestic USD 529 payment",
		"kind": "529_payment"
		},
	"description": "529 payment with specific provider",
	"extra_terms": null,
	"price": {
		"value": 1200000,
		"currency": "USD"
		},
	"fees": 0,
	"exchange_rate": 1,
	"fields":[]
    }
  ]
}
You can find all details about this step here: Offers - Getting a List of Offers.
4. Create an order.
You can think of an order as like a "shopping cart" for your payment. It contains all the information needed to create a payment in Flywire, but you can go back and edit it before actually creating a payment with it.
An order contains:
-
the payer information
Who is the payer?
A payer is the person who is sending you funds.
Depending on
For example, if -
the recipient information
Who is the recipient?
A recipient - also called a portal - contains the information that is needed for receiving funds, like the receiving bank account, the currency in which Flywire takes payments from your payers, or specific fields your system requires to process a payment. Flywire assigns each recipient a unique identifier, called recipient ID or portal code.
You as a client can have multiple recipients, for example for different bank accounts or currencies.
-
the offer chosen for this payment
What is an offer?
An offer is the price for an available payment method (credit card, bank transfer, etc.) for a payment.
Example: The payer needs to pay 5,000 USD for tuition, one of the offers is "Pay 4,300 CNY via Bank Transfer". The offer tells the payer what they have to pay, including FX rates and fees if those apply.
The amount to pay (price) in offers can change due to FX rates. The final amount is only "locked in" when you create a payment from the order.
More info
If a payment is done in two different currencies, the amount your payer pays depends on the current FX rate. Since FX rates frequently change, the amount to pay can change too.
The amount to pay for an offer (given in the price parameter) is the amount at the time you requested the offer. It can change at any moment, even if the offer is used for an order.
The offers that are available for a payment depends on a combination of the following factors:
-
The chosen recipient.
-
The country or countries involved in the payment (for example, paying from China to the US).
-
The amount of money being paid.
An offer can also contain additional information needed from the payer to process the payment.
-
-
optional: A notifications URL
What is a notifications URL?
The notifications URL enables you to receive callbacks about the payment status (see Payment Status Notifications).
The notifications URL is the dynamic URL for receiving callbacks.
Dynamic vs. static URL
There are two different URLs for receiving callbacks:
Static URL
For API integrations:
When you set up your application that accesses the Flywire API, you had the option to define a notifications URL. This is the static notifications URL. Callbacks will be sent to this URL for all payments you created via the Flywire API.
The recipient of a payment may also have a static notifications URL defined which might be different from your static notifications URL as a client. In that case, callbacks will also be sent to the recipient's notifications URL.For other integrations:
When you set up your portal together with Flywire, you had the option to define a callback URL for that portal. Callbacks will be sent to this URL for all payments for this portal.
If you don't use a static callback URL yet and want to start using it, please contact the Solutions team.
Dynamic URL
The URL you can set in a parameter when you are creating a payment is the dynamic notifications URL. Since this URL can be different for every payment you create, it is called dynamic.
How defining static and dynamic URLs affect callbacks
 = not set
 = set
= setStatic
URLDynamic
URLResult
You won't receive notifications.
You'll receive notifications to your static URL.
For API integrations:
The dynamic URL will override the static URL and you'll receive notifications only to the dynamic URL.
For other integrations:
You'll receive callbacks to both URLs. This is called "dual callback URL".
A dual callback URL means you defined a static URL in your portal and you are sending callbacks to a different callback URL via the parameter for the payment. In this case, callbacks will be sent to both URLs. This approach can be useful if you want to update two separate systems.
You'll receive notifications to your dynamic URL Even though it is not mandatory, you should provide a notifications URL in order to receive status changes of a payment. When the status of a payment changes, you will receive a notification from Flywire via the provided URL. See Payment Status Notifications for more information.
In this example, the order is for Flywire University (FWU). You need the mandatory fields, the items, and the offer ID from the steps before the create the order.
This endpoint creates an order.
Creating an order does not create a payment. To create a payment, you have to charge the order you created.
Parameters for the Request Body
payer object
The payer's first name.
If the payer is a company or organization, use the organization name as the first name.
The payer's middle name.
The last name (family name) of the payer.
If the payer is a company or organization, use the organization name as the last name.
The first line of the payer's address.
The residential address is required for legal reasons, which is why PO boxes are not permitted.
The second line of the payer's address.
The payer's city.
The payer's zip code.
The country of the payer.
Format:
Two-letter format (ISO 3166-1 alpha-2), for example US for USA or GB for the United Kingdom.
The state where the payer resides in.
Format:
Only the second part of the ISO 3166-2 code, for example for US-NY the value is NY.
The phone number of the payer (including the country code).
Use 00 in front of the country code, for example, "0044123456" for country code 44.
The payer's email address.
recipient object
The recipient ID (also called portal code).
The recipient ID identifies the recipient (also called portal). The recipient ID has been assigned by Flywire when the recipient has been set up.
Format:
Either: 3 letters (ABC)
Or: 5 alphanumeric characters, always starting with a letter (ABC1D)
fields array
It depends on the recipient which fields are optional or required. If a field is required, you must provide it here. Optional fields can be left out.
You have two options:
Checking via the API
You can check which fields are required for a recipient (portal) with this request (replace {recipientId} with the recipient ID):
Required fields have the required parameter set to true. For more info see Getting Details about a Recipient.
Checking online
You can check which fields are required by checking your portal configuration.
Identifier of the field.
The value for this field.
items array
An item is something that your payer can pay for (for example: tuition fees, housing, etc.). When you create a payment, you display the items to your payer and they can choose for which items they want to pay. How many items there are depends on the recipient's configuration.
You can check which items are required for a recipient with this request (replace {recipientId} with the recipient ID):
The items array lists which items are defined for the recipient.
For more information, refer to Getting Details about a Recipient.
The Flywire API expects every recipient to have at least one item. If no item(s) were specified when the recipient was set up, the Flywire API interprets that as one item which has the id "default".
Identifier of the item.
You can check which items are required for a recipient with this request (replace {recipientId} with the recipient ID):
The items array lists which items are defined for the recipient.
For more information, refer to Getting Details about a Recipient.
The Flywire API expects every recipient to have at least one item. If no item(s) were specified when the recipient was set up, the Flywire API interprets that as one item which has the id "default".
The amount for this item in the billing currency,
The billing currency is the currency in which the recipient of the payment is billing their payer. The billing currency depends on the
The amount is specified in the smallest unit of the currency, called subunits. For example, in USD, the subunit is cents, and 100 cents equal 1 USD. So, an amount of 12025 (cents) is equivalent to 120.25 USD.
Note that the subunit-to-unit ratio varies by currency, it is not always 100. See Currencies for the subunits of each currency.
offer object
An offer is the price for an available payment method (credit card, bank transfer, etc.) for a payment.
Example: The payer needs to pay 5,000 USD for tuition, one of the offers is "Pay 4,300 CNY via Bank Transfer". The offer tells the payer what they have to pay, including FX rates and fees if those apply.
The amount to pay (price) in offers can change due to FX rates. The final amount is only "locked in" when you create a payment from the order.
If a payment is done in two different currencies, the amount your payer pays depends on the current FX rate. Since FX rates frequently change, the amount to pay can change too.
The amount to pay for an offer (given in the price parameter) is the amount at the time you requested the offer. It can change at any moment, even if the offer is used for an order.
The offers that are available for a payment depends on a combination of the following factors:
-
The chosen recipient.
-
The country or countries involved in the payment (for example, paying from China to the US).
-
The amount of money being paid.
An offer can also contain additional information needed from the payer to process the payment.
See Offers for details about the offer object.
ID of the offer that you want to use for this order.
You can find the offer ID in the response after getting the list of offers.
The offer ID is a string of characters that uniquely identifies a specific offer.
Example format: MTAxMSEgcHXfY8Fua499cmFuc2Zlcl9l7XigRWM
fields array
Some countries' regulations require extra fields in order to process a payment depending on the selected offer. If an offer contains any extra fields, they are required fields.
-
Paying in China with certain methods requires the payer to provide their Chinese identification number and exact name that appears on the ID.
-
Paying in India with certain methods requires the payer to provide their PAN number and source of funds.
-
Paying in Brazil with certain methods requires the payer to provide their CPF number (Cadastro de Pessoas Físicas or Natural Persons Register).
Identifier of the field.
The value for this field.
The notifications URL enables you to receive callbacks about the payment status (see Payment Status Notifications).
The notifications URL is the dynamic URL for receiving callbacks.
There are two different URLs for receiving callbacks:
Static URL
For API integrations:
When you set up your application that accesses the Flywire API, you had the option to define a notifications URL. This is the static notifications URL. Callbacks will be sent to this URL for all payments you created via the Flywire API.
The recipient of a payment may also have a static notifications URL defined which might be different from your static notifications URL as a client. In that case, callbacks will also be sent to the recipient's notifications URL.For other integrations:
When you set up your portal together with Flywire, you had the option to define a callback URL for that portal. Callbacks will be sent to this URL for all payments for this portal.
If you don't use a static callback URL yet and want to start using it, please contact the Solutions team.
Dynamic URL
The URL you can set in a parameter when you are creating a payment is the dynamic notifications URL. Since this URL can be different for every payment you create, it is called dynamic.
How defining static and dynamic URLs affect callbacks
|
= not set |
= set |
| Static URL |
Dynamic URL |
Result |
|
|
|
You won't receive notifications. |
|
|
|
You'll receive notifications to your static URL. |
|
|
|
For API integrations: The dynamic URL will override the static URL and you'll receive notifications only to the dynamic URL. For other integrations: You'll receive callbacks to both URLs. This is called "dual callback URL". A dual callback URL means you defined a static URL in your portal and you are sending callbacks to a different callback URL via the parameter for the payment. In this case, callbacks will be sent to both URLs. This
approach can be useful if you want to update two separate systems.
|
|
|
|
You'll receive notifications to your dynamic URL |
The external reference.
The external reference helps you to identify a payment, since the Flywire-generated payment reference might not be the way you typically identify payments. With the external reference, you can enter your own identifier, such as an ID or invoice number.
The external reference is included in all status notifications to help you map a payment to a callback notification. (see Payment Status Notifications)
metadata object
You can specify up to 20 metadata pairs.
Maximum length for keys: 40 characters
Maximum length for values: 500 characters
Custom metadata is additional data entered by you when you create the payment, for example data you need to identify the payment in your system. Metadata can be useful when you want to add data that is not already covered by recipient fields, for example if you are not the one who set up the recipient and have no influence on the fields.
Metadata consist of pairs of keys and values, for example key Payer_ID_From_My_System and value ID12345.
curl https://base-url-placeholder/orders
  -X POST
  -H "Content-Type: application/json"
  -H "X-Authentication-Key: {api_key}"
  -d '{
 	"payer": {
		"first_name": "Peter",
		"last_name": "Payer",
		"middle_name": null,
		"address1": "789 Calle Mayor",
		"address2": null,
		"city": "Madrid",
		"country": "ES",
		"state": null,
		"zip": "28013",
		"phone": "0034912345678",
		"email": "[email protected]"
    },
	"recipient": {
		"id": "FWU",
   		"fields": [
            {
                "id": "custom_field_1",
                "value": "ID12345"
            },
			{
				"id": "custom_field_2",
				"value": "2020"
			}
        ]
	},
	"items": [
		{
			"amount": 80000,
			"id": "tuition"
		},
		{
			"amount": 40000,
			"id": "housing"
		}
	],
	"offer": {
		"id": "MTAwMDAgcHRfYmFua190cmFuc2Zlcl9jYWQgRVM=",
		"fields": [
			{
				"id": "pan_number",
				"value": "12345678"
			}
		]
	},
	"notifications_url": "http://consumer-url.com/notifications",
	"external_reference": "xyz123456",
	"metadata": {
		"external_payment_id": "PAYd910447bbf9fed52e3131e"
		}
}'
You'll get an ID back. In this example, the order ID is 52c6a5df-b6c6-40bc-a71a-fefb82ad96b3: This is the order ID you need to confirm the order.
The order ID.
The order ID is a string of characters that uniquely identifies a specific order. The order ID gets automatically assigned to an order when a new order is created. Example order ID: 52c6a5df-b6c6-40bc-a71a-fefb82ad96b3
The time and date the order was created.
Timestamps use ISO 8601 format with UTC (YYYY-MM-DDTHH:MM:SSZ, e.g., 2025-03-31T13:21:27Z).
The last part of a timestamp indicates the time zone:
-
Z → Means UTC (Coordinated Universal Time).
Example: 2024-09-20T14:30:00Z = 2:30 PM in UTC.
-
+hh:mm or -hh:mm → Offset from UTC.
Example: 2024-09-20T14:30:00+02:00 = 2:30 PM in a time zone 2 hours ahead of UTC (e.g., Central European Summer Time).
payer object
The payer information is not automatically included. Returning payer information is disabled by default and needs to be enabled by Flywire.
Please contact the Solutions team if you require payer information to be returned.
The payer's first name.
The payer's last name.
The payer's middle name.
The payer's first line of address.
The payer's second line of address.
The payer's city.
The payer's zip code.
The ISO2 code of the payer country (the country the money was sent from).
The payer's state.
The payer's phone number.
The payer's email address.
recipient object
The recipient ID (also called portal code).
The recipient ID identifies the recipient (also called portal). The recipient ID has been assigned by Flywire when the recipient has been set up.
Format:
Either: 3 letters (ABC)
Or: 5 alphanumeric characters, always starting with a letter (ABC1D)
fields array
Fields of a recipient (also called a portal) are fields that are specific to that recipient. Depending on how you use Flywire, you might know them under the names dynamic fields, custom fields, or student fields.
These fields are defined when the recipient (portal) is set up by Flywire.
Identifier of the field.
The value for this field.
items array
An item is something that your payer can pay for (for example: tuition fees, housing, etc.). When you create a payment, you display the items to your payer and they can choose for which items they want to pay. How many items there are depends on the recipient's configuration.
Identifier of the item.
The amount for this item in the billing currency,
The billing currency is the currency in which the recipient of the payment is billing their payer. The billing currency depends on the
The amount is specified in the smallest unit of the currency, called subunits. For example, in USD, the subunit is cents, and 100 cents equal 1 USD. So, an amount of 12025 (cents) is equivalent to 120.25 USD.
Note that the subunit-to-unit ratio varies by currency, it is not always 100. See Currencies for the subunits of each currency.
offer object
An offer is the price for an available payment method (credit card, bank transfer, etc.) for a payment.
Example: The payer needs to pay 5,000 USD for tuition, one of the offers is "Pay 4,300 CNY via Bank Transfer". The offer tells the payer what they have to pay, including FX rates and fees if those apply.
The amount to pay (price) in offers can change due to FX rates. The final amount is only "locked in" when you create a payment from the order.
If a payment is done in two different currencies, the amount your payer pays depends on the current FX rate. Since FX rates frequently change, the amount to pay can change too.
The amount to pay for an offer (given in the price parameter) is the amount at the time you requested the offer. It can change at any moment, even if the offer is used for an order.
The offers that are available for a payment depends on a combination of the following factors:
-
The chosen recipient.
-
The country or countries involved in the payment (for example, paying from China to the US).
-
The amount of money being paid.
An offer can also contain additional information needed from the payer to process the payment.
See Offers for details about the offer object.
ID of the offer that is used for this order.
The offer ID is a string of characters that uniquely identifies a specific offer.
Example format: MTAxMSEgcHXfY8Fua499cmFuc2Zlcl9l7XigRWM
fields array
Some countries' regulations require extra fields in order to process a payment depending on the selected offer. If an offer contains any extra fields, they are required fields.
-
Paying in China with certain methods requires the payer to provide their Chinese identification number and exact name that appears on the ID.
-
Paying in India with certain methods requires the payer to provide their PAN number and source of funds.
-
Paying in Brazil with certain methods requires the payer to provide their CPF number (Cadastro de Pessoas Físicas or Natural Persons Register).
Identifier of the field.
The value for this field.
The notifications URL enables you to receive callbacks about the payment status (see Payment Status Notifications).
The notifications URL is the dynamic URL for receiving callbacks.
There are two different URLs for receiving callbacks:
Static URL
For API integrations:
When you set up your application that accesses the Flywire API, you had the option to define a notifications URL. This is the static notifications URL. Callbacks will be sent to this URL for all payments you created via the Flywire API.
The recipient of a payment may also have a static notifications URL defined which might be different from your static notifications URL as a client. In that case, callbacks will also be sent to the recipient's notifications URL.For other integrations:
When you set up your portal together with Flywire, you had the option to define a callback URL for that portal. Callbacks will be sent to this URL for all payments for this portal.
If you don't use a static callback URL yet and want to start using it, please contact the Solutions team.
Dynamic URL
The URL you can set in a parameter when you are creating a payment is the dynamic notifications URL. Since this URL can be different for every payment you create, it is called dynamic.
How defining static and dynamic URLs affect callbacks
|
= not set |
= set |
| Static URL |
Dynamic URL |
Result |
|
|
|
You won't receive notifications. |
|
|
|
You'll receive notifications to your static URL. |
|
|
|
For API integrations: The dynamic URL will override the static URL and you'll receive notifications only to the dynamic URL. For other integrations: You'll receive callbacks to both URLs. This is called "dual callback URL". A dual callback URL means you defined a static URL in your portal and you are sending callbacks to a different callback URL via the parameter for the payment. In this case, callbacks will be sent to both URLs. This
approach can be useful if you want to update two separate systems.
|
|
|
|
You'll receive notifications to your dynamic URL |
The unique identifier you provided for the payment to help you match the callback to the payment.
For API integrations:
You provided this identifier via the external_reference parameter.
For all other integrations:
You provided this identifier via the callback_id parameter.
metadata object
There are different kinds of metadata for a payment:
Metadata added by Flywire
The payer ID (payor_id) uniquely identifies a payer.
You provided the payer ID when your created the payment. Usually, you use an ID from another system, like your ERP.
The tracking URL is only returned for bank transfer payments created via the ![]() Checkout integration.
Checkout integration.
The tracking URL leads your payer to the Flywire Payment Experience where they can track their payment. As long as the payment is in progress, the payer can download the instructions for bank transfer payments there, including an authorization letter in case they need it.
To be able to make a bank transfer payment, it is crucial that the payer has access to the bank transfer instructions. There are multiple options for the payer to access the information:
-
The instructions are displayed to the payer after they entered their details in the Checkout Experience.
-
The payer also has the option to download the instructions from the Checkout Experience, including an authorization letter if one is needed.
-
You should also send the link to the instructions to the payer via email. This can either happen automatically or you can do it manually, see One Off Payments: Emails to Your Payer.
|
|
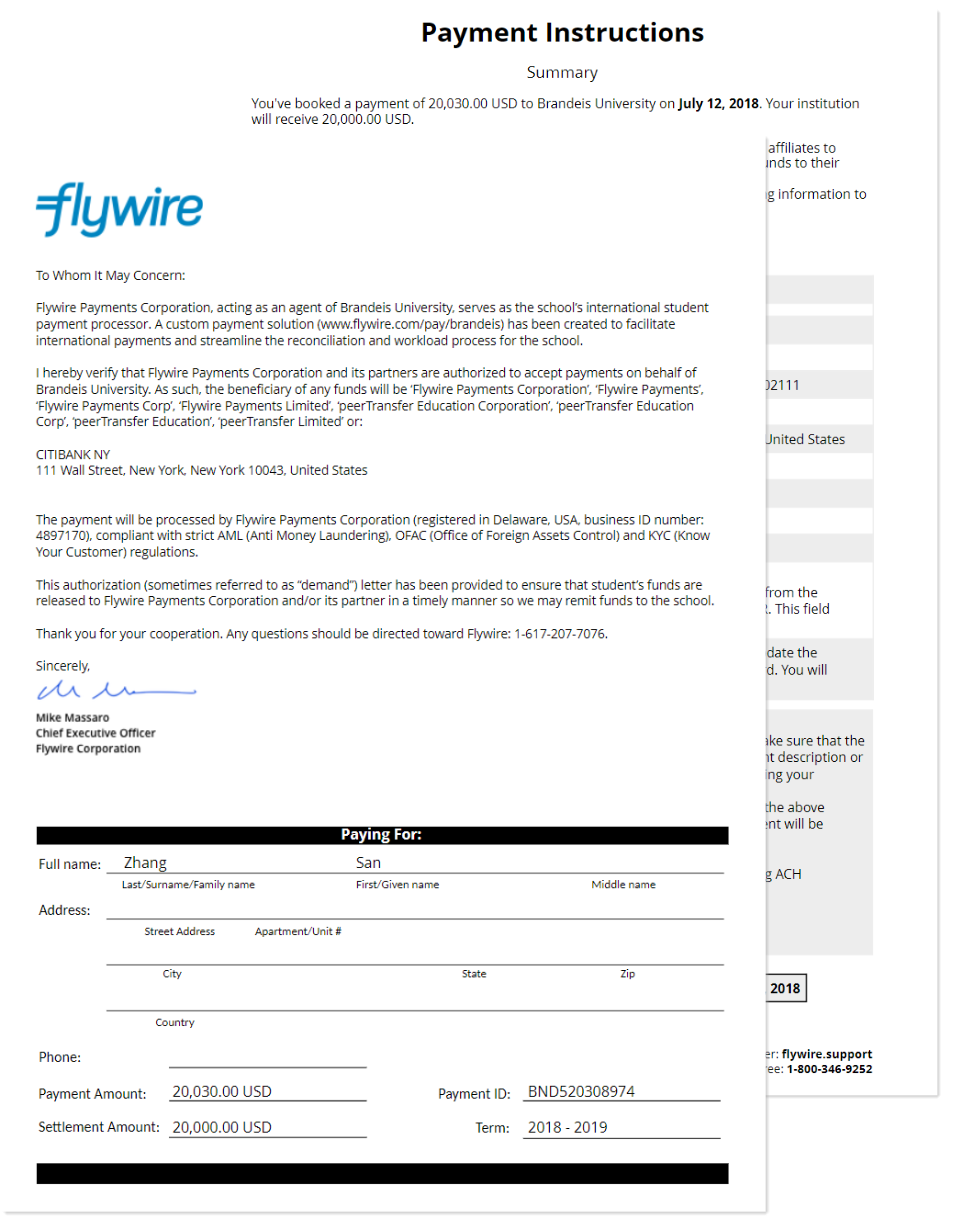
Some international payments require an Authorization letter. It explains the partnership between you and Flywire, and contractually authorizes Flywire to collect payments on your behalf. The authorization letter always comes together with the payment instructions for the bank transfer. |
Metadata added by you
Only for 529 Payments and self-managed recurring payments. Not present for One Off Payments and Flywire-hosted recurring payments.
Custom metadata is additional data entered by you when you create the payment, for example data you need to identify the payment in your system. Metadata can be useful when you want to add data that is not already covered by recipient fields, for example if you are not the one who set up the recipient and have no influence on the fields.
Metadata consist of pairs of keys and values, for example key Payer_ID_From_My_System and value ID12345.
{
	"id": "52c6a5df-b6c6-40bc-a71a-fefb82ad96b3",
	"created_at": "2020-10-20 17:41:27 UTC",
	"payer": {
		"first_name": "Peter",
		"last_name": "Payer",
		"middle_name": null,
		"address1": "789 Calle Mayor",
		"address2": null,
		"city": "Madrid",
		"country": "ES",
		"state": null,
		"zip": "28013",
		"phone": "0034912345678",
		"email": "[email protected]"
    },
	"recipient": {
		"id": "FWU",
   		"fields": [
            {
                "id": "custom_field_1",
                "value": "ID12345"
            },
			{
				"id": "custom_field_2",
				"value": "2020"
			}
        ]
	},
	"items": [
		{
			"amount": 80000,
			"id": "tuition"
		},
		{
			"amount": 40000,
			"id": "housing"
		}
	],
	"offer": {
		"id": "MTAwMDAgcHRfYmFua190cmFuc2Zlcl9jYWQgRVM=",
		"fields": [
			{
				"id": "pan_number",
				"value": "12345678"
			}
		]
	},
	"notifications_url": "http://consumer-url.com/notifications",
	"external_reference": "xyz123456",
	"metadata": {
		"external_payment_id": "PAYd910447bbf9fed52e3131e"
		}
}
You can find all details about this step here: Orders - Creating an Order.
5. Confirm the order to create the payment.
As soon as you confirm an order, it gets a payment reference and turns into a payment.
In everyday usage, a "payment" usually refers to the entire process of making a payment through Flywire. But the term "payment" has a specific meaning in Flywire:
-
A payment is considered created when a payment reference is assigned to it, not any earlier stage in the process.
What is the payment reference?
The payment reference is an ID generated by Flywire to identify a payment.
Format:
Either: ABC123456789
3-letter portal/recipient ID 9 numbers
Or: 1AB12CD452ABC1D
number 8 alphanums number 5-alphanum portal/recipient ID
With the payment reference, the payment can be tracked through the different stages of the payment process.
The payment reference is also important in other situations, for example:
-
When a payer is using bank transfer as payment method, they usually must provide the payment reference when sending the funds.
-
The payment reference helps Flywire to identify the payment if you or your payer needs support.
-
-
When the payment reference is assigned, two things happen:
-
The FX rate is locked in for FX payments (FX = "foreign exchange", a payment where one currency has to be converted to a different currency).
-
The payment starts its journey in status initiated, and its progress traceable via the payment reference. If you are using Flywire Dashboard, you can view the payment on your dashboard.
-
In this example, the order you created in the step before returned the order ID 52c6a5df-b6c6-40bc-a71a-fefb82ad96b3. This means your endpoint is:
POST /orders/52c6a5df-b6c6-40bc-a71a-fefb82ad96b3/charge
When you confirm ("charge") an order, it creates a payment in Flywire.
The payment reference is an ID generated by Flywire to identify a payment.
Format:
Either: ABC123456789
3-letter portal/recipient ID 9 numbers
Or: 1AB12CD452ABC1D
number 8 alphanums number 5-alphanum portal/recipient ID
With the payment reference, the payment can be tracked through the different stages of the payment process.
The payment reference is also important in other situations, for example:
-
When a payer is using bank transfer as payment method, they usually must provide the payment reference when sending the funds.
-
The payment reference helps Flywire to identify the payment if you or your payer needs support.
Parameters for the Request Body
No request body needed.
How to Resolve the Path Placeholders of the Endpoint
Exchange {orderId} in the endpoint with the order ID.
The order ID is a string of characters that uniquely identifies a specific order. The order ID gets automatically assigned to an order when a new order is created. Example order ID: 52c6a5df-b6c6-40bc-a71a-fefb82ad96b3
You get the order ID in the response after you created an order.
curl https://base-url-placeholder/orders/52c6a5df-b6c6-40bc-a71a-fefb82ad96b3/charge
  -X POST
  -H "Content-Type: application/json"
  -H "X-Authentication-Key: {api_key}"
You'll get the payment reference for this payment back, along with some more information about the payment.
The payment reference is an ID generated by Flywire to identify a payment.
Format:
Either: ABC123456789
3-letter portal/recipient ID 9 numbers
Or: 1AB12CD452ABC1D
number 8 alphanums number 5-alphanum portal/recipient ID
With the payment reference, the payment can be tracked through the different stages of the payment process.
The payment reference is also important in other situations, for example:
-
When a payer is using bank transfer as payment method, they usually must provide the payment reference when sending the funds.
-
The payment reference helps Flywire to identify the payment if you or your payer needs support.
The payment reference.
The payment reference is an ID generated by Flywire to identify a payment.
Format:
Either: ABC123456789
3-letter portal/recipient ID 9 numbers
Or: 1AB12CD452ABC1D
number 8 alphanums number 5-alphanum portal/recipient ID
With the payment reference, the payment can be tracked through the different stages of the payment process.
The payment reference is also important in other situations, for example:
-
When a payer is using bank transfer as payment method, they usually must provide the payment reference when sending the funds.
-
The payment reference helps Flywire to identify the payment if you or your payer needs support.
The payment amount in the payer currency.
The amount is specified in the smallest unit of the currency, called subunits. For example, in USD, the subunit is cents, and 100 cents equal 1 USD. So, an amount of 12025 (cents) is equivalent to 120.25 USD.
Note that the subunit-to-unit ratio varies by currency, it is not always 100. See Currencies for the subunits of each currency.
The payer currency.
Format:
Three-letter ISO 4217 currency code, for example EUR.
The payment amount in the billing currency.
The billing currency is the currency in which the recipient of the payment is billing their payer. The billing currency depends on the
The amount is specified in the smallest unit of the currency, called subunits. For example, in USD, the subunit is cents, and 100 cents equal 1 USD. So, an amount of 12025 (cents) is equivalent to 120.25 USD.
Note that the subunit-to-unit ratio varies by currency, it is not always 100. See Currencies for the subunits of each currency.
The billing currency.
Format:
Three-letter ISO 4217 currency code, for example EUR.
The billing currency is the currency in which the recipient of the payment is billing their payer. The billing currency depends on the
{
	"payment_reference": "FWU425810948",
    "amount_from": 30400,
    "currency_from": "EUR",
    "amount_to": 30200,
    "currency_to": "USD"
}
You can find all details about this step here: Orders - Charging an Order (Creating a Payment).
Next steps
You can track the payment if you added a notifications URL to the order (see Payment Status Notifications).
