 Checkout for Pre-Authorization Payments
A Pre-Authorization Payment temporary reserves the payment amount on a debit or credit card. The purpose of a pre-authorization is to verify that the cardholder has sufficient credit available to cover a transaction and to temporarily set aside that amount until you capture the funds.
Pre-Authorization Payments are only available for same-currency payments, not for FX payments.
Example for a Pre-Authorization Payment:
A guest checks into a hotel for a three-night stay, and you place a pre-authorization on their credit card for the estimated cost of the stay.
Check-In: You pre-authorizes $600 on the guest's credit card ($150 per night plus $150 deposit). This reduces the guest's available credit by $600 but is not yet charged.
During the Stay: The guest orders room service for $50.
Check-Out: The final bill is $500 ($450 for room charges plus $50 for room service). You capture $500 from the pre-authorization. The remaining $100 from the original hold is returned to the guest's available credit.
A Pre-Authorization Payment is split into two distinct steps:
-
Pre-authorization of funds
This step reserves the funds on the card for a certain amount of time (the holding period). The funds are reserved but not withdrawn.
 How do I pre-authorize funds?
By creating a Pre-Authorization Payment:
-
For creating a single Pre-Authorization Payment see Creating a Checkout Session for Pre-Authorization Payments.
-
You can also start self-managed recurring payments with a Pre-Authorization Payment, see Checkout for Self-Managed Recurring Payments.
How long is the holding period?
How long funds can be reserved depends on the card issuer and other circumstances. At the moment, Flywire can reserve the funds for 7 days. If you are not capturing the funds within the holding period, blocked amount is released back to the cardholder's credit.
If you want to release the block on the funds before the holding period ends, you can cancel the Pre-Authorization Payment.
When you cancel a Pre-Authorization Payment the blocked amount immediately returns back to the cardholder's credit.
Can I change the amount that is being reserved?
Yes, there is an option to adjust the pre-authorization amount, see Adjusting the Amount for a Pre-Authorization Payment.
You can adjust the Pre-Authorization Payment amount during the holding period if you used the authorization type preauth when you created the payment. You can only change it to a higher amount, not to a lower amount.
-
-
Capturing the funds
When the funds are captured, the card is charged and funds are withdrawn. You can manually capture funds anytime during the holding period. If you decide not to capture the funds you can cancel a Pre-Authorization Payment anytime during the holding period.
Do I have to capture the exact pre-authorized amount?
You can capture the blocked amount or less, but not more.
If you capture less, the remaining balance is released back to the cardholder immediately and the payment will be updated to reflect the captured amount.
What happens if I don't capture the payment during the holding period?
How long funds can be reserved depends on the card issuer and other circumstances. At the moment, Flywire can reserve the funds for 7 days. If you are not capturing the funds within the holding period, blocked amount is released back to the cardholder's credit.
How do Checkout Sessions of this type work?
-
You create a Checkout Session to either generate a URL or a session ID, depending on your implementation.
-
Your payer accesses the UI form on your website where they fill it out and confirm it.
-
You get a postMessage via the event listener that contains a URL for confirming the Checkout Session.
-
You receive the payment reference in the response.
The payment will stay in initiated until you capture the funds, see Capturing the Funds for a Pre-Authorization Payment.
Creating a Checkout Session for Pre-Authorization Payments
Request
Parameters for the Request Body
The type of the Checkout Session. Must be tokenization_and_pay for Pre-Authorization Payments.
charge_intent object
Must be manual. This parameter ensures that you are able to manually capture the funds within the holding period.
The authorization type defines if the blocked amount can be changed during the holding phase.
Possible values:
-
preauth : The amount that has been authorized can be changed during the holding phase, see .
-
final: The amount that has been authorized is final and cannot be changed.
The mode of a payment depends on three factors:
-
Frequency: Are the intervals for the payment regular or irregular?
-
Purchase: Is it one single purchase or are new goods/services purchased?
-
Delivery: Are the goods/services delivered once or in multiple deliveries?
Available modes
| Mode | Frequency | Purchase | Delivery |
|---|---|---|---|
|
installment |
regular or irregular intervals |
Single purchase of goods or services |
Single delivery (can be in advance, at any time during the plan, or at the end) |
|
subscription |
Regular intervals |
Multiple purchases (for new or renewed goods or services) |
Multiple and regular deliveries |
|
unscheduled |
No pre-agreed intervals |
Multiple purchases (for new or renewed goods or services) |
Multiple deliveries at no pre-agreed intervals |
payor object
You have the option to pass payer information to pre-fill the fields of the UI form.
For a description of all fields and their valid values form see:
-
Payment Element if you are using Flywire Elements
-
Checkout Experience if you are using Checkout
Before pre-filling the payer fields, consider your use case and who the actual payer will be. The UI forms collect the card holder or bank account owner information. There can be cases when this person is different from the payer in your system.
For example, if you are a school and your system stores information about a student, you consider the student as the “payer”. But the person who actually pays could be the student’s parent. In this case, it would not make sense to pre-fill the fields with the student’s information, since the card holder is a different person. On the other hand, the payer can always edit the fields in the UI form, which means even if you are pre-filling the fields with the wrong details the payer can always correct them.
In order to create the best payment experience for your payers, consider which information you store in your system and how useful it is for them when fields are already filled out.
options object
Contains settings for the UI form.
form object
Controls the label for the action button of the UI form.
Possible values
-
save (default value)
-
next
-
pay
Note: The label will be translated according to the locale parameter.
The language you want to translate the form to. The localization affects the labels of the form fields and the action button.
The default is English (“en”).
| Language | Value for locale |
|---|---|
| English | en |
| Spanish | es-ES |
| Chinese | zh-CN |
| Korean | ko |
| Portuguese | pt-PT |
| Japanese | ja |
| French | fr-FR |
| Bahasa Indonesia | id |
| Arabic | ar |
| Vietnamese | vi |
| Italian | it-IT |
| German | de-DE |
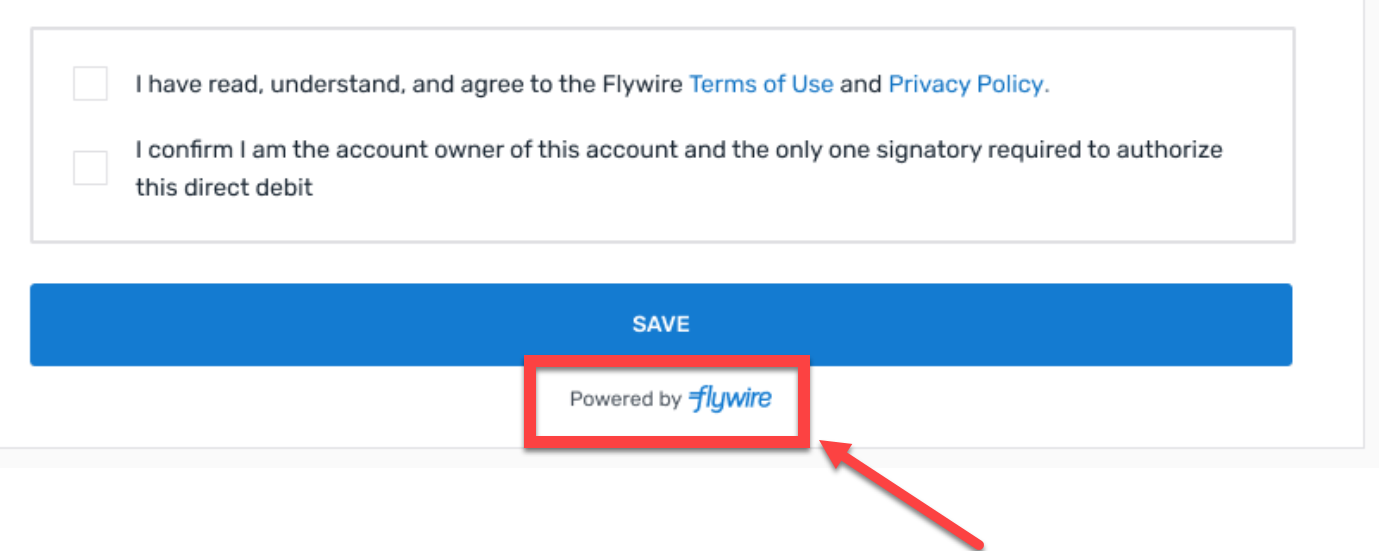
Controls if the "Powered by Flywire" logo is shown at the bottom of the form.
true displays the logo, false hides the logo.
The logo is shown below the action button of the UI form:
recipient object
Contains the fields of the recipient.
fields array
It depends on the recipient which fields are optional or required. If a field is required, you must provide it here. Optional fields can be left out.
You can check which fields are required for a recipient with this request (replace {recipientId} with the recipient ID):
Required fields have the required parameter set to true. For more info see Getting Details about a Recipient.
Identifier of the field.
The value for this field.
items array
An item is something that your payer can pay for (for example: tuition fees, housing, etc.). When you create a payment, you display the items to your payer and they can choose for which items they want to pay. How many items there are depends on the recipient's configuration.
You can only use one item in this request. The id of the item must be called default.
Identifier of the item.
You can only use one item in this request. The id of the item must be called default.
The amount for this item in the billing currency,
The billing currency is the currency in which the recipient of the payment is billing their payer. The billing currency depends on the
The amount is specified in the smallest unit of the currency, called subunits. For example, in USD, the subunit is cents, and 100 cents equal 1 USD. So, an amount of 12025 (cents) is equivalent to 120.25 USD.
Note that the subunit-to-unit ratio varies by currency, it is not always 100. See Currencies for the subunits of each currency.
The notifications URL enables you to receive callbacks about the payment status (see Payment Status Notifications).
The notifications URL is the dynamic URL for receiving callbacks.
There are two different URLs for receiving callbacks:
Static URL
For API integrations:
When you set up your application that accesses the Flywire API, you had the option to define a notifications URL. This is the static notifications URL. Callbacks will be sent to this URL for all payments you created via the Flywire API.
The recipient of a payment may also have a static notifications URL defined which might be different from your static notifications URL as a client. In that case, callbacks will also be sent to the recipient's notifications URL.For other integrations:
When you set up your portal together with Flywire, you had the option to define a callback URL for that portal. Callbacks will be sent to this URL for all payments for this portal.
If you don't use a static callback URL yet and want to start using it, please contact the Solutions team.
Dynamic URL
The URL you can set in a parameter when you are creating a payment is the dynamic notifications URL. Since this URL can be different for every payment you create, it is called dynamic.
How defining static and dynamic URLs affect callbacks
 = not set = not set |
 = set = set |
| Static URL |
Dynamic URL |
Result |
|
|
|
You won't receive notifications. |
|
|
|
You'll receive notifications to your static URL. |
|
|
|
For API integrations: The dynamic URL will override the static URL and you'll receive notifications only to the dynamic URL. For other integrations: You'll receive callbacks to both URLs. This is called "dual callback URL". A dual callback URL means you defined a static URL in your portal and you are sending callbacks to a different callback URL via the parameter for the payment. In this case, callbacks will be sent to both URLs. This
approach can be useful if you want to update two separate systems.
|
|
|
|
You'll receive notifications to your dynamic URL |
The external reference.
The external reference is used to match a notification to a particular payment. You can use any kind of identifier or reference from your own system you might need to identify the payment.
The recipient ID.
The recipient ID is the unique three-letter ID that identifies the recipient, for example FWU for Flywire University. The recipient ID has been assigned by Flywire when the recipient has been set up.
You can use this request to get a list of all recipients that are available to you as a client and what their recipient ID is:
For details see Getting a List of all available Recipients.
Must be cards for Pre-Authorization Payments since only card payments can be pre-authorized.
The payor_id depends on how you want to uniquely identify a payer. Usually, you use an ID from another system, for example your ERP. Spaces are not allowed.
curl https://base-url-placeholder/checkout/sessions
  -X POST
  -H "Content-Type: application/json"
  -H "X-Authentication-Key: {api_key}"
  -d '{
    "type": "tokenization_and_pay",
	"charge_intent": {
		"capture": "manual",
		"authorization": "preauth",
		"mode": "subscription"
	},
   "payor": {
		"first_name": "Peter",
		"last_name": "Payer",
		"address": "123 High Street",
		"city": "London",
		"country": "GB",
		"state": "",
		"phone": "0044123456789",
		"email": "[email protected]",
		"zip": "SW1A 1AA"
    },
    "options": {
        "form": {
            "action_button": "save",
            "locale": "en",
            "show_flywire_logo": true
        }
    },
	"recipient": {
   		"fields": [
            {
                "id": "custom_field_1",
                "value": "ID12345"
            },
			{
				"id": "custom_field_2",
				"value": "2020"
			}
        ]
	},
    "items": [
        {
            "id": "default",
            "amount": 33000,
        }
    ],
    "notifications_url": "https://webhook.site/9bf9cf8d-1d8c-46d1-b147-ca5841ff2ede",
    "external_reference": "Payment ID12456",
    "recipient_id": "FLW",
    "schema": "cards",
    "payor_id": "MyPayerID"
}
Response
- Response with no warnings
- Response with warnings
The Checkout Session ID.
This is the session ID you need if you are using Flywire Elements with Smart Rendering or Checkout as Javascript with API.
Smart Rendering means you render Flywire Elements on your website with the help of the Flywire SDK script.
Extensive customization
-
Select which payer fields to display.
-
Customize the appearance, such as fonts and colors.
-
Choose the language.
Responsive layout
Optimized responsive layout for desktop and mobile devices.
Easy event handling
Simply define what should happen in case of success or errors - no need to filter individual postMessages.
The time before the Checkout Session expires in seconds.
hosted_form object
Only relevant when you render the form via iframe. More info:
-
iframe rendering for Flywire Elements
-
iframe rendering for Checkout
The hosted-form-URL. This is the URL your iframe displays.
The method (GET).
warnings array
The field where the error occurred.
For a description of all fields and their valid values form see:
-
Payment Element if you are using Flywire Elements
-
Checkout Experience if you are using Checkout
errors array
You can decide which information from the response you want to filter out in your backend before passing the URL to your frontend.
The error text.
The error type.
{
"id": "494d2e9d-c0c9-407c-9094-5b3b2a02c00f",
"expires_in_seconds": 1800,
"hosted_form": {
	"url": "https://payment-checkout-dev-apache.flywire.cc/v1/form?session_id=494d2e9d-c0c9-407c-9094-5b3b2a02c00f",
	"method": "GET"
},
"warnings": []
}
When are warnings returned?
If the warning array contains warnings, it means that you tried to pre-fill the UI form with invalid values. You can use these warnings to check the data in your system for mistakes.
Are warnings an error?
No, warnings inform you of issues with field values, but you will still receive the URL and can display the form to your payer.
How do the warnings affect the form?
If a drop down field (like country) is affected by invalid values, the field will be empty, meaning no selection from the drop down is made yet. Your payer has to select the value from the drop down manually.
The Checkout Session ID.
This is the session ID you need if you are using Flywire Elements with Smart Rendering or Checkout as Javascript with API.
Smart Rendering means you render Flywire Elements on your website with the help of the Flywire SDK script.
Extensive customization
-
Select which payer fields to display.
-
Customize the appearance, such as fonts and colors.
-
Choose the language.
Responsive layout
Optimized responsive layout for desktop and mobile devices.
Easy event handling
Simply define what should happen in case of success or errors - no need to filter individual postMessages.
The time before the Checkout Session expires in seconds.
hosted_form object
Only relevant when you render the form via iframe. More info:
-
iframe rendering for Flywire Elements
-
iframe rendering for Checkout
The hosted-form-URL. This is the URL your iframe displays.
The method (GET).
warnings array
The field where the error occurred.
For a description of all fields and their valid values form see:
-
Payment Element if you are using Flywire Elements
-
Checkout Experience if you are using Checkout
errors array
You can decide which information from the response you want to filter out in your backend before passing the URL to your frontend.
The error text.
The error type.
{
"id": "e6bf6f63-46e0-4bd7-9bce-8106c02d0b3f",
"expires_in_seconds": 1800,
"hosted_form": {
	"url": "https://payment-checkout-dev-apache.flywire.cc/v1/form?session_id=e6bf6f63-46e0-4bd7-9bce-8106c02d0b3f",
	"method": "GET"
},
"warnings": [
	{
		"source": "email",
		"errors": [
			{
				"text": "must be a valid email",
				"error_type": "invalid_email"
    		}
   		]
  	}
  ]
}
The Payer's side: Filling out and sending the UI Form
After you created the Checkout Session, your payer accesses the UI Form on your website. Depending on the UI Form, your payer goes through different steps to fill it out and send it.
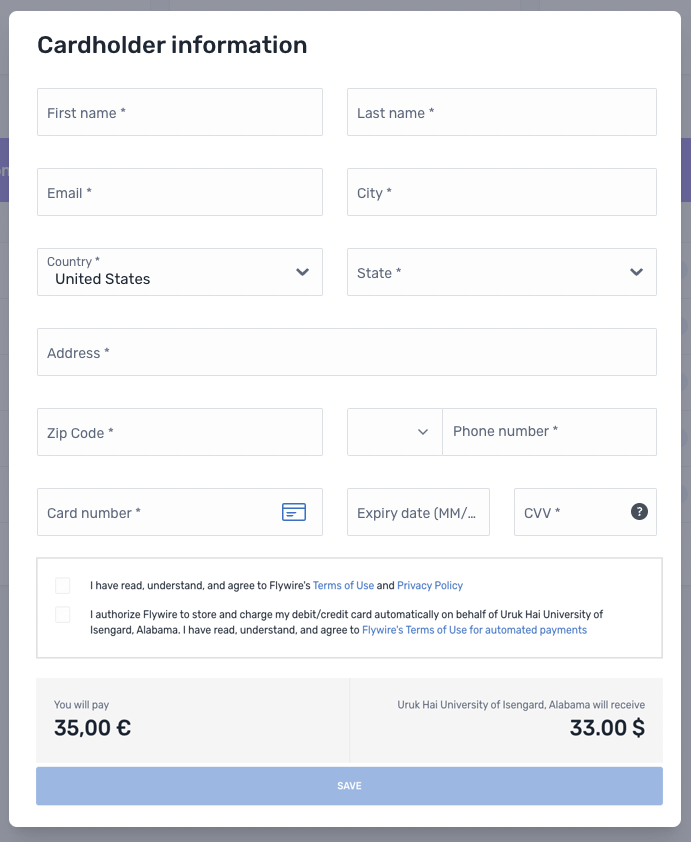
What does my payer see?
The payer sees a form that collects the payer and card information. After the payer confirmed the form, the payment is created. With Smart Rendering, the appearance of the element and the displayed fields may vary based on your customizations.
The postMessage of the Event Listener
After your payer sent the form, the event listener will return a successful postMessage.
A successful postMessage confirms that the form was submitted and that you can confirm the Checkout Session now. However, it does not indicate payment success. Payment status updates will be sent via callback notifications, see Payment Status Notifications for details.
The postMessage contains the following information:
confirm_url object
Contains the confirm URL. The confirm URL is the full url for the request to confirm the session, already resolved with the correct session ID.
The method (POST).
The confirm URL. The confirm URL is the full url for the request to confirm the session, already resolved with the correct session ID.
payor object
The email address your payer entered in the UI Form. You need to use this email address to send mandatory emails to your payer, see
One Off Payments: Emails to Your Payer (only if you opted for sending emails yourself)
This parameter helps you filter the PostMessages to only return the result of the Checkout Session. This is only necessary when you render via iframe (see Implementing the Payment Element for Elements and Implementing the Checkout Experience for Checkout).
Indicates if the Checkout Session was successful.
true: Checkout Session successful
false: Checkout Session failed
You can use this parameter to filter the PostMessages to only return successful ones. This is only necessary when you render via iframe (see Implementing the Payment Element for Elements and Implementing the Checkout Experience for Checkout).
{
confirm_url: {
	method: "POST",
	url: "https://api-platform.flywire.com/payments/v1/checkout/sessions/494d2e9d-c0c9-407c-9094-5b3b2a02c00f/confirm",
},
payor: {
email: "[email protected]"
},
source: "checkout_session",
success: true
}
Confirming a Checkout Session
Request
As a security measure to ensure that you are the one who created the session, you have to confirm the Checkout Session.
How to Resolve the Path Placeholders of the Endpoint
You don't need to manually resolve the {ID} in the endpoint, as Flywire provides the fully resolved URL via postMessage.
Why should I use the confirm url from the postMessage?
-
It already contains the correct Checkout Session ID, no need to retrieve it from somewhere else.
-
You always receive the URL after the form has been sent. If you would try to confirm a Checkout Session before the form has been sent, you'll get an error message
curl https://base-url-placeholder/checkout/sessions/494d2e9d-c0c9-407c-9094-5b3b2a02c00f/confirm
  -X POST
  -H "Content-Type: application/json"
  -H "X-Authentication-Key: {api_key}"
Response
The payment reference.
The payment reference identifies a payment.
The format for a payment reference is:
Recipient ID followed by a string of characters, for example FWU744586810.
With the payment reference, the payment can be tracked during its journey through the different stages of the payment process.
The payment reference is also important in other situations, for example:
When a payer is using bank transfer as payment method, they usually must provide the payment reference when sending the funds.
The payment reference helps Flywire to identify the payment if you or your payer needs support.
charge_info object
The payment amount in the payer currency.
The amount is specified in the smallest unit of the currency, called subunits. For example, in USD, the subunit is cents, and 100 cents equal 1 USD. So, an amount of 12025 (cents) is equivalent to 120.25 USD.
Note that the subunit-to-unit ratio varies by currency, it is not always 100. See Currencies for the subunits of each currency.
The payer currency in ISO 4217 format.
payment_method object
Contains information about the payment method the payer used.
The payment method token (not needed for single Pre-Authorization Payments).
The payment method type.
Possible values:
| bank_transfer | Payment is done via bank transfer. |
| online | Payment is done via an alternative payment method (APM), through a third-party provider. |
| card | Payment is done via credit or debit card. You'll get additional information about the type of card in the parameter card_classification (either credit or debit). |
direct_debit | Payment is done via direct debit. |
| 529_payments | Payment is done via a 529 provider. |
Only for card payments.
Credit or debit card.
Possible values:
creditdebit
The last four digits of the card number or bank account number.
Only for card payments.
The card expiration date in the format MM/YYYY.
The ISO2 code of the country where the card was issued.
Only for card payments.
The brand of the card (for example, Visa or Mastercard).
Indicates who issued the card to the payer (for example, a bank).
mandate object
The mandate ID (not needed for single Pre-Authorization Payments).
{
"payment_reference": "RUC208967136",
"charge_info": {
	"amount": 100000,
	"currency": "EUR"
	},
"payment_method": {
	"token": "232301485cfa4b36bc28",
	"type": "card",
	"card_classification": "credit",
	"last_four_digits": "1111",
	"card_expiration": "03/2030",
	"country": "US",
	"brand": "visa",
	"issuer": "JPMORGAN CHASE BANK, N.A."
	},
"mandate": {
	"id": "MCRUC20230330uAM584YC"
	"surcharge": {
		"percentage": 0.03
		}
	}
}
Next steps
To charge the card, you have to manually capture the funds during the holding period.
You can adjust the Pre-Authorization Payment amount during the holding period if you used the authorization type preauth when you created the payment. You can only change it to a higher amount, not to a lower amount.
If you want to release the block on the funds before the holding period ends, you can cancel the Pre-Authorization Payment.
When you cancel a Pre-Authorization Payment the blocked amount immediately returns back to the cardholder's credit.
