Use Case: Self-Managed Recurring Payments
With self-managed recurring payments, you define the plans yourself. You have complete freedom, for example regarding the number of installments and when payments are made.
Since Flywire doesn't know your settings, you have to manually initiate each payment for those plans yourself.
You also have to send mandatory emails to your payers that inform them about the recurring payments.
Available payment methods:
-
Card
-
Direct debit
 Which direct debit schemes are supported?
Supported direct debit schemes
SEPA SEPA (Single Euro Payments Area) direct debit is a payment system that makes payments in Europe easier and cheaper. SEPA allows you to collect payments in all countries that follow the SEPA scheme (36 countries in the Eurozone). The currency for all SEPA direct debits is Euros.
BACS BACS (Bankers' Automated Clearing System) is a network of banks and building societies that participate in the BACS payments scheme. BACS payments are made in GBP and are only available in the UK. BACS payments are one of the most common bank-to-bank transfers in the UK.
EFT Canada EFT ("Electronic Funds Transfer") Canada is the most common direct debit scheme for payments in Canada. Flywire uses the third-party implementation Plaid to connect your payers to their bank accounts for EFT Canada.
ACH ACH ("Automated Clearing House") is an electronic network used in the United States of America for processing financial transactions. The ACH system is designed for domestic transactions within the United States, which means the currency for ACH payments is USD.
Walkthrough
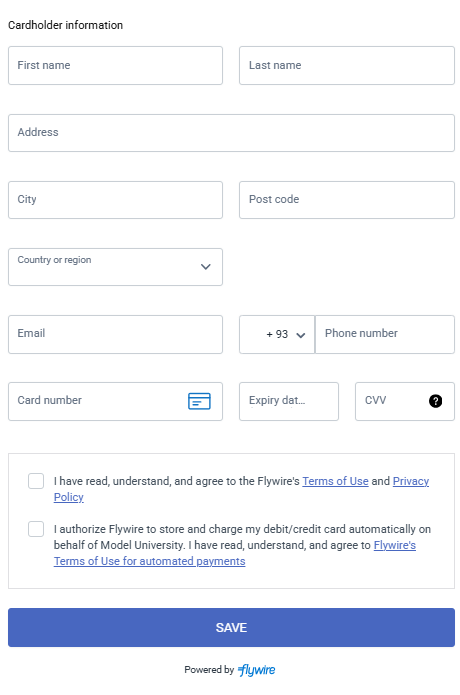
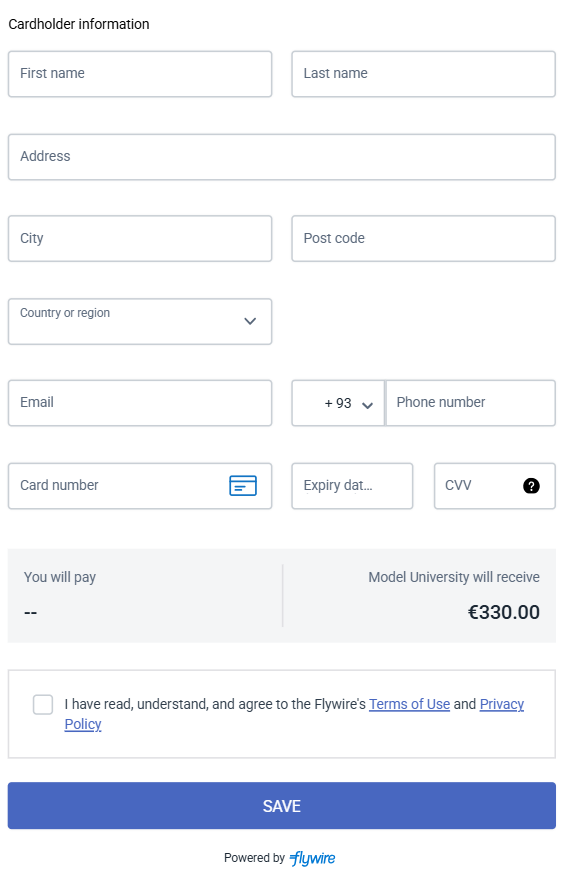
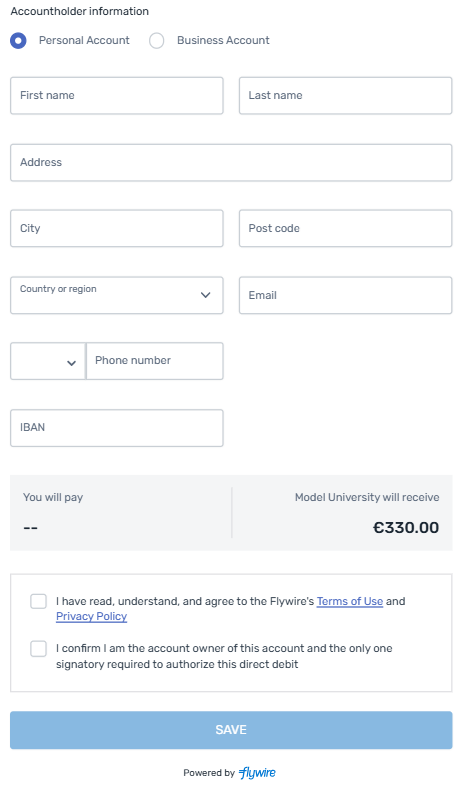
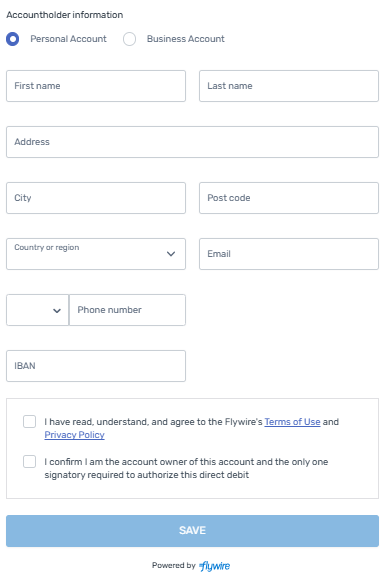
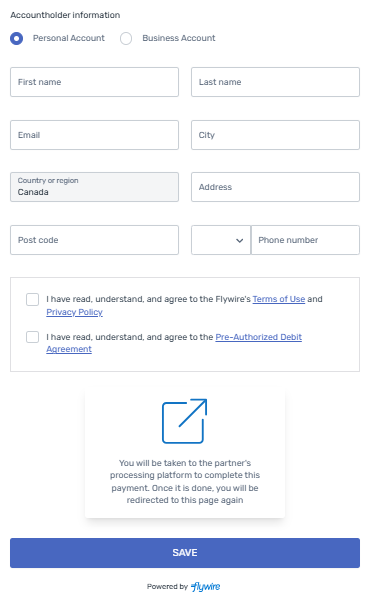
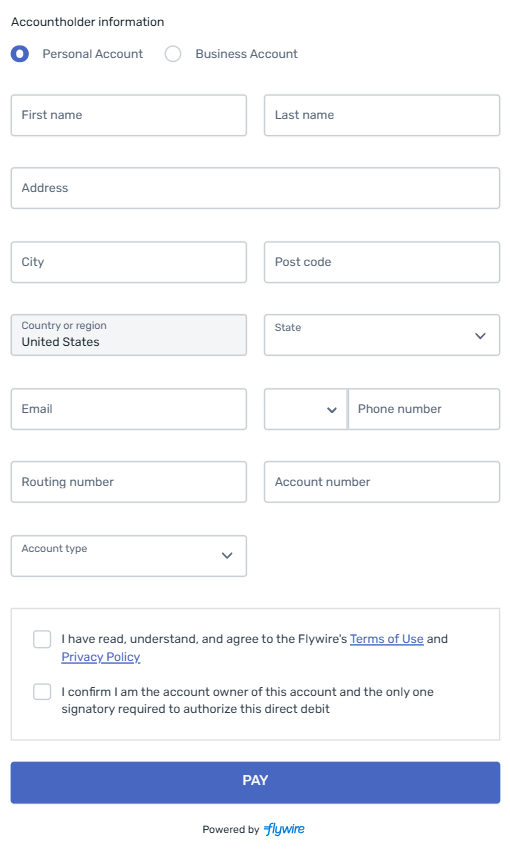
In this scenario, your payer chose on your website which plan they want to use. Now you want to let your payer choose how they want to pay the recurring payments. At this point, you need to display a UI form for either card or direct debit payments.
Supported direct debit schemes
| SEPA |
SEPA (Single Euro Payments Area) direct debit is a payment system that makes payments in Europe easier and cheaper. SEPA allows you to collect payments in all countries that follow the SEPA scheme (36 countries in the Eurozone). The currency for all SEPA direct debits is Euros. |
| BACS |
BACS (Bankers' Automated Clearing System) is a network of banks and building societies that participate in the BACS payments scheme. BACS payments are made in GBP and are only available in the UK. BACS payments are one of the most common bank-to-bank transfers in the UK. |
| EFT Canada |
EFT ("Electronic Funds Transfer") Canada is the most common direct debit scheme for payments in Canada. Flywire uses the third-party implementation Plaid to connect your payers to their bank accounts for EFT Canada. |
| ACH |
ACH ("Automated Clearing House") is an electronic network used in the United States of America for processing financial transactions. The ACH system is designed for domestic transactions within the United States, which means the currency for ACH payments is USD. |
The following steps are necessary to create recurring payments with the Flywire API:
To be able to use the Flywire API, you need to be registered, and all requests to the Flywire API need to be authenticated, see Flywire API Basics
If you are just getting started and only have Sandbox credentials, you need to use the Sandbox environment. All request examples let you switch between the production and sandbox base URL.
-
Implement a trigger on your website that sends an http request to your backend.
The trigger could be a button like "Make Payment". The http request tells your backend to send a secure request to the Flywire API to create a Checkout Session.
What does the http request contain?
How exactly the http request looks like is up to you,
If your payers have accounts on your website, you can use the request to transfer data from your system and use it to pre-fill the fields of the form.
For security reasons, you should also implement some form of authentication.Why can't I just send a request to the Flywire API call from the frontend?
Because you need your API Key to make an API request. Your API Key is secret and should never be sent from the frontend. Always make API request securely from your backend.
-
Create a Checkout Session via the API.
From your backend, you can securely create a Checkout Session. You need to know which recipient you want to use for this request.
Tip if you don't know which recipients are available to you or what their recipient ID is
You can use this request to get a list of all recipients that are available to you as a client and what their recipient ID is:
GET /payments/v1/recipientsFor details see Getting a List of all available Recipients.
See Creating a Checkout Session for details. -
Receive the URL for displaying the form.
The response after creating Checkout Session will return a URL to you (as the value of the url parameter in the hosted_form object). This is the URL you need in order to display the UI form in an iframe on your website.
When you are pre-filling the form, the response can contain warnings (in the warnings array) in case the pre-filling of any fields didn't pass the validation, see Field validation warnings after pre-filling a UI form for more details.
You can decide which information from the response you want to filter out in your backend before passing the URL to your frontend.
Example response after creating a Checkout Session
No matter which type of Checkout Session you created, the response is always the same.
-
 Success response (no warnings)
 -
 Success response (with warnings)
 -
 422 Error
id string
The session ID is the unique identifier for a Checkout Session.
This is the session ID you need if you are using Flywire Elements with Smart Rendering
What is Smart Rendering?
Smart Rendering means you render Flywire Elements on your website with the help of the Flywire SDK script.
Extensive customization
Select which payer fields to display, choose the language, and customize the appearance, such as fonts and colors.
Responsive layout
Optimized responsive layout for desktop and mobile devices.
Easy event handling
Simply define what should happen in case of success or errors - no need to filter individual postMessages.
expires_in_seconds integer
The time before the Checkout Session expires in seconds.
hosted_form object
Only relevant when you render the form via iframe. More info:
-
iframe rendering for Flywire Elements
-
iframe rendering for Checkout
url string (url)
The hosted-form-URL. This is the URL your iframe displays.
method string
The method (GET).
warnings array
source string
The field where the error occurred.
For a description of all fields and their valid values form see:
-
Payment Element if you are using Flywire Elements
-
Checkout Experience if you are using Checkout
errors array
You can decide which information from the response you want to filter out in your backend before passing the URL to your frontend.
text string
The error text.
error type string
The error type.
{
"id": "494d2e9d-c0c9-407c-9094-5b3b2a02c00f",
"expires_in_seconds": 1800,
"hosted_form": {
	"url": "https://elements.flywire.com/v1/form?session_id=494d2e9d-c0c9-407c-9094-5b3b2a02c00f",
	"method": "GET"
},
"warnings": []
}
When are warnings returned?
If the warning array contains warnings, it means that you tried to pre-fill the UI form with invalid values. You can use these warnings to check the data in your system for mistakes.
Are warnings an error?
No, warnings inform you of issues with field values, but you will still receive the URL and can display the form to your payer.
How do the warnings affect the form?
If a drop down field (like country) is affected by invalid values, the field will be empty, meaning no selection from the drop down is made yet. Your payer has to select the value from the drop down manually.
If you set a field to hidden or read-only, the settings will be disregarded and the field will become visible and editable in the form.
More info about setting fields to hidden or read-only
When using Elements, you can control which payer fields can be edited by your payer - either by setting them to read-only or be completely hiding the field from the payer.
You can configure read-only at three levels:
-
Smart Rendering settings (if you are using Smart Rendering)
-
Individual field settings (defined in the form options when creating a Checkout Session)
-
Global form settings (defined in the form options when creating a Checkout Session)
What happens if a field has conflicting settings at multiple levels?
Smart Rendering > Individual Field > Global Form
This means Smart Rendering settings win over individual field settings, and individual field settings win over global form settings.
You can configure the visibility of fields at two levels:
-
Smart Rendering settings (if you are using Smart Rendering)
-
Individual field settings (defined in the form options when creating a Checkout Session)
What happens if a field has conflicting settings at multiple levels?
Smart Rendering > Individual Field
This means Smart Rendering settings win over individual field settings.
What happens if something goes wrong? - Automatic Field Unlocking
All payer fields are required to send the form. If your settings would prevent the payer from submitting the form - for example you're hiding the email field but provided an invalid address- the field automatically becomes visible and editable.
Automatic field unlocking happens for a hidden or read-only field when:
-
you didn't submit a value through the Checkout Session (results in an empty field for the payer to fill out)
-
you submitted an invalid value through the Checkout Session (results in a field showing the invalid value, highlighted with an error message so that the payer can correct it)
id string
The session ID is the unique identifier for a Checkout Session.
This is the session ID you need if you are using Flywire Elements with Smart Rendering
What is Smart Rendering?
Smart Rendering means you render Flywire Elements on your website with the help of the Flywire SDK script.
Extensive customization
Select which payer fields to display, choose the language, and customize the appearance, such as fonts and colors.
Responsive layout
Optimized responsive layout for desktop and mobile devices.
Easy event handling
Simply define what should happen in case of success or errors - no need to filter individual postMessages.
expires_in_seconds integer
The time before the Checkout Session expires in seconds.
hosted_form object
Only relevant when you render the form via iframe. More info:
-
iframe rendering for Flywire Elements
-
iframe rendering for Checkout
url string (url)
The hosted-form-URL. This is the URL your iframe displays.
method string
The method (GET).
warnings array
source string
The field where the error occurred.
For a description of all fields and their valid values form see:
-
Payment Element if you are using Flywire Elements
-
Checkout Experience if you are using Checkout
errors array
You can decide which information from the response you want to filter out in your backend before passing the URL to your frontend.
text string
The error text.
error type string
The error type.
{
"id": "e6bf6f63-46e0-4bd7-9bce-8106c02d0b3f",
"expires_in_seconds": 1800,
"hosted_form": {
	"url": "https://elements.flywire.com/v1/form?session_id=494d2e9d-c0c9-407c-9094-5b3b2a02c00f",
	"method": "GET"
},
"warnings": [
	{
		"source": "email",
		"errors": [
			{
				"text": "must be a valid email",
				"error_type": "invalid_email"
    		}
   		]
  	}
  ]
}
422 Error: Creating the Checkout Session failed - Recipient currency does not match
When does this happen?
The billing currency of the recipient you chose for the Checkout Session does not match the currency of the direct debit scheme.
What is the billing currency?
The billing currency is the currency in which the recipient of the payment is billing their payer. The billing currency depends on the
What should you do?
-
Use a different direct debit scheme
-
Alternative: Use a different recipient (if you can't use a different recipient, contact Flywire to change the settings of the recipient)
{ "type": "https://developers.flywire.com", "title": "Unprocessable entity", "status": 422, "detail": "Invalid parameters", "errors": [ { "source": "/", "param": "recipient_id", "type": "invalid_param", "message": "BACS direct debit requires GBP. The recipient ARA cannot receive payments in GBP." } ] } -
-
Display the form on your website.
The form is where Flywire gathers the payer and payment information.
-
Receive the URL for confirming the Checkout Session.
There are many ways for your backend to receive the confirm URL. One option is to directly send it from the event listener you implemented on your website to your backend.
Example response from the event listener
After your payer sent the form, the event listener will return a successful postMessage.
A successful postMessage confirms that the form was successfully submitted and that you can confirm the Checkout Session now. However, it does not indicate payment success. Payment status updates will be sent via callback notifications, see Payment Status Notifications for details.
The postMessage contains the following information:
success boolean
Indicates if the Checkout Session was successful.
-
true: Checkout Session successful
-
false: Checkout Session failed
You can use this parameter to filter the PostMessages to only return successful ones. This is only necessary when you render via iframe.
source string
This parameter helps you filter the PostMessages to only return the result of the Checkout Session. This is only necessary when you render via iframe.
payor object
The email address your payer entered in the UI form. If you are handling emails yourself, you need to use this email address to send mandatory emails to your payer.
The payer's email address is returned so you can ensure you have the correct email address.
Even if you pre-filled the payer information with an email address, your payer might have changed it when filling out the form.
If you are handling emails yourself, you need to ensure you have the correct email address for the payer.
confirm_url object
Contains the confirm URL. The confirm URL is the full URL for the request to confirm the session, already resolved with the correct session ID.
method string
The method (POST) indicates that you must send a POST request to the confirm URL.
url string (url)
The confirm URL. The confirm URL is the full url for the request to confirm the session, already resolved with the correct session ID.
{ "success": true, "source": "checkout_session", "payor": { "email": "[email protected]" }, "confirm_url": { "method": "POST", "url": "https://api-platform.flywire.com/payments/v1/checkout/sessions/494d2e9d-c0c9-407c-9094-5b3b2a02c00f/confirm", } } -
-
Confirm the Checkout Session via the API.
After the payer filled out the form you need to confirm the session as a security measure.
Example for confirming a Checkout Session
As a security measure to ensure that you are the one who created the session, you have to confirm the Checkout Session.
How to Resolve the Path Placeholders of the Endpoint
The session ID is the unique identifier for a Checkout Session.
You don't need to manually resolve the {sessionID} in the endpoint, as Flywire provides the fully resolved URL via the postMessage (see 3. The postMessage of the Event Listener).
Why should you use the confirm url from the postMessage?
It already contains the correct Checkout Session ID, no need to retrieve it from somewhere else.You always receive the URL after the form has been sent. If you would try to confirm a Checkout Session before the form has been sent, you'll get an error messageYou can only send the request to confirm the Checkout Session once. After a Checkout Session has been confirmed, you'll receive an error if you try to confirm it again.Parameters for the Request Body
No request body needed.
POST/payments/v1/checkout/sessions/{sessionID}/confirmcurl https://base-url-placeholder/checkout/sessions/494d2e9d-c0c9-407c-9094-5b3b2a02c00f/confirm -X POST -H "Content-Type: application/json" -
Receive the payment method token and the mandate ID via the API.
After you confirmed the session, you’ll receive a payment method token and a mandate ID in the API response. You need both of them to create payments.
Payment method tokens and mandate IDs are sensitive data. Make sure sensitive data is handled in your backend, while the frontend only displays the form.Example for receiving the payment method token and mandate ID
The response contains the payment method token (parameter token in payment_method) and the mandate ID (parameter id in mandate)
payment_method object
Contains information about the payment method the payer used and the payment method token.
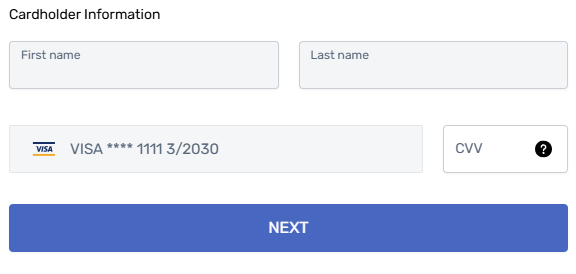
You can display the card information in your UI for your payer to make it easier for them to identify which card they saved in your system.token string
The payment method token. You need this token to charge recurring payments for this payment method.
What is the payment method token?
The payment method token is a unique string of numbers and characters that gets assigned to a card or bank account when you store them via Flywire Elements. It identifies the payment method (e.g., last four digits of a card or bank account) and includes payer details, such as the cardholder or account owner.
Format:
String of 20 characters, for example:
a1b2c3d4e5f67890abcd
type string
The payment method type.
Possible values:
bank_transfer Payment is done via bank transfer.
online Payment is done via an alternative payment method (APM), through a third-party provider.
card Payment is done via credit or debit card.
direct_debit
Payment is done via direct debit.
529_payments Payment is done via a 529 provider.
card_classification string
Only for card payments.
Credit or debit card.
Possible values:
-
credit
-
debit
last_four_digits string
The last four digits of the card number or bank account number.
card_expiration string
Only for card payments.
The card expiration date in the format MM/YYYY.
country string
The ISO2 code of the country where the card was issued.
brand string
Only for card payments.
The brand of the card. For example, Visa or Mastercard (MC).
issuer string
Indicates who issued the card to the payer (for example, a bank).
mandate object
It is mandatory to include the mandate ID when charging a recurring payment.
Why is it mandatory?
For some card payments, this is mandatory to be compliant with policies. For example the mandate ID serves as the "Visa Transaction ID", which is mandatory since October 31st, 2022 (not providing the Visa Transaction ID could result in soft declines and fees for non-compliance). Other payment processors may require a similar ID for consent verification in the future.
Flywire generates mandate IDs for both cards and bank accounts to ensure future readiness.
id string
The mandate ID.
The mandate ID is a Flywire-generated ID that represents the payer's consent for recurring payments, much like a signature authorizing future payments.
After tokenizing a card or bank account, the mandate ID is returned to you in the mandate_id parameter or in the id parameter inside the mandate object.
Format of mandate IDs
Payment Method Mandate ID Format Bank account MT+ recipient ID + date of mandate generation + string of characters
Example: MTQQ20240430NTZTZX
Card that has only been tokenized, payments are charged later MC + ZER + date of mandate generation + string of characters
Example: MCZER20240430SaA8rNHh
Card that has been tokenized and the first payment has been charged immediately MC + recipient ID + date of mandate generation + string of characters
Example: MCTQQ20240430HaB7fKMg
It is mandatory to include the mandate ID when charging a recurring payment.
Why is it mandatory?
For some card payments, this is mandatory to be compliant with policies. For example the mandate ID serves as the "Visa Transaction ID", which is mandatory since October 31st, 2022 (not providing the Visa Transaction ID could result in soft declines and fees for non-compliance). Other payment processors may require a similar ID for consent verification in the future.
Flywire generates mandate IDs for both cards and bank accounts to ensure future readiness.
For bank accounts, the mandate is represented by the mandate ID and additionally in PDF form.
More info about the mandate PDF
The mandate PDF is the mandate fully written out "on paper" (but paperless as a PDF). The PDF is delivered to your payer by email.
There are different types of PDFs depending on the direct debit scheme for the payments:
SEPA mandate
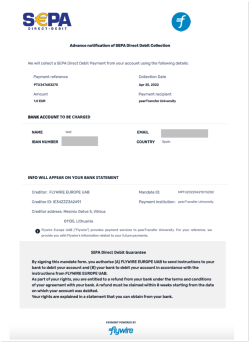
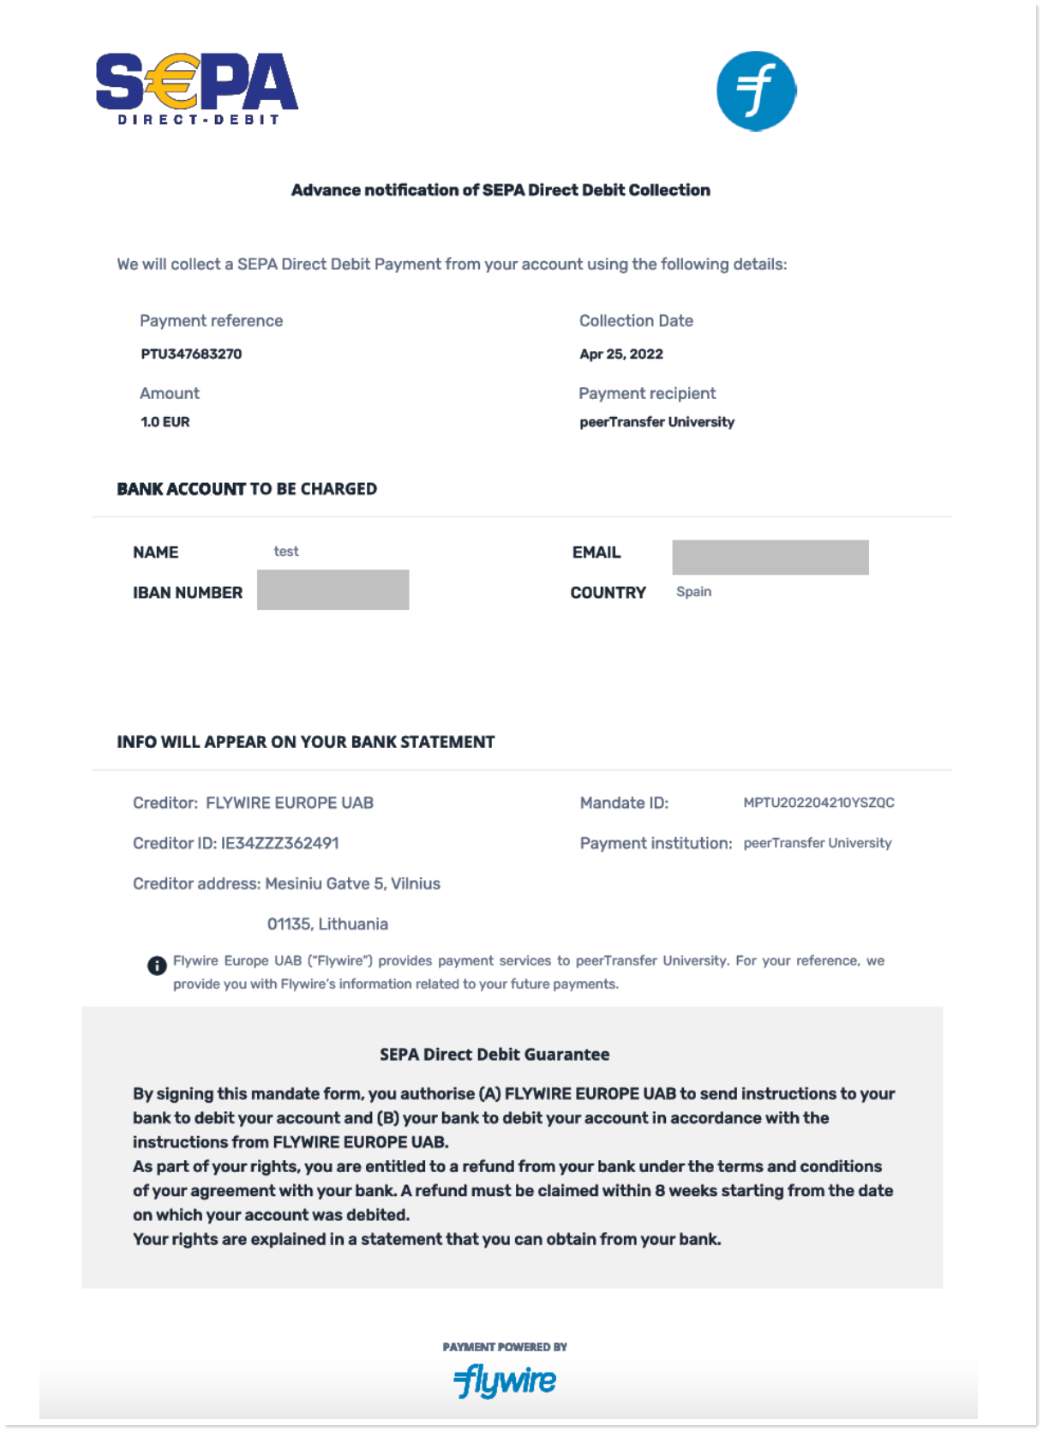
The SEPA mandate is a PDF with the written out SEPA contract. A SEPA mandate has a specific format and strictly defined content. It is part of the SEPA payment system, and you cannot charge a bank account without having a SEPA mandate.
The file name for the PDF with the SEPA mandate contains the date the SEPA mandate was created and the mandate ID that was generated by Flywire.
The SEPA mandate is created and sent to your payer by Flywire, you don't need to create and send it yourself.
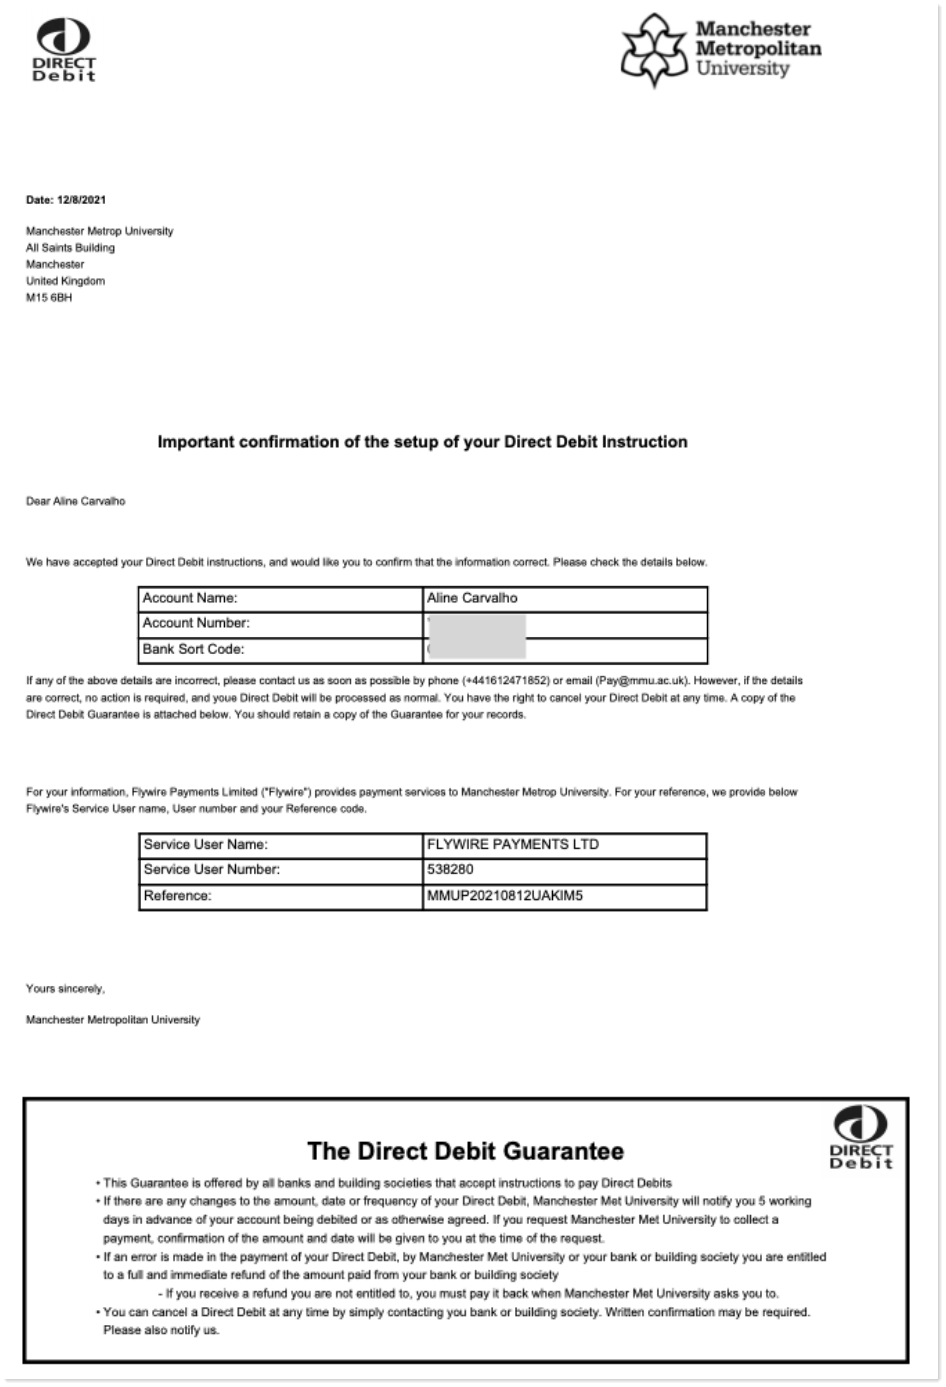
BACS mandate

The BACS mandate is a PDF with the written out contract including the Direct Debit Guarantee for BACS. A BACS mandate has a specific format and strictly defined content. It is part of the BACS payment system, and you cannot charge a bank account without having a BACS mandate.
The BACS mandate is created and sent to your payer by a third-party provider, you don't need to create and send it yourself.
EFT Canada mandate
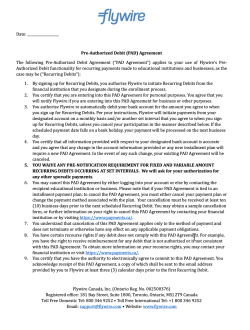
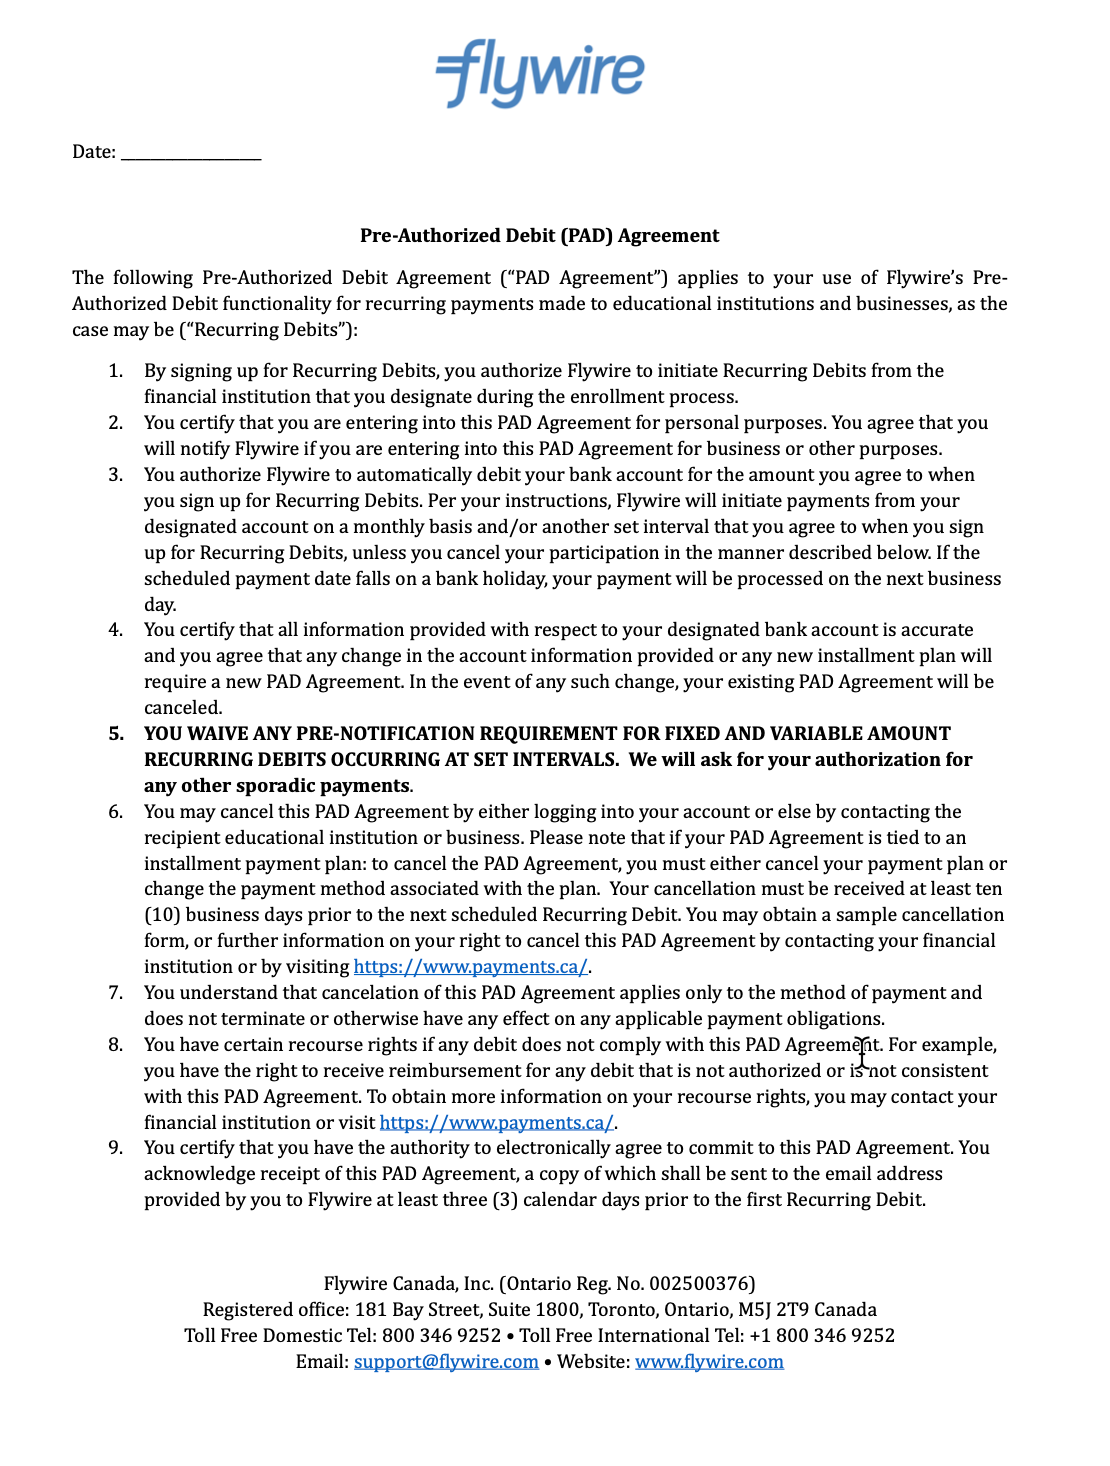
The mandate PDF for EFT Canada is called PAD (Pre-Authorized Debit Agreement). It is a PDF that always has the same format and content, but you need to provide the current date.
Process for delivering the mandate (PAD) for EFT Canada:
-
Download the PAD PDF from Flywire.
You can download the Flywire PAD here: Download PAD PDF
-
Insert the correct date (when the payer agreed to EDT Canada direct debit) into the Flywire PAD PDF.
-
Send it to your payer as an email attachment. The email needs to contain the following information:
-
Total number of scheduled payments
-
Total payment amount
-
First payment date
-
Last payment date
-
Flywire PAD (as an attachment)
-
ACH mandate
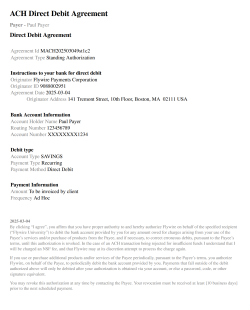
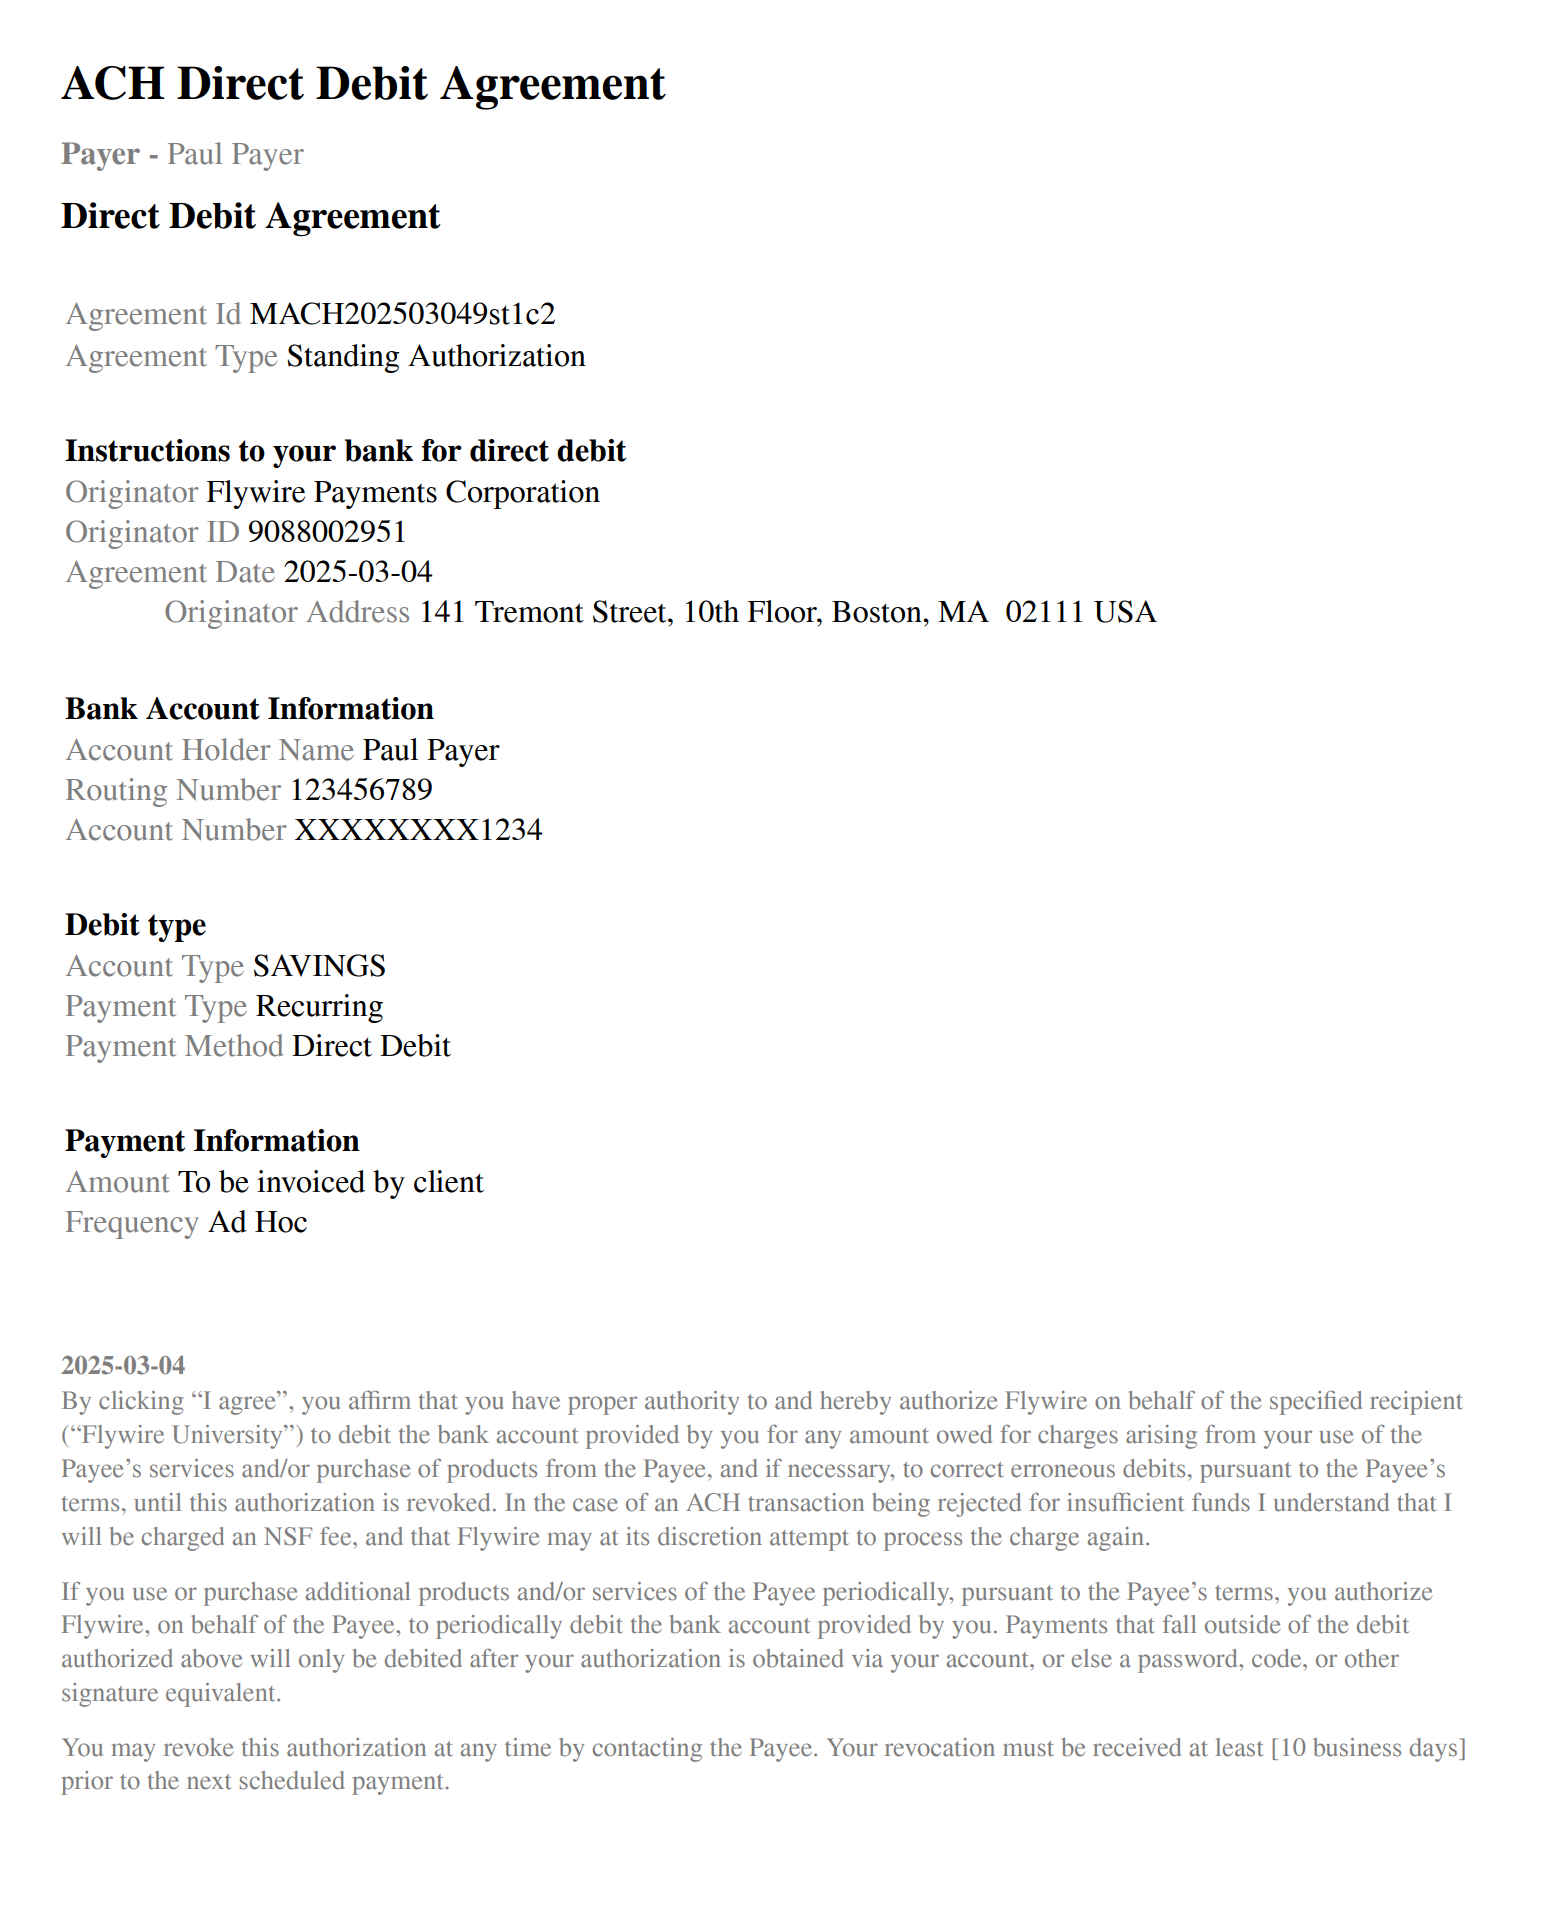
The ACH mandate is a PDF containing the written ACH authorization agreement. An ACH mandate has a specific format and required content, as defined by ACH regulations. It is part of the ACH payment system, and you cannot charge a bank account without obtaining an ACH mandate.
The ACH mandate is created and sent to your payer by Flywire, you don't need to create and send it yourself.
currency string
The currency for this mandate. The currency of the mandate depends on the payer's choice they made when creating the mandate.
When can a payer select different currencies?
If the card currency doesn't match the currency of the payer's country, and if there is an option to pay in either of them, the payer can choose which currency they want to pay in. They have two options: The currency of the card they are paying with and the currency of the country they have chosen for their address.

Format:
Three-letter ISO 4217 currency code, for example EUR.
adjustments array
Only returned if adjustments are applied. If an adjustment is applied and you are handling emails to your payer yourself, you need to include the information in the pre-notification email to your payer.Contains price modifications that apply to each payment of the plan. Each item includes a category and specific calculation rules.
How service fees and surcharges are calculated
These adjustments are calculated as a percentage (proportion) of the total payment amount.
Example:
For a payment in USD:
Initial payment amount: 200000 (meaning 2000 USD) Adjustment proportion: 0.12 (meaning 12%) -
Calculate 12% of 2000 USD -> 240 USD
-
amount_to is 24000 (meaning 240 USD)
If the calculated amount is lower than the minimum_fee, the fixed minimum fee is applied instead.
Example:
For a payment in USD:
Initial payment amount: 10000 (meaning 100 USD) Adjustment proportion: 0.02 (meaning 2%) Minimum fee: 500 (meaning 5 USD)
-
Calculate the proportional adjustment: 2% of 100 = 2 USD
-
Compare the proportional amount to the minimum: 2 USD is less than the 5 USD minimum. The minimum of 5 USD is applied.
Note for recurring payments:
For recurring payments, you might not know the amount of future payments yet, which means you don't know if the percentage or the minimum fee will apply. The API response provides information about both, so you can inform the payer when they save their payment method for future payments.
Example: "For payments with this card, a 2% fee applies (or a minimum of $10)."
category string
The category of the adjustment. Possible values:
surcharge A surcharge is an adjustment for card payments.
A surcharge may apply in certain situations, including, but not limited to, mismatches between card currency and payer country, as well as the use of certain card types. The surcharge depends on the individual settings for the recipient of the payment.
service A service fee is an adjustment that can apply to a payment method. The service fee depends on the individual settings for the recipient of the payment.
proportion decimal
The percentage of the adjustment as a decimal. For example, 0.03 means 3% of the original payment amount.
minimum_fee integer
The minimum fee is the minimum amount that is added the total payment amount for this adjustment. If the proportion of the adjustment results in a lower amount than the minimum, the minimum fee is applied.
Example:
For a payment in USD:
Initial payment amount: 10000 (meaning 100 USD) Adjustment proportion: 0.02 (meaning 2%) Minimum fee: 500 (meaning 5 USD)
-
Calculate the proportional adjustment: 2% of 100 = 2 USD
-
Compare the proportional amount to the minimum: 2 USD is less than the 5 USD minimum. The minimum of 5 USD is applied.
The amount is in the billing currency.
What is the billing currency?
The billing currency is the currency in which the recipient of the payment is billing their payer. The billing currency depends on the
The amount is specified in the smallest unit of the currency, called subunits. For example, in USD, the subunit is cents, and 100 cents equal 1 USD. So, an amount of 12025 (cents) is equivalent to 120.25 USD.
Note that the subunit-to-unit ratio varies by currency, it is not always 100. See Currencies for the subunits of each currency.
payor object
This information is returned so you can confirm the payer's country and email address.
Why is confirming the payer's country necessary?
Payments in the USA require delivering the receipt to the payer. If Flywire handles emails for you, Flywire will send the receipt automatically. If you are handling emails yourself, you need to ensure to send the receipt to your payer.
Help for sending receipts
-
How to check whether the payer is from the USA:
You get the payer country information in the response after confirming a Checkout Session.
Alternatively, you also get the information by Getting Details about a Payment
-
How to get the receipt for the payment:
You can use the endpoint for Getting a Payment Receipt to download the receipt that Flywire created for you.
-
How to send the receipt to your payer:
For self-managed recurring payments, in the "Charge Successful" email for each payment, see Recurring Payments: Emails to Your Payer.
For One Off payments and Pre-Authorization Payments, in the "Payment Guaranteed" email for the payment, see One Off Payments: Emails to Your Payer or Pre-Authorization Payments: Emails to Your Payer.
Why is confirming the payer's email address necessary?
Even if you pre-filled the payer information with an email address, your payer might have changed it when filling out the form.
If you are handling emails yourself, you need to ensure you have the correct email address for the payer.
country string
The ISO2 code of the payer country (the country the money was sent from).
email string
The payer's email address.
state string
The payer's state.
{ "payment_method": { "token": "232301485cfa4b36bc28", "type": "card", "card_classification": "credit", "last_four_digits": "1111", "card_expiration": "03/2030", "brand": "visa", "issuer": "JPMORGAN CHASE BANK, N.A." }, "mandate": { "id": "MCRUC20230330uAM584YC", "currency": "EUR", "adjustments": [ { "category": "surcharge", "proportion": 0.01, "minimum_fee": 2000 } ] }, "payor": { "country": "US", "email": "[email protected]", "state": "NY" } } -
-
Create a payment and charge the payer via the API.
Create a payment that includes the payment method token and mandate ID. Keep creating the following payments in the same way until the recurring payments are done.
Why do I need to create payments manually?
With self-managed recurring payments, you define the plans yourself. You have complete freedom, for example regarding the number of installments and when payments are made.
Since Flywire doesn't know your settings, you have to manually initiate each payment for those plans yourself.
You also have to send mandatory emails to your payers that inform them about the recurring payments.
Available payment methods:
-
Card
-
Direct debit
Which direct debit schemes are supported?
Supported direct debit schemes
SEPA SEPA (Single Euro Payments Area) direct debit is a payment system that makes payments in Europe easier and cheaper. SEPA allows you to collect payments in all countries that follow the SEPA scheme (36 countries in the Eurozone). The currency for all SEPA direct debits is Euros.
BACS BACS (Bankers' Automated Clearing System) is a network of banks and building societies that participate in the BACS payments scheme. BACS payments are made in GBP and are only available in the UK. BACS payments are one of the most common bank-to-bank transfers in the UK.
EFT Canada EFT ("Electronic Funds Transfer") Canada is the most common direct debit scheme for payments in Canada. Flywire uses the third-party implementation Plaid to connect your payers to their bank accounts for EFT Canada.
ACH ACH ("Automated Clearing House") is an electronic network used in the United States of America for processing financial transactions. The ACH system is designed for domestic transactions within the United States, which means the currency for ACH payments is USD.
-

Essentials: Payment Method Token and Mandate ID
About the Payment Method Token
The payment method token is a unique string of numbers and characters that gets assigned to a card or bank account when you store them via Flywire Elements. It identifies the payment method (e.g., last four digits of a card or bank account) and includes payer details, such as the cardholder or account owner.
Format:
String of 20 characters, for example:
a1b2c3d4e5f67890abcd
Important Information
-
One payment method token can be used for multiple mandate IDs.
-
The payment method token needs to be included in each payment.
Since the token already contains information about the payer, sending the token means that you don’t need to include payer information manually in a payment anymore.
-
The payer information in the payment method token can be different from the payer information stored in your system.
The token stores the information gathered in the UI form. Even if you pre-filled the form with data from your system, the payer might have edited the fields in the form. This can be the case when data in your system is wrong (misspelled names etc.) or when the actual payer is different from what your system considers a “payer” (for example, your system contains information about your students as “payers” but the actual payer (card holder or bank account owner) is a parent).
Where can I find the payment method token for a payer?
The payment method token is returned to you in the response after you confirmed a Checkout Session.
You can also find all payment method tokens for a payer (identified by their payor_id) with this request:
For details see Getting a List of all stored Payment Methods for a Payer.
About the Mandate ID
The mandate ID is a Flywire-generated ID that represents the payer's consent for recurring payments, much like a signature authorizing future payments.
After tokenizing a card or bank account, the mandate ID is returned to you in the mandate_id parameter or in the id parameter inside the mandate object.
| Payment Method | Mandate ID Format |
|---|---|
| Bank account |
MT+ recipient ID + date of mandate generation + string of characters Example: MTQQ20240430NTZTZX |
| Card that has only been tokenized, payments are charged later |
MC + ZER + date of mandate generation + string of characters Example: MCZER20240430SaA8rNHh |
| Card that has been tokenized and the first payment has been charged immediately |
MC + recipient ID + date of mandate generation + string of characters Example: MCTQQ20240430HaB7fKMg |
It is mandatory to include the mandate ID when charging a recurring payment.
For some card payments, this is mandatory to be compliant with policies. For example the mandate ID serves as the "Visa Transaction ID", which is mandatory since October 31st, 2022 (not providing the Visa Transaction ID could result in soft declines and fees for non-compliance). Other payment processors may require a similar ID for consent verification in the future.
Flywire generates mandate IDs for both cards and bank accounts to ensure future readiness.
For bank accounts, the mandate is represented by the mandate ID and additionally in PDF form.
The mandate PDF is the mandate fully written out "on paper" (but paperless as a PDF). The PDF is delivered to your payer by email.
There are different types of PDFs depending on the direct debit scheme for the payments:
|
|
The SEPA mandate is a PDF with the written out SEPA contract. A SEPA mandate has a specific format and strictly defined content. It is part of the SEPA payment system, and you cannot charge a bank account without having a SEPA mandate.
The file name for the PDF with the SEPA mandate contains the date the SEPA mandate was created and the mandate ID that was generated by Flywire.
The SEPA mandate is created and sent to your payer by Flywire, you don't need to create and send it yourself. |
|
|
The BACS mandate is a PDF with the written out contract including the Direct Debit Guarantee for BACS. A BACS mandate has a specific format and strictly defined content. It is part of the BACS payment system, and you cannot charge a bank account without having a BACS mandate. The BACS mandate is created and sent to your payer by a third-party provider, you don't need to create and send it yourself.
|
|
The mandate PDF for EFT Canada is called PAD (Pre-Authorized Debit Agreement). It is a PDF that always has the same format and content, but you need to provide the current date. Process for delivering the mandate (PAD) for EFT Canada:
|
|
|
The ACH mandate is a PDF containing the written ACH authorization agreement. An ACH mandate has a specific format and required content, as defined by ACH regulations. It is part of the ACH payment system, and you cannot charge a bank account without obtaining an ACH mandate.
The ACH mandate is created and sent to your payer by Flywire, you don't need to create and send it yourself. |
Storing the mandate ID
Each mandate ID belongs to a specific plan (an installment plan, a subscription, etc.). You need to store the mandate together with the information about the plan and its payments in your system to ensure that you will be able to identify it.
The mandate PDF for bank accounts has other specific policies for storing:
Direct debit mandates for SEPA and BACS have to be stored for 3 years. Since the emails with the mandate are handled by Flywire (for SEPA and ACH) or Finastra (for BACS), Flywire or Finastra will store the mandate for you.
The mandate PDF is the mandate fully written out "on paper" (but paperless as a PDF). The PDF is delivered to your payer by email.
There are different types of PDFs depending on the direct debit scheme for the payments:
|
|
The SEPA mandate is a PDF with the written out SEPA contract. A SEPA mandate has a specific format and strictly defined content. It is part of the SEPA payment system, and you cannot charge a bank account without having a SEPA mandate.
The file name for the PDF with the SEPA mandate contains the date the SEPA mandate was created and the mandate ID that was generated by Flywire.
The SEPA mandate is created and sent to your payer by Flywire, you don't need to create and send it yourself. |
|
|
The BACS mandate is a PDF with the written out contract including the Direct Debit Guarantee for BACS. A BACS mandate has a specific format and strictly defined content. It is part of the BACS payment system, and you cannot charge a bank account without having a BACS mandate. The BACS mandate is created and sent to your payer by a third-party provider, you don't need to create and send it yourself.
|
|
|
The mandate PDF for EFT Canada is called PAD (Pre-Authorized Debit Agreement). It is a PDF that always has the same format and content, but you need to provide the current date. Process for delivering the mandate (PAD) for EFT Canada:
|
|
|
The ACH mandate is a PDF containing the written ACH authorization agreement. An ACH mandate has a specific format and required content, as defined by ACH regulations. It is part of the ACH payment system, and you cannot charge a bank account without obtaining an ACH mandate.
The ACH mandate is created and sent to your payer by Flywire, you don't need to create and send it yourself. |
Using the mandate ID for recurring payments
The mandate ID needs to be included in each payment that belongs to the same plan (for example, installments of an installment plan or payments for an ongoing subscription). If the payer wants to pay for a different plan, you need to generate a new mandate.
How do I generate a new mandate ID?
-
New card or bank account
If a payer wants to use a new card or bank account for a plan, you have to save (and therefore tokenize) the card or bank account, as this will also give you a mandate.
-
Existing card
If a payer wants to use an existing card that is already tokenized, you can generate a new mandate for the new plan with this card.
Where do I find existing mandate IDs?
You can find all mandate IDs for a payment method token with this request:
For details see Getting the Mandate IDs for a Payment Method Token.